
Oh wow! They came up awesome! My tags still look all scratched! Oh well!

Clints LH Project
Started by
_Viper_
, Mar 27 2006 10:51 PM
307 replies to this topic
#51

MRLXSS
-

- Members
-

- 12,396 posts
The Render Garage
- Name:Matt
- Location:Upwey, Melbourne
- Car:355 LX Hatchback, DeLorean DMC-12, LX SS Hatch, VY Cross8 Crewman
- Joined: 09-November 05
Posted 05 October 2009 - 08:05 AM
#52
_Viper_
_Viper_
-

- Guests
Posted 08 October 2009 - 10:18 PM
Dropped into the panel shop today to take a look, has made abit of progress... Was great to see the car with the front guards and apron on again (been off for over a year) he has lined up all the doors & panels, cut the guards and half way through fitting the flares and front spoiler.
The front guards already had holes in them from some set of flares but didnt match the flares I had... on the drivers side the new flares covered all the old holes, phew... but not quite on the passenger side... but it wasnt that much of a drama as the badge holes and ariel hole was left in this guard too so I got him to weld up all the holes and is going to respray that panel (fingers crossed its blends well... he assures me I will never tell the difference)
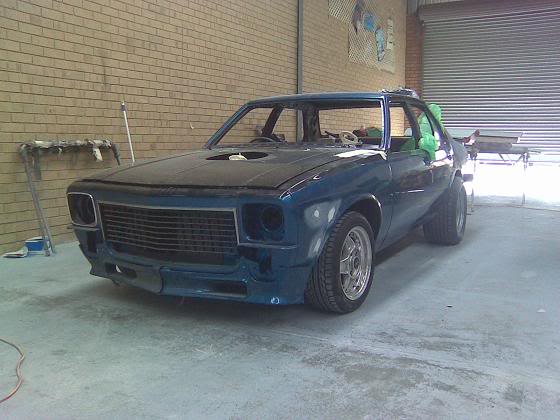
Been soo long since Ive seen it with all the panels on...
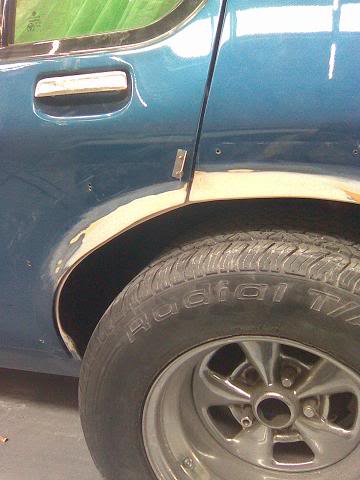
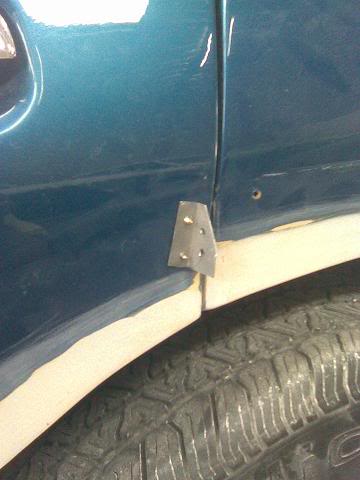
Rear guards cut and little bracket he made up to make the flare sit correctly... I had a look at the article by Ruts and he probly could have cut abit more out! but mmm too late now I guess, hope its enough
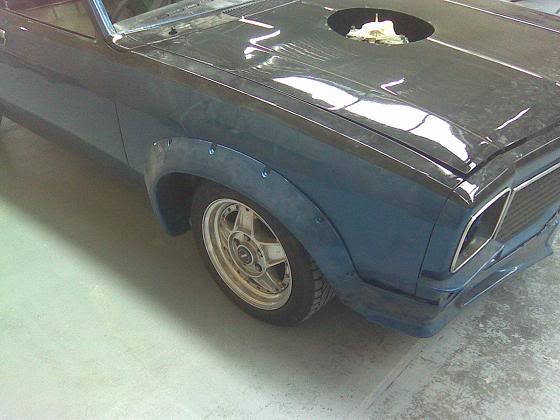
Front flare and spoiler test fitting
So far pretty happy with his work and speed... my wallet sure isnt tho!
The front guards already had holes in them from some set of flares but didnt match the flares I had... on the drivers side the new flares covered all the old holes, phew... but not quite on the passenger side... but it wasnt that much of a drama as the badge holes and ariel hole was left in this guard too so I got him to weld up all the holes and is going to respray that panel (fingers crossed its blends well... he assures me I will never tell the difference)
Been soo long since Ive seen it with all the panels on...
Rear guards cut and little bracket he made up to make the flare sit correctly... I had a look at the article by Ruts and he probly could have cut abit more out! but mmm too late now I guess, hope its enough
Front flare and spoiler test fitting
So far pretty happy with his work and speed... my wallet sure isnt tho!
#53
Neils LX
-

- Members
-
- 2,074 posts
Forum Fixture
- Name:a
- Location:North west NSW
- Joined: 18-March 07
Posted 08 October 2009 - 11:01 PM
Hi
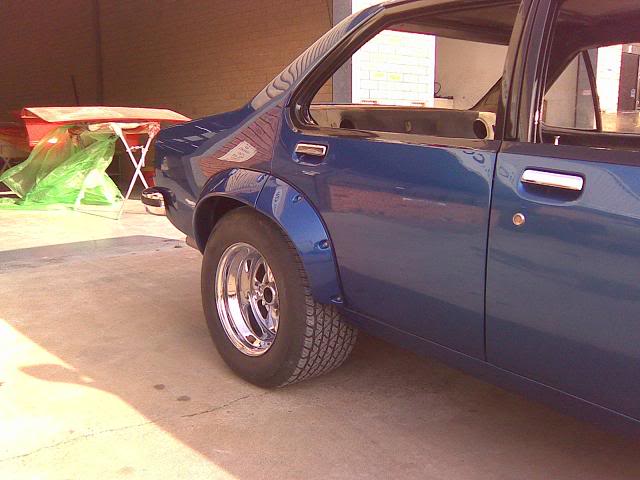
Thats a great idea for the rear door flare. I wonder why flares have nothing normaly there to hold the corner in.
You have a very nice car with some phat rear wheels.
Chears Neil
Thats a great idea for the rear door flare. I wonder why flares have nothing normaly there to hold the corner in.
You have a very nice car with some phat rear wheels.
Chears Neil
#54

Posted 09 October 2009 - 06:22 AM
Looks great, but...
Do yourself a big favour - pull the springs and sit it on the bump stops to see if those tyres clear. If they don't you'll be kicking yourself later, its a lot easier to fix at this stage!Rear guards cut and little bracket he made up to make the flare sit correctly... I had a look at the article by Ruts and he probly could have cut abit more out! but mmm too late now I guess, hope its enough
#55
_Viper_
_Viper_
-
- Guests
Posted 10 November 2009 - 11:38 PM
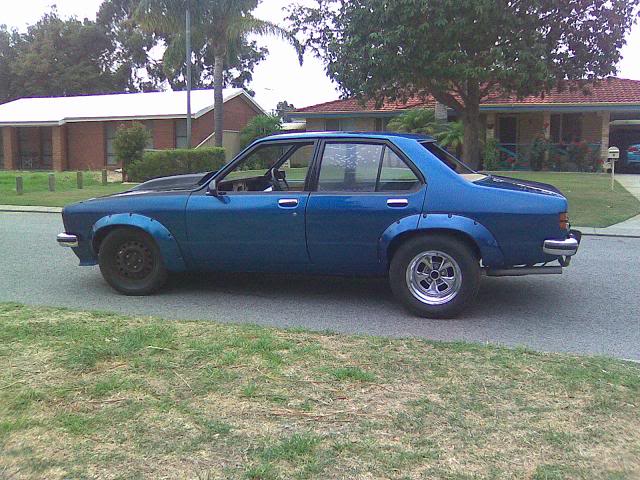
Got the Torana back today, I pulled into the workshop carpark and it was sitting out in the sun and f*ck yea almost creamed my panties.
They:
-Cut the rear guards
-Fit the flares, bonnet scoop, front spoiler
-Filled aerial hole and badge holes in passenger guard and re-sprayed
-Cut hole in bonnet
-Aligned all doors/panels
-Painted and fitted the SL/R Mirrors
-Rust proof interior
-Cut and polish whole car
Almost looks like a complete car now!
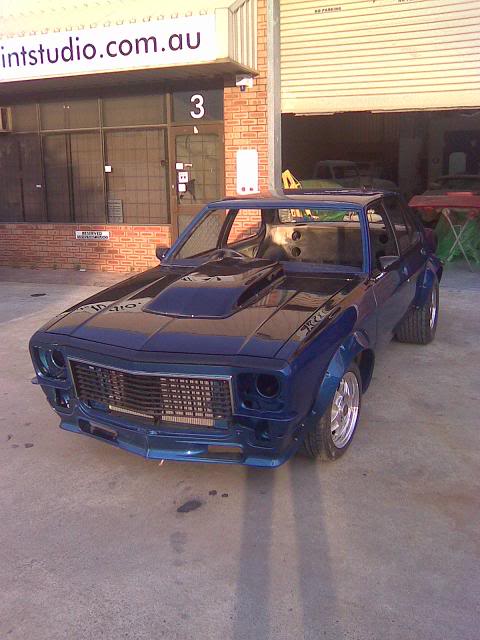
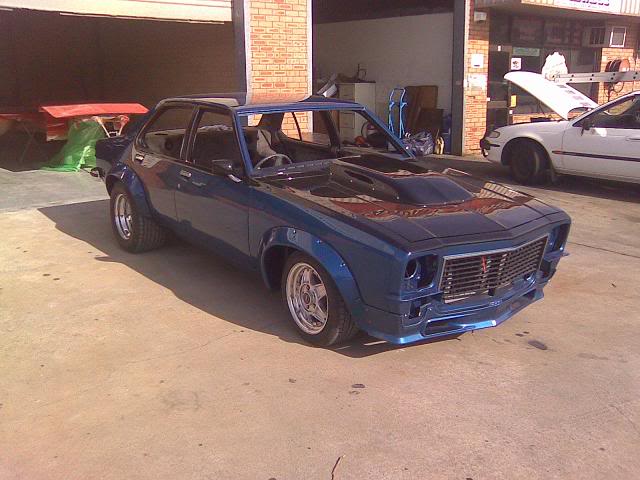
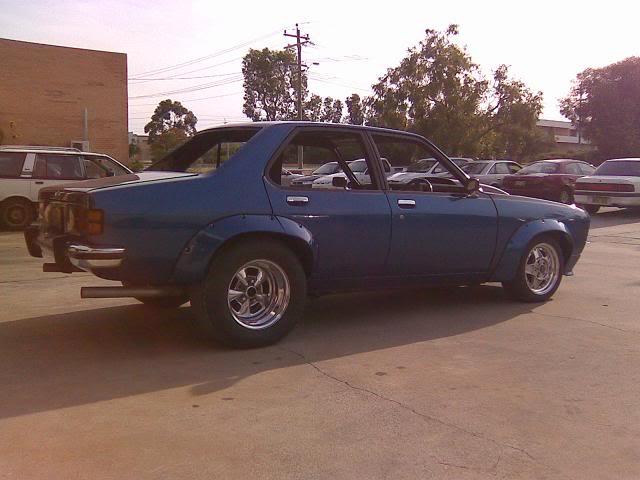
Rear end needs to be lowerd another inch or so and yea there my Gemini wheels on the front... I need new tyres as the 235/60/15's were hitting the flares. I actually need larger wheels on the rear! even with the 295's they dont quite fill the flares!. Am out of cash for now so cant do too much for a little while. will finish off the wiring and fit a few things (front bumper etc) then once I got some cash again ill do the interior
They:
-Cut the rear guards
-Fit the flares, bonnet scoop, front spoiler
-Filled aerial hole and badge holes in passenger guard and re-sprayed
-Cut hole in bonnet
-Aligned all doors/panels
-Painted and fitted the SL/R Mirrors
-Rust proof interior
-Cut and polish whole car
Almost looks like a complete car now!
Rear end needs to be lowerd another inch or so and yea there my Gemini wheels on the front... I need new tyres as the 235/60/15's were hitting the flares. I actually need larger wheels on the rear! even with the 295's they dont quite fill the flares!. Am out of cash for now so cant do too much for a little while. will finish off the wiring and fit a few things (front bumper etc) then once I got some cash again ill do the interior
#56
dattoman
-

- Administrators
-
- 16,471 posts
Do I feel lucky? Well, do ya, punk?
- Name:Neil
- Location:Perth Western Australia
- Car:LX SS , 76 Cadillac , 3 x dattos
- Joined: 04-February 07
Posted 11 November 2009 - 01:23 AM
Starting to look real good Clint
#57
Posted 11 November 2009 - 07:44 AM
Looks great, I think the rear tyres are just right, they will appear to fill the flares more once you lower it a little. Can't wait to see it with bigger boots on the front to match, Toranas look awesome with big rubber
#58
MRLXSS
-
- Members
-
- 12,396 posts
The Render Garage
- Name:Matt
- Location:Upwey, Melbourne
- Car:355 LX Hatchback, DeLorean DMC-12, LX SS Hatch, VY Cross8 Crewman
- Joined: 09-November 05
Posted 11 November 2009 - 09:02 AM
VERY VERY NICE!
Looks bloody tough as mate!
Looks bloody tough as mate!
#59
_mello92_
_mello92_
-
- Guests
Posted 11 November 2009 - 09:06 AM
The colour is tasty. 
Looks pretty good mate.
But yeah, needs to be lowered a bit more in the rear.
Looks pretty good mate.
But yeah, needs to be lowered a bit more in the rear.
#60
_gen3torrie_
_gen3torrie_
-
- Guests
Posted 11 November 2009 - 10:29 PM
f*ck Clint can't wait for you to take me for a drive in that. or we could go to WhoopAss Wednesay when my torrys done f*ck yeah two Dark Blue Torrys going down the strip mmmmm
#61
_Viper_
_Viper_
-
- Guests
Posted 12 November 2009 - 07:44 AM
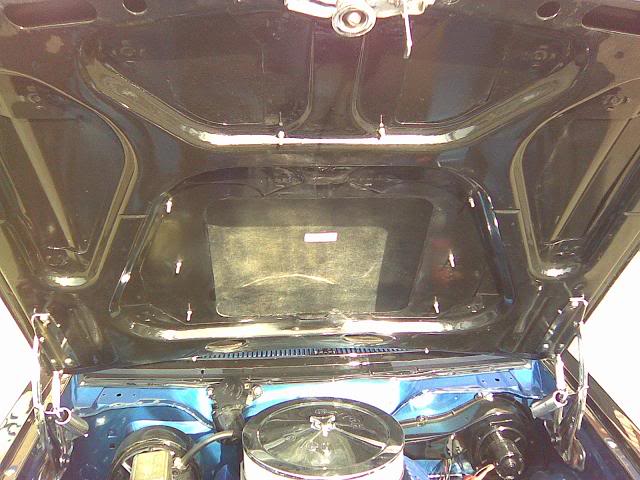
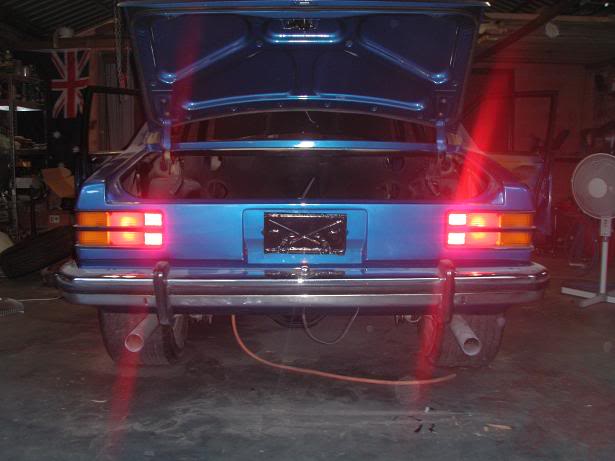
One thing he didnt fix was my bootlid... as you can see in the pic is the drivers side seems to be pushed forward and up a little bit, he reakons someone has over-extended the bootlid while opening it and bending the hinges... He said he couldnt fix it... But surely it would just be a matter of manipulating the hinge to get it back into the correct position??? or how hard is it to replace the whole hinge... (spose I should go have a look for myself, im assuming its just a bunch of spot welds)

#62
Heath
 View Garage
-

- Administrators
-
- 18,314 posts
I like cars.
- Name:Heath
- Location:Eastern Suburbs, Melbourne
- Car:Heavily Modified UC Sunbird Hatchback
- Joined: 07-November 05
View Garage
Posted 12 November 2009 - 08:48 AM
If you were tubbing your car it would probably be easyish, but with everything else around there I suspect it might be quite a painful exercise. And getting it to actually line up necessarily better... dunno
That's a bit of a bugger though :(
That's a bit of a bugger though :(
#63
Posted 12 November 2009 - 10:01 AM
I'd say you're on the right track with the boot, can't be too hard except for those horrible springs
#64
Heath
View Garage
-
- Administrators
-
- 18,314 posts
I like cars.
- Name:Heath
- Location:Eastern Suburbs, Melbourne
- Car:Heavily Modified UC Sunbird Hatchback
- Joined: 07-November 05
View Garage
Posted 12 November 2009 - 10:09 AM
lol honestly those springs are not that bad. Everyone hates them because they don't really understand them and the best way to deal with them.
#67
_gen3torrie_
_gen3torrie_
-
- Guests
Posted 13 November 2009 - 12:36 PM
well there will be 3 Tough Blue Torana's soon once mine is done
#68
_Viper_
_Viper_
-
- Guests
Posted 15 November 2009 - 09:55 AM
Maybe black bonnet was a bad idea... is covered in dust already :/ haha. Think ill go with the wash it and put the car cover on idea.
#69
Heath
View Garage
-
- Administrators
-
- 18,314 posts
I like cars.
- Name:Heath
- Location:Eastern Suburbs, Melbourne
- Car:Heavily Modified UC Sunbird Hatchback
- Joined: 07-November 05
View Garage
Posted 15 November 2009 - 11:14 AM
Yeah mate my bonnet gets dirty about 100 times as quickly as anything else on the car. But the blackouts do look tops when it's all clean
#70
_doogs_
_doogs_
-
- Guests
Posted 15 November 2009 - 05:17 PM
Looks bloody awesome mate, well done.
You tidyed up the bay wiring very nicely.
You tidyed up the bay wiring very nicely.
#71
_Viper_
_Viper_
-
- Guests
Posted 16 November 2009 - 11:34 AM
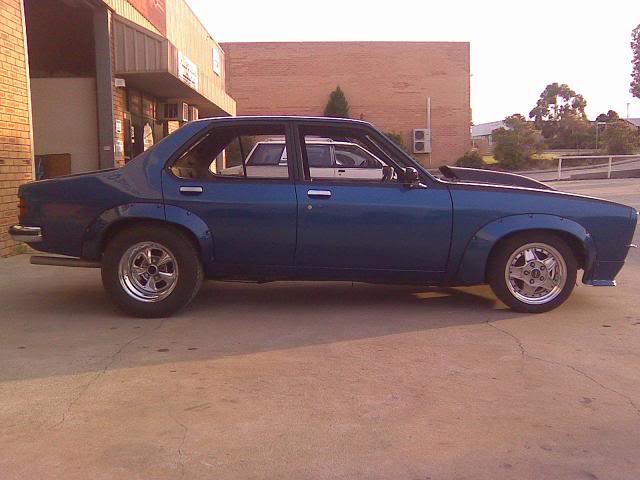
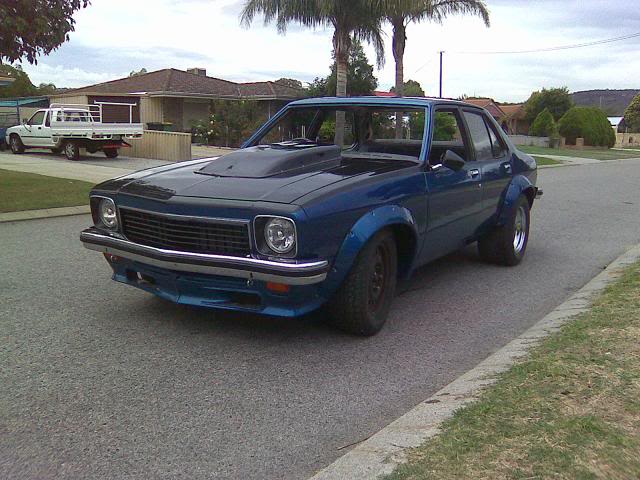
Heh was on my old computer the other day and I found the Pic which I found yearrrrrs ago which made me want a Torana and what I pretty much based my project on!
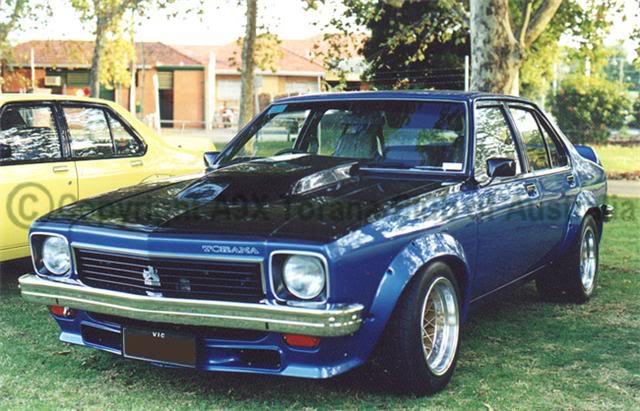
Anyone know whos this Torana is/was? I know I found it on these forums back in the day
Anyone know whos this Torana is/was? I know I found it on these forums back in the day
#72
Heath
View Garage
-
- Administrators
-
- 18,314 posts
I like cars.
- Name:Heath
- Location:Eastern Suburbs, Melbourne
- Car:Heavily Modified UC Sunbird Hatchback
- Joined: 07-November 05
View Garage
Posted 16 November 2009 - 02:17 PM
Mmmmm big hotwires make me horny! Those front wheels are perfect
#73
_Viper_
_Viper_
-
- Guests
Posted 07 March 2010 - 07:51 PM
Well, I spent the first half of the x-mass holidays prepping the Gemini for paint, Then I got real sick and didnt touch any cars for pretty much all of Jan/Feb And then I went back to work down south.
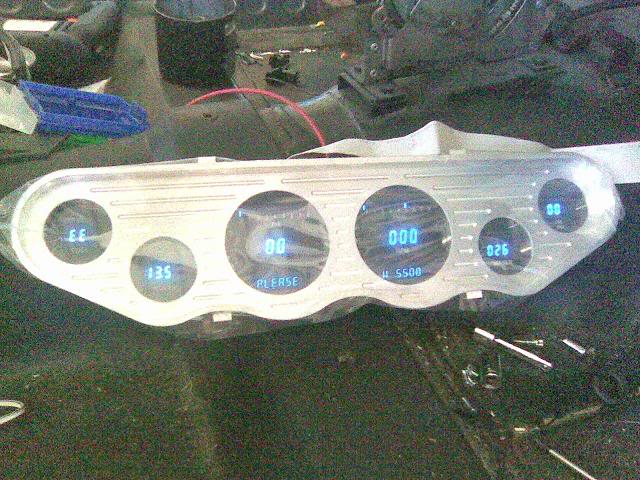
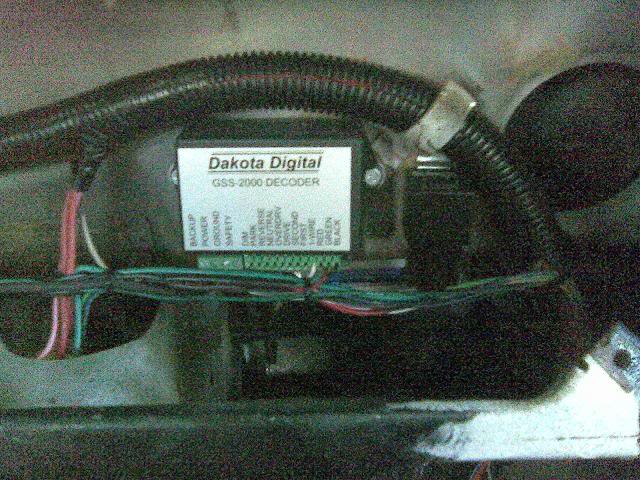
Anyway was on break for 5days last week and while the Gem is away got stuck into the Torana, mainly been doing the wiring. Ive 95% finished the Painless wiring kit and then I wired up the MSD6AL and Dakota Digital Dash... Had some dramas with the Gear position sensor (little sender mounted on the gearbox which tells the Dash which gear your in for it to display) as I have a B&M megashifter and the mount they supplied for the gear sender was supposed to bolt onto where my shift cable was mounted... so had to mod the mounts a little bit got it sorted
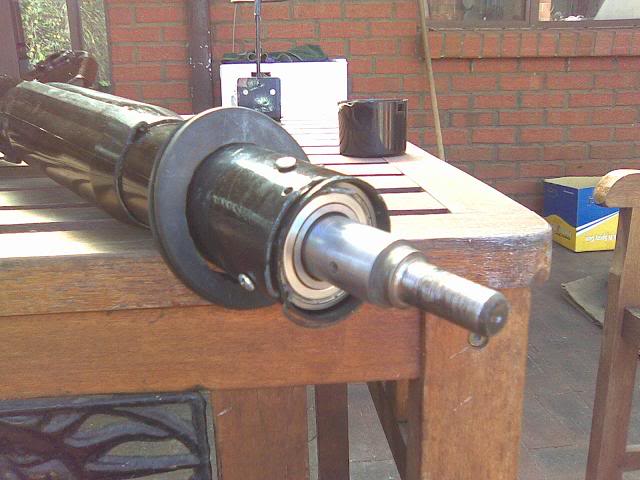
Recently I pulled the Steering Column out and did the lower bearing mod as demonstrated by other members on here using a new 6205 bearing and give it a quick coat of paint and I ran most of the cable from the battery in the boot today also
Also had the front bumper brackets powdercoated and I fitted the newly chromed front bumper.
Hmm thats about it I think, Oh I also managed to get the boot lid lined up alot better then the panel beater did
But yea Ill get pics as soon as I get a chance to steal the good digi cam from the gf Just thought Id let you all know that something is actually being done on the poor lil bugga
Anyway was on break for 5days last week and while the Gem is away got stuck into the Torana, mainly been doing the wiring. Ive 95% finished the Painless wiring kit and then I wired up the MSD6AL and Dakota Digital Dash... Had some dramas with the Gear position sensor (little sender mounted on the gearbox which tells the Dash which gear your in for it to display) as I have a B&M megashifter and the mount they supplied for the gear sender was supposed to bolt onto where my shift cable was mounted... so had to mod the mounts a little bit got it sorted
Recently I pulled the Steering Column out and did the lower bearing mod as demonstrated by other members on here using a new 6205 bearing and give it a quick coat of paint and I ran most of the cable from the battery in the boot today also
Also had the front bumper brackets powdercoated and I fitted the newly chromed front bumper.
Hmm thats about it I think, Oh I also managed to get the boot lid lined up alot better then the panel beater did
But yea Ill get pics as soon as I get a chance to steal the good digi cam from the gf
Just thought Id let you all know that something is actually being done on the poor lil bugga
#74
_Viper_
_Viper_
-
- Guests
Posted 14 March 2010 - 08:36 PM
Had my day off today and got into the Torry, fit the Steering column... had a couple of problems with a collapsed shaft and the ignition switch but got them sorted
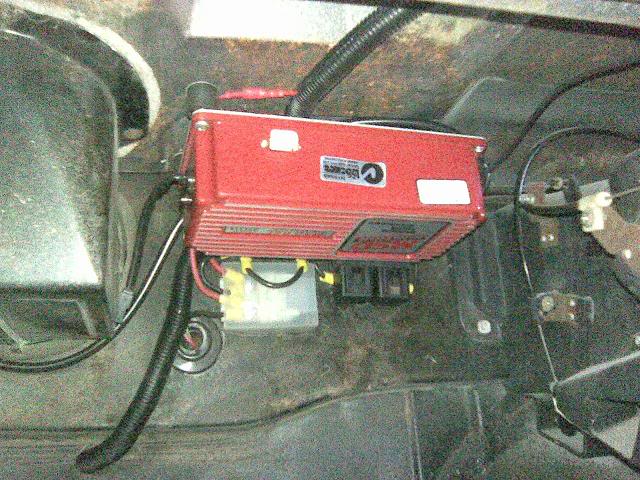
Then came the big moment to connect the new wiring up to power (why I didnt do this from the start and test everything as I went I donno, I know I should have) But yea just connected it to a 10amp battery charger incase anything is wrong as it will trip itself out. And found alot of things didnt work or were being weird... but it was mostly just the case of having the pins around the wrong way on the indicator switch, heater switch, wiper motor etc so after abit of playing around with the multimeter got the Wipers, Horn, Indicators, Blower Fan, Washer bottle, Brake lights. Starter motor, Boot light, interior light, stereo, ciggy lighter and Dakota Dash all sorted... Im still yet to find a knob for my new headlight switch so yet to test them. But yea Im just about finished! yay.
Few recent pics
(yet to run split tubing over the lower group of wires)
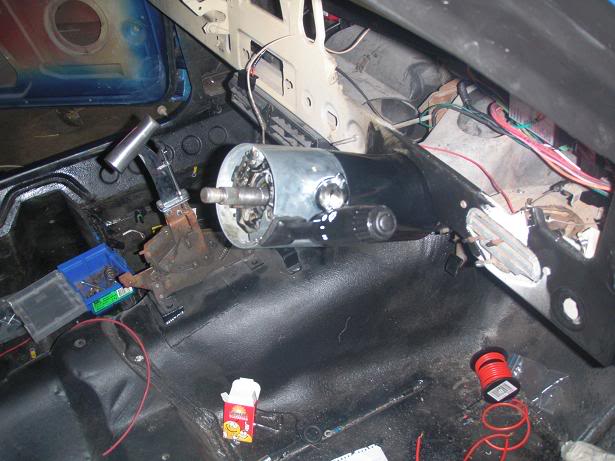
Back down south tommorow so wont get anymore done till next Sunday... as soon as wiring is done its off to the upholsterer
Then came the big moment to connect the new wiring up to power (why I didnt do this from the start and test everything as I went I donno, I know I should have) But yea just connected it to a 10amp battery charger incase anything is wrong as it will trip itself out. And found alot of things didnt work or were being weird... but it was mostly just the case of having the pins around the wrong way on the indicator switch, heater switch, wiper motor etc so after abit of playing around with the multimeter got the Wipers, Horn, Indicators, Blower Fan, Washer bottle, Brake lights. Starter motor, Boot light, interior light, stereo, ciggy lighter and Dakota Dash all sorted... Im still yet to find a knob for my new headlight switch so yet to test them. But yea Im just about finished! yay.
Few recent pics
(yet to run split tubing over the lower group of wires)
Back down south tommorow so wont get anymore done till next Sunday... as soon as wiring is done its off to the upholsterer
#75
_Viper_
_Viper_
-
- Guests
Posted 10 April 2010 - 07:49 PM
Cars at the Trimmers
struggling to find fabric to match my front seats tho (Blue Velour)


0 user(s) are reading this topic
0 members, 0 guests, 0 anonymous users

