
Maybe I should just order 2 black ones for the drivers side and 2 polished ones for the passenger so I dont have to decide!

Clints LH Project
Started by
_Viper_
, Mar 27 2006 10:51 PM
307 replies to this topic
#102
 _Viper_
_Viper_
-

- Guests
Posted 27 January 2011 - 08:39 PM
Well got abit further with the dash, went down to bunnings and found some galvanised strips which were for wood tie downs or something, anyway cut them to the length I needed and put a bend in them then bit of fiddling about and tacked them onto the dash
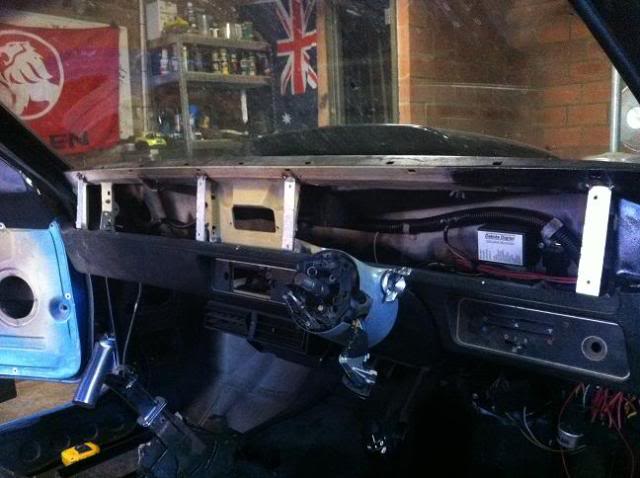
Just used a few self tappers to mark the holes and see what it looks like
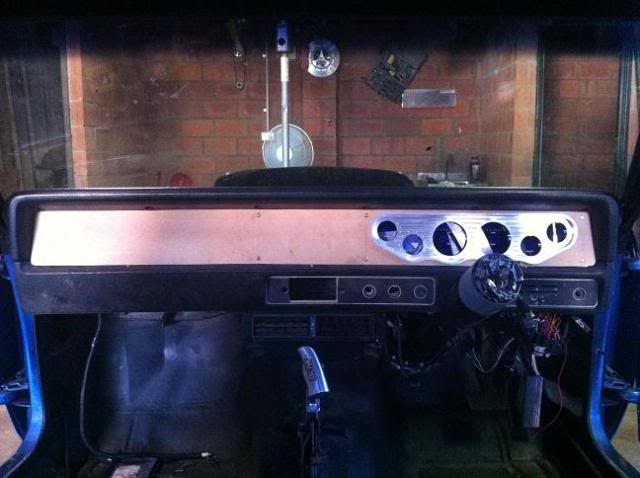
But I think I will upholster it like a Door trim with the hidden plastic plugs on the rear and keep it all smooth. But what color, Black or blue hmm
Just used a few self tappers to mark the holes and see what it looks like
But I think I will upholster it like a Door trim with the hidden plastic plugs on the rear and keep it all smooth. But what color, Black or blue hmm
#103
Stinga
-

- Members
-

- 2,114 posts
.
- Name:Stinga
- Location:Wollongong, NSW
- Car:HD Holden ute, and sedan, UC torana
- Joined: 05-December 05
Posted 27 January 2011 - 09:01 PM
i like the idea of having it with something like a doortrim clip. i vote for black, i think blue would take the focus away from the instrument cluster.
#104
_Viper_
_Viper_
-
- Guests
Posted 20 April 2011 - 02:25 PM
Well I finally got around to doing this... Dont know if I'll add anything to the left side or not. Will leave it as is for now I think... ended up trimming it in Black marine Vinyl just as you would a door trim and used door trim push in clips to hold it onto those brackets I fitted earlier so its all hidden.
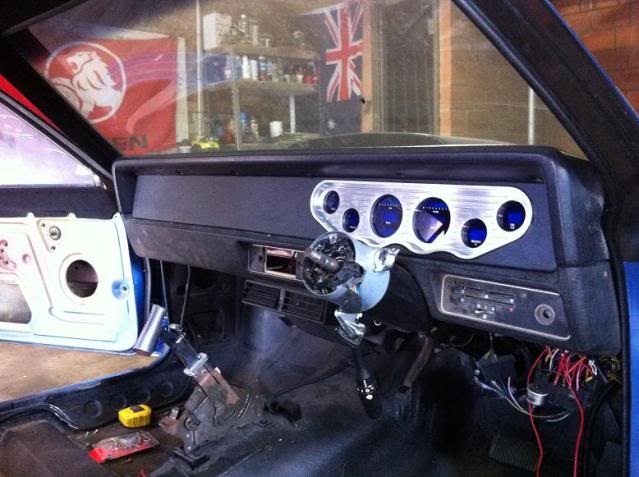
Picked up some universal seat rails today also so will get stuck into fitting the seats today or maybe tomorrow.
Picked up some universal seat rails today also so will get stuck into fitting the seats today or maybe tomorrow.
Edited by Viper, 20 April 2011 - 02:27 PM.
#106
_Viper_
_Viper_
-
- Guests
Posted 21 April 2011 - 01:21 PM
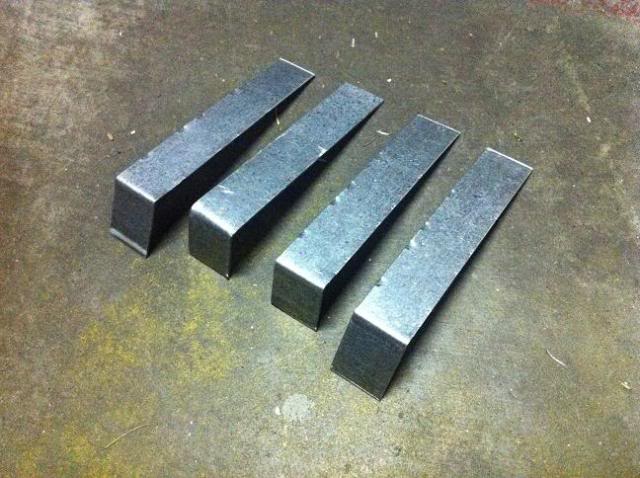
Finished one of the seat rails, just goto round the corners off, clean it up and give it a coat of paint 
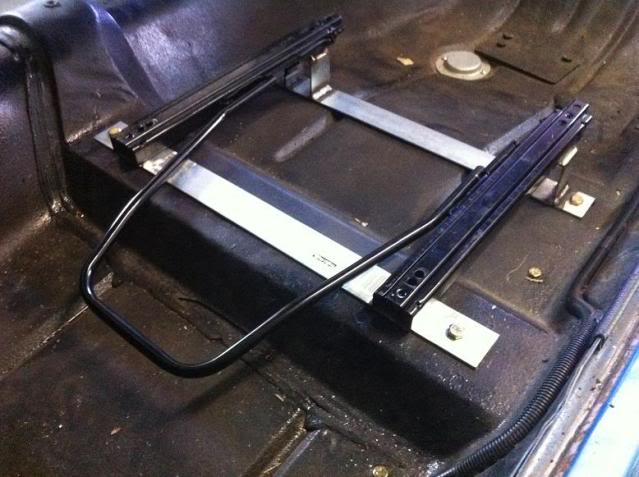
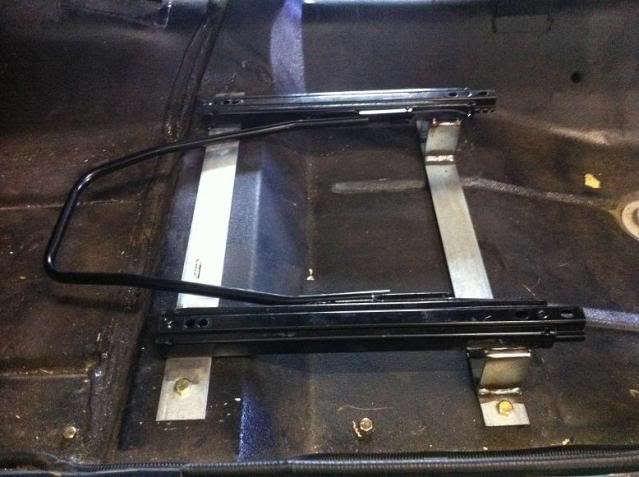
Gonna have some chow then make a start on the second one and Finally Torana will have seats for first time in 6 years (I like these little milestones)
Gonna have some chow then make a start on the second one and Finally Torana will have seats for first time in 6 years (I like these little milestones)
#107
_Viper_
_Viper_
-
- Guests
Posted 21 April 2011 - 05:55 PM
Feels good, nice and comfy and the Rails have HEAPS of travel, go right back till I cant reach the pedals and right forward till my knee's touch the dash so Im pretty happy.
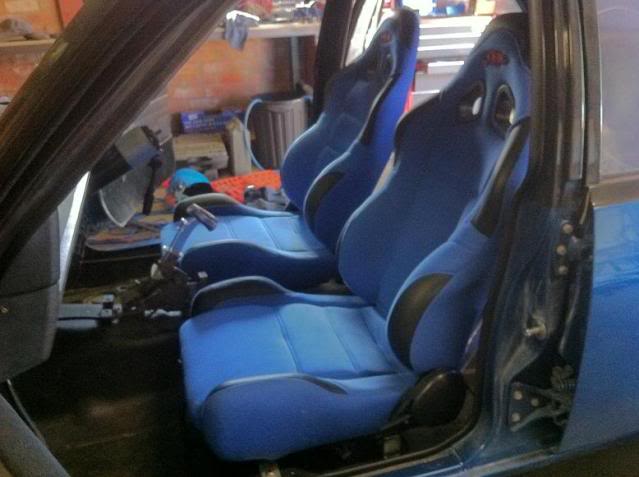
Still goto finish off some wiring, fit the carpet, sort handbrake cable, Give the other pieces of the dash a coat of Satin black, sort Door trims, Make a Parcel Shelf, Seat belts are probly a good idea too!
Still goto finish off some wiring, fit the carpet, sort handbrake cable, Give the other pieces of the dash a coat of Satin black, sort Door trims, Make a Parcel Shelf, Seat belts are probly a good idea too!
#108
_Bomber Watson_
_Bomber Watson_
-
- Guests
Posted 21 April 2011 - 09:09 PM
Dash isnt to my taste but well executed so i'll say each to there own!!
Blue seats are in the same ballpark.
Good job overall and a few ideas for me to steal.
Cheers.
Blue seats are in the same ballpark.
Good job overall and a few ideas for me to steal.
Cheers.
#109
_Kush_
_Kush_
-
- Guests
Posted 21 April 2011 - 09:14 PM
Yes, consider some of your ideas...... stolen (cue the evil chuckle)
#110
_Viper_
_Viper_
-
- Guests
Posted 08 June 2011 - 11:04 PM
If ya cant beat em, Join em... well help them anyway... This will make it easier to steal my work
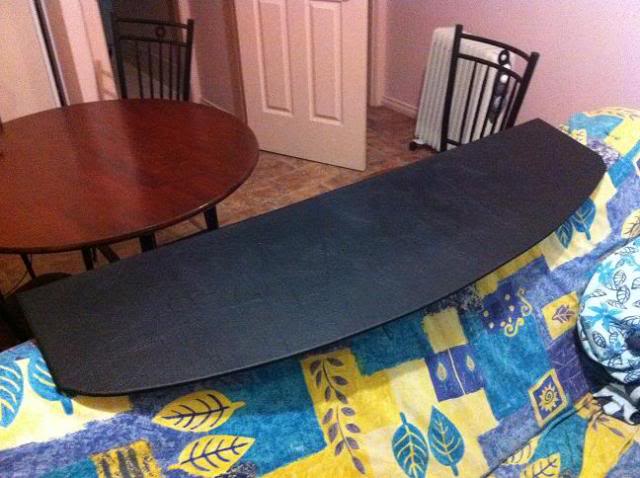
I made up a pretty basic parcel shelf and thought Id do a quick writeup as the same process can be used to make door trims or whatever.
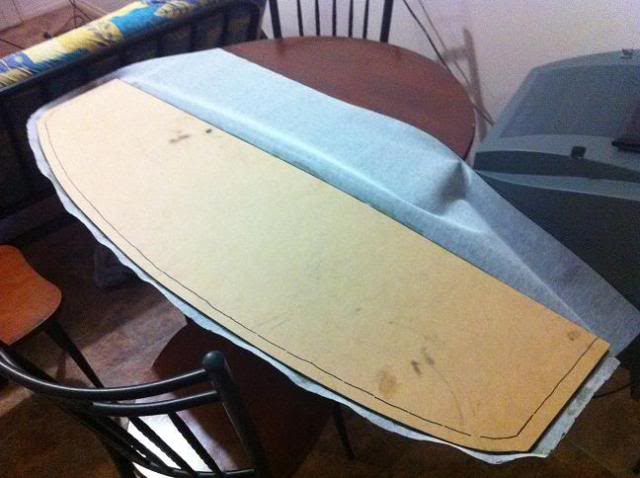
I dont have pics of this part as I actually did it awhile ago... But I used some Thin single ply cardboard and made up a template with that first then cut out a backing board from some 3mm MDF... I cut it slightly bigger then multiple times test fit and trimmed slightly then test fitted again etc till I was happy.
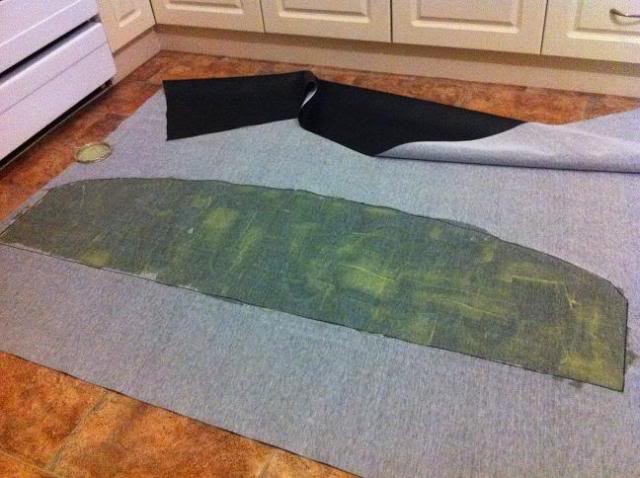
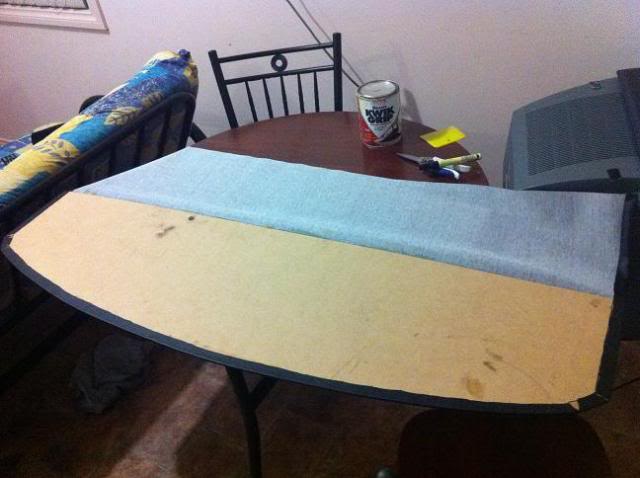
Here is a pic of the Backing board and the 2mm Closed cell foam I used as underlay under the Vinyl
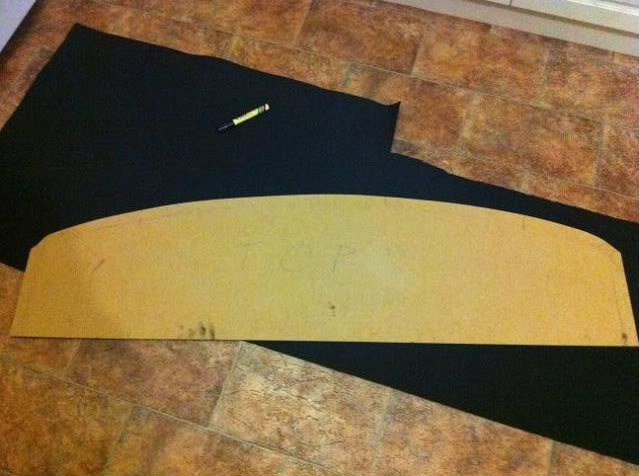
I laid the board over the foam and marked around it then used some quick grip on both the board and the Foam, let it dry till tacky then placed the board over the Foam, starting at one end and pushing it down to the other to try avoid air bubbles.
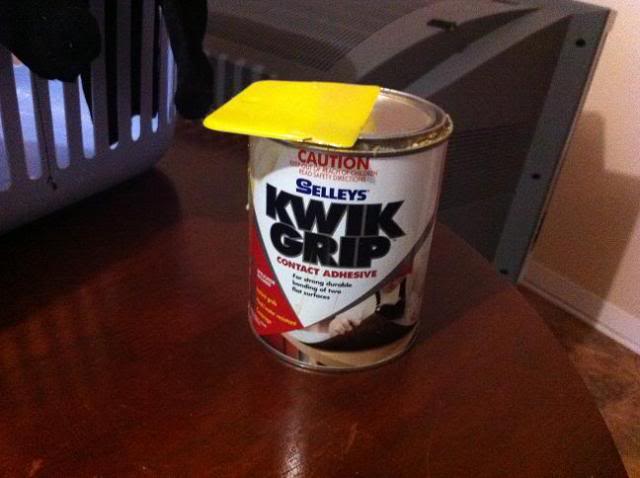
I basically just pour abit of the kwik grip out then use that plastic spatula to spread it out evenly.
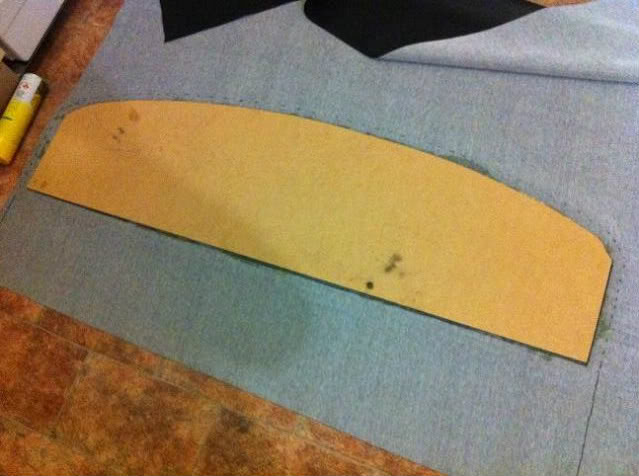
Then I just cut all the excess foam off.
I then layed the parcel shelf over my Vinyl and drew a outline around it, removed the board and started applying some more quick-grip.... Because both the Vinyl and the Foam is porous I only applied the Kwikgrip to the Vinyl.
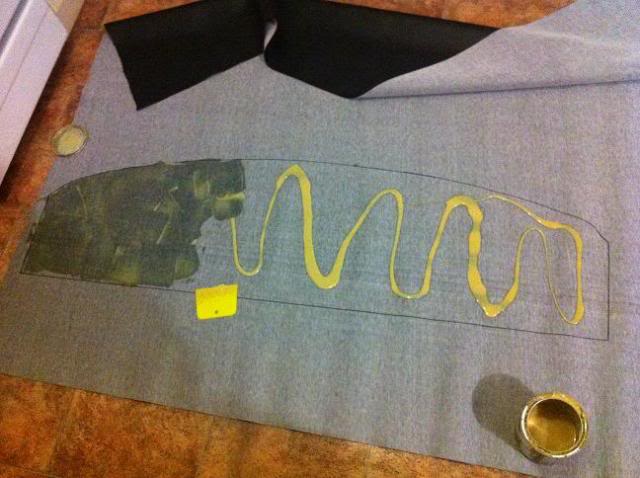
Then laid the board onto the Vinyl in the same way, flexing it so I could start at one end and push it down across to the other... You only get one chance with this stuff, once its down its staying down, if you try to pull it apart it will just tear the foam.

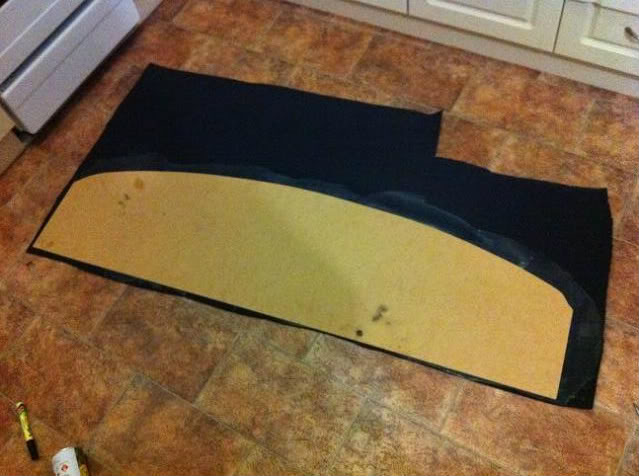
I then marked about 20mm around the board and cut it out.
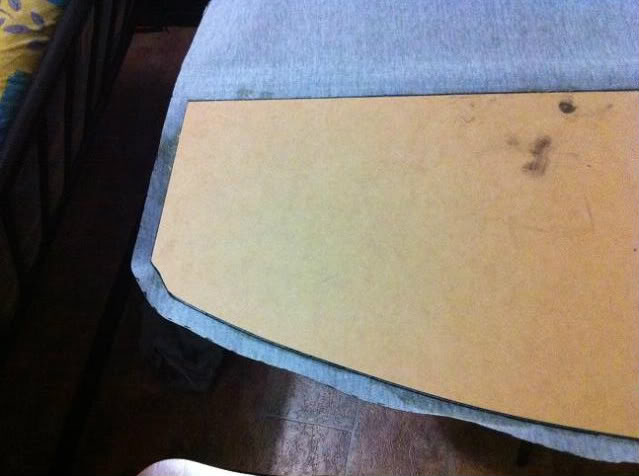
You can see I didnt cut off the section towards the front that goes up against the seats... Thats because you can just leave the vinyl to hang down over the rear firewall under the seats and there is no chance of it leaving a gap.
I then Folded the vinyl over on the inside and marked where it would finish up so I knew where to put my glue.
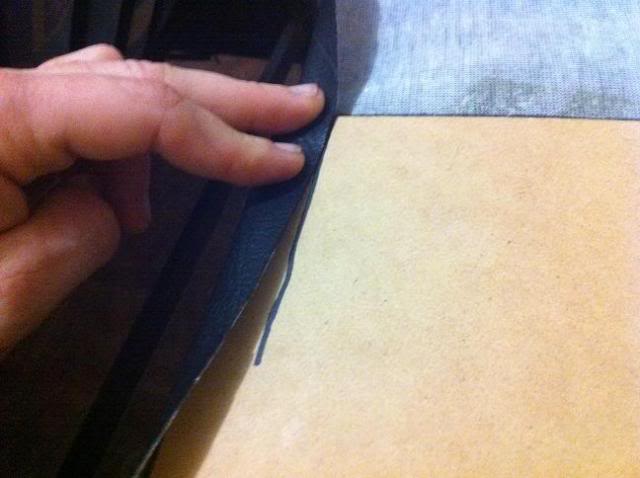
Then I put glue on both the board up to where I marked and the underside of the vinyl and let it dry till tacky Then fold it over while also pulling some tension on it so its nice and tight on the other side.
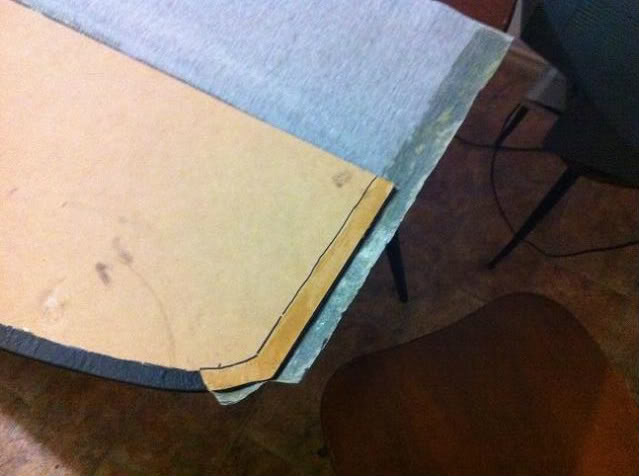
You can see on the corners if you try to fold it over it doesnt quite work out.
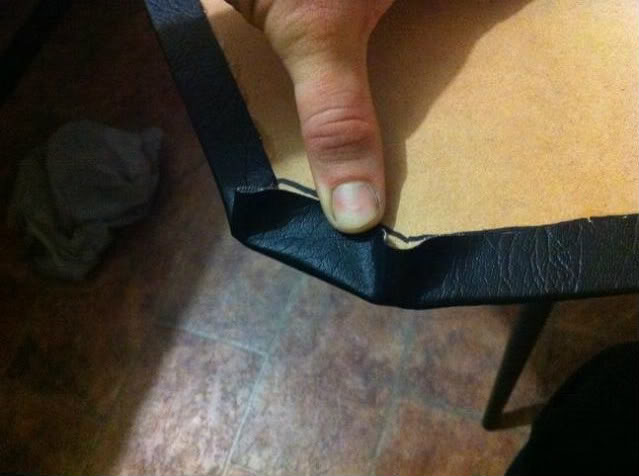
So you just have to cut the corners strategically so it will fold over nicely...
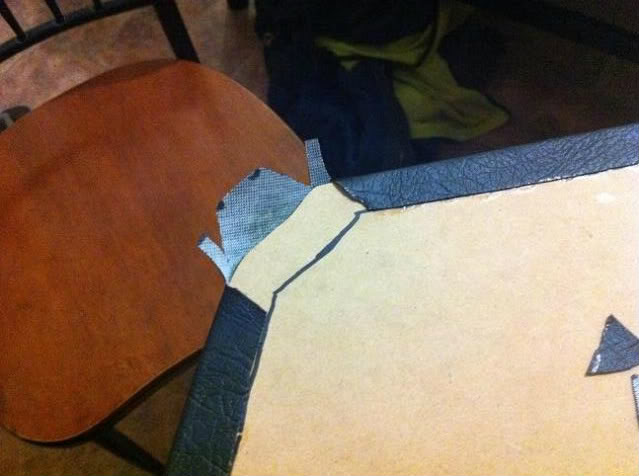
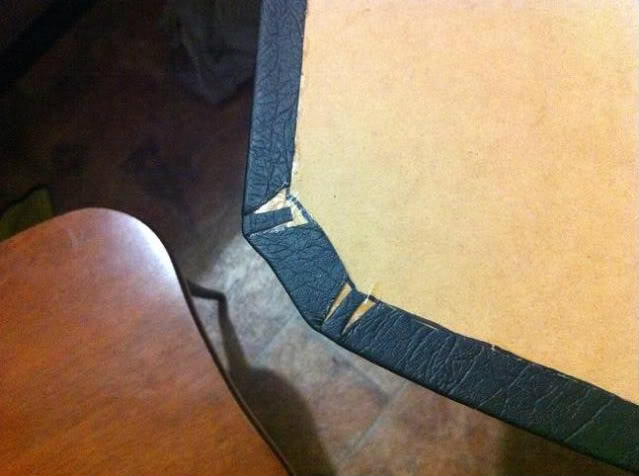
Is more then one way to do it.
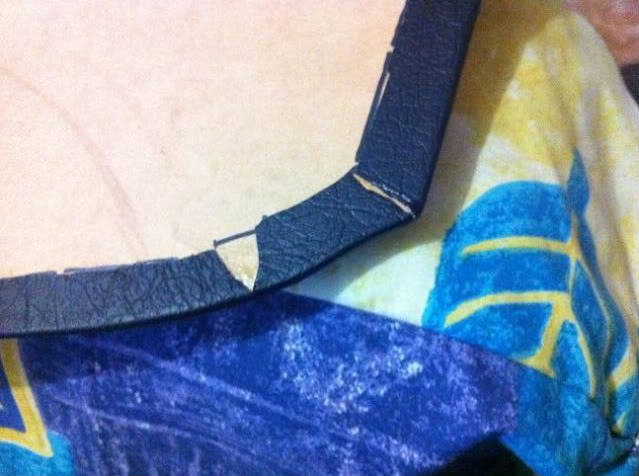
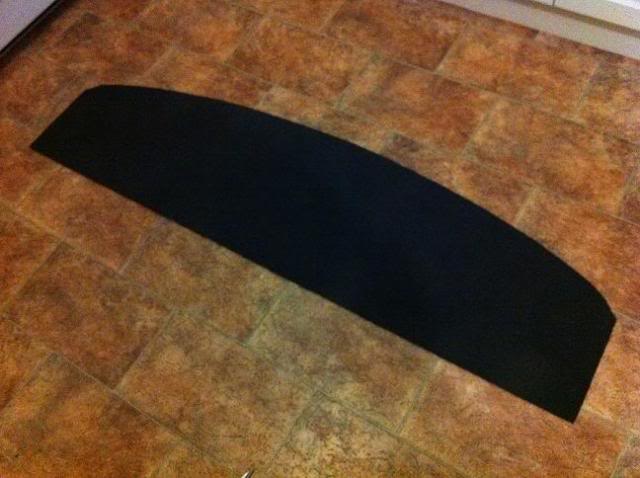
But as long as it turns out with nothing showing on the top side
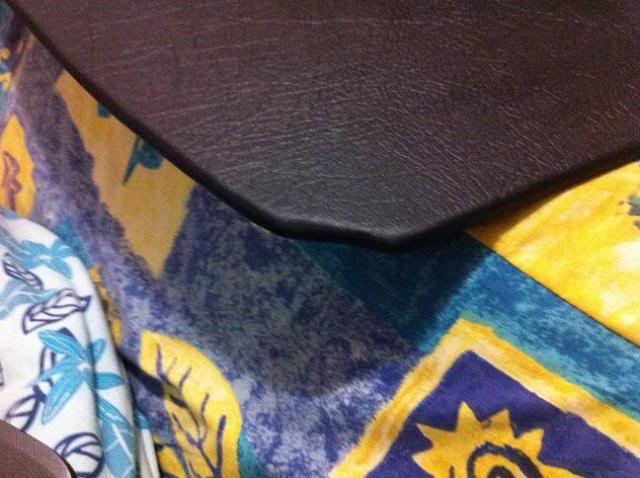
The long broard curve along the top is gentle enough the Vinyl can just stretch and conform to shape.... Glue the rest of the edges and your done.
So there you have it a very basic and simple way to trim pretty much anything. You can easily cut out another layer of foam to any shape you want and put on top of the first layer of foam and then cover both layers with Vinyl and you end up with a nice embossed effect, its just abit tricky to get it into all the tight corners...
Here is a couple of pics of some Door trims I did on my Gemini using the same method
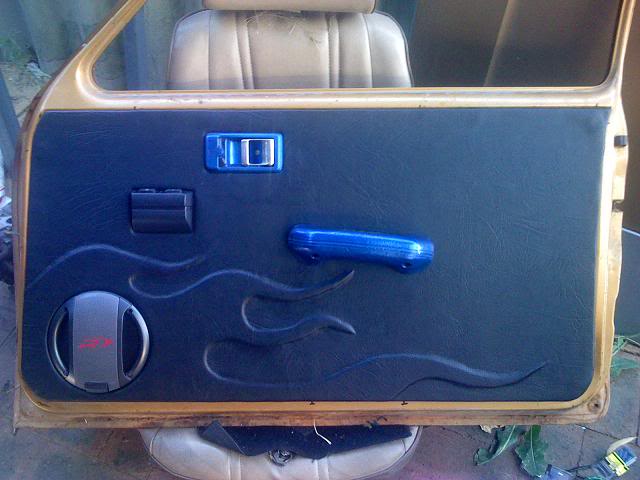
I'll get some pics of it fitted to the car when im home next.
I made up a pretty basic parcel shelf and thought Id do a quick writeup as the same process can be used to make door trims or whatever.
I dont have pics of this part as I actually did it awhile ago... But I used some Thin single ply cardboard and made up a template with that first then cut out a backing board from some 3mm MDF... I cut it slightly bigger then multiple times test fit and trimmed slightly then test fitted again etc till I was happy.
Here is a pic of the Backing board and the 2mm Closed cell foam I used as underlay under the Vinyl
I laid the board over the foam and marked around it then used some quick grip on both the board and the Foam, let it dry till tacky then placed the board over the Foam, starting at one end and pushing it down to the other to try avoid air bubbles.
I basically just pour abit of the kwik grip out then use that plastic spatula to spread it out evenly.
Then I just cut all the excess foam off.
I then layed the parcel shelf over my Vinyl and drew a outline around it, removed the board and started applying some more quick-grip.... Because both the Vinyl and the Foam is porous I only applied the Kwikgrip to the Vinyl.
Then laid the board onto the Vinyl in the same way, flexing it so I could start at one end and push it down across to the other... You only get one chance with this stuff, once its down its staying down, if you try to pull it apart it will just tear the foam.
I then marked about 20mm around the board and cut it out.
You can see I didnt cut off the section towards the front that goes up against the seats... Thats because you can just leave the vinyl to hang down over the rear firewall under the seats and there is no chance of it leaving a gap.
I then Folded the vinyl over on the inside and marked where it would finish up so I knew where to put my glue.
Then I put glue on both the board up to where I marked and the underside of the vinyl and let it dry till tacky Then fold it over while also pulling some tension on it so its nice and tight on the other side.
You can see on the corners if you try to fold it over it doesnt quite work out.
So you just have to cut the corners strategically so it will fold over nicely...
Is more then one way to do it.
But as long as it turns out with nothing showing on the top side
The long broard curve along the top is gentle enough the Vinyl can just stretch and conform to shape.... Glue the rest of the edges and your done.
So there you have it a very basic and simple way to trim pretty much anything. You can easily cut out another layer of foam to any shape you want and put on top of the first layer of foam and then cover both layers with Vinyl and you end up with a nice embossed effect, its just abit tricky to get it into all the tight corners...
Here is a couple of pics of some Door trims I did on my Gemini using the same method
I'll get some pics of it fitted to the car when im home next.
Edited by Viper, 08 June 2011 - 11:15 PM.
#111
_Quagmire_
_Quagmire_
-
- Guests
Posted 08 June 2011 - 11:16 PM
did you use rollers on the door trim?
looks kinda tricky with those flames
did you mark out and cut any holes in the parcel shelf for the seat belts?
or can this be done later?
looks kinda tricky with those flames
did you mark out and cut any holes in the parcel shelf for the seat belts?
or can this be done later?
#112
_Viper_
_Viper_
-
- Guests
Posted 08 June 2011 - 11:27 PM
Nah I actually just used the back end of a pencil to push the Vinyl into the edges...
There is seatbelt mounts in the parcel shelf? lol oops... I bought my car as a bare shell and to be honest have not had a complete Torana for like 6 years... I assumed the seat belts mounted on the C-pillar like my Gemini hehe. But thats ok the Hole can be drilled later without a problem... Just goto make sure you cut the foam and vinyl with a Stanley knife first.. If ya go straight at it with the drill it can sometimes get caught up and rip a hole alot bigger then you wanted.
There is seatbelt mounts in the parcel shelf? lol oops... I bought my car as a bare shell and to be honest have not had a complete Torana for like 6 years... I assumed the seat belts mounted on the C-pillar like my Gemini hehe. But thats ok the Hole can be drilled later without a problem... Just goto make sure you cut the foam and vinyl with a Stanley knife first.. If ya go straight at it with the drill it can sometimes get caught up and rip a hole alot bigger then you wanted.
#113
_Viper_
_Viper_
-
- Guests
Posted 11 June 2011 - 05:02 PM
I had a look at my parcel shelf today Quag and there is no mounts for the seatbelts? My C-pillars were trimmed awhile ago and I assumed the mounts where on that?
Anyway couple of pics with it fitted, Ignore the rear window thats in need of a re-tint
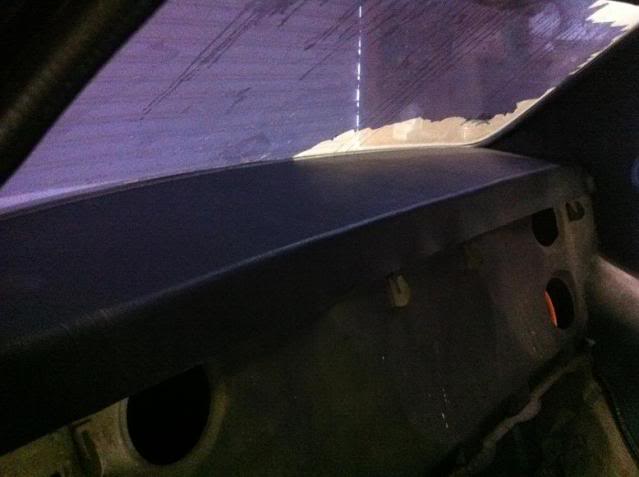
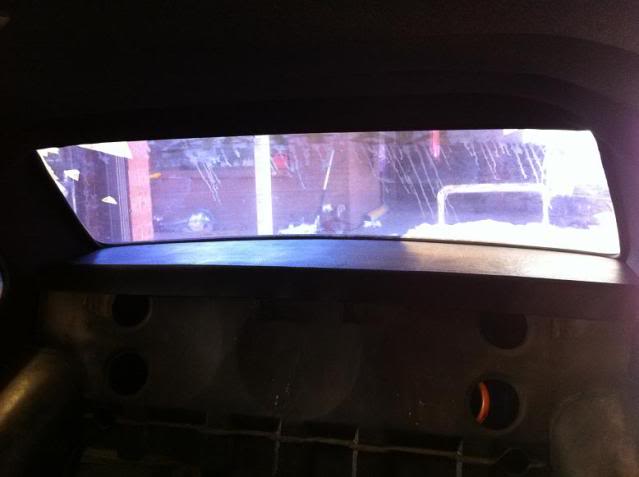
Anyway couple of pics with it fitted, Ignore the rear window thats in need of a re-tint
#114
_Quagmire_
_Quagmire_
-
- Guests
Posted 11 June 2011 - 05:14 PM
ooopppss
my bad then just assumed they where....like the h series etc
my bad then just assumed they where....like the h series etc
#115
_Viper_
_Viper_
-
- Guests
Posted 11 June 2011 - 06:09 PM
See where assumptions gets us hehe, I better go see If I can feel the hole on the C-pillar
#116
_Kush_
_Kush_
-
- Guests
Posted 11 June 2011 - 06:26 PM
The holes are in the c pillar.
What's wrong with all of you??
What's wrong with all of you??
#118
ReplicarSLR
-

- Members
-
- 517 posts
Forum Fixture
- Location:QLD
- Car:Not anymore unfortunately
- Joined: 31-May 07
Posted 11 June 2011 - 07:30 PM
Yep LH and early LX have them in the C pillar so they should be there since lt's a LH
#119
_A9XOSS_
_A9XOSS_
-
- Guests
Posted 11 June 2011 - 07:42 PM
looking good, as for the window tint. if your going to scrap it off, a little tip for ya if you dont already know to get the glue off the glass.
which is a pain in the a@#, just spay orange citrus cleaner on it and wait for a few moments. then it will go all gooey / jelly like, it will scrap it off easy as. then clean up with window cleaner and all will be like new again.
which is a pain in the a@#, just spay orange citrus cleaner on it and wait for a few moments. then it will go all gooey / jelly like, it will scrap it off easy as. then clean up with window cleaner and all will be like new again.
Edited by A9XOSS, 11 June 2011 - 07:45 PM.
#121
SmacT
-

- Members
-
- 907 posts
Forum Fixture
- Name:Sam
- Location:Sydney
- Car:LX 4dr 383, TKX, BW
- Joined: 24-December 08
Posted 11 June 2011 - 09:00 PM
There are child restraint holes in the parcel shelf, could be what threw you.
#122
_Viper_
_Viper_
-
- Guests
Posted 26 June 2011 - 08:08 PM
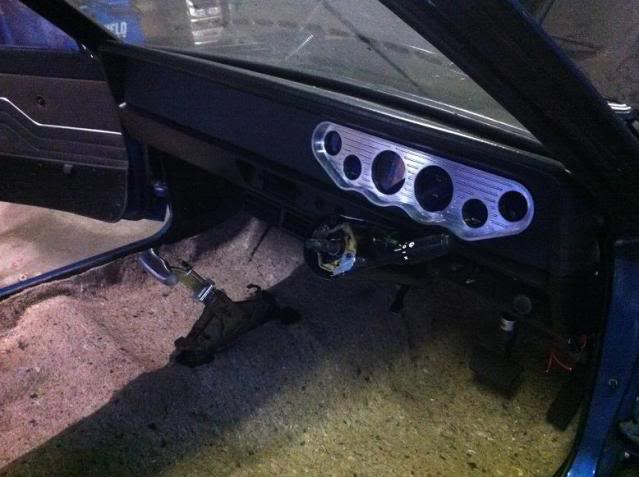
Spent the day on the Torana today, Finished all the wiring under the dash, gave the lower half of the dash a coat of Satin black which came up really nice... just need to use a really fine brush or something and repaint the white outlines.
Also got a new indicator housing (coffee pot) from a HZ ute, which has the stalk with indicators, wipers n washer built in and even Hazard lights so gave that a coat of black and wired it all in and fitted it... Only to find the ignition barrel wouldnt turn (hmm turned fine when it was out of the car). After abit of looking and pulling it off then back on then off found it was Just fowling a little bit on the inner shaft of the steering column in one spot so cut that off and all good. Too bad my brand new Torana ignition barrel doesnt fit it :(
So bolted all the dash in properly. Still need to get a head unit and put a ciggy lighter fitting where the wiper switch used to be... Donno what ill put in the old choke spot?
Then fit the carpet underlay.... which was REALLY a kent to cut... I got some half decent upholstery scissors but yeh... got through it tho.
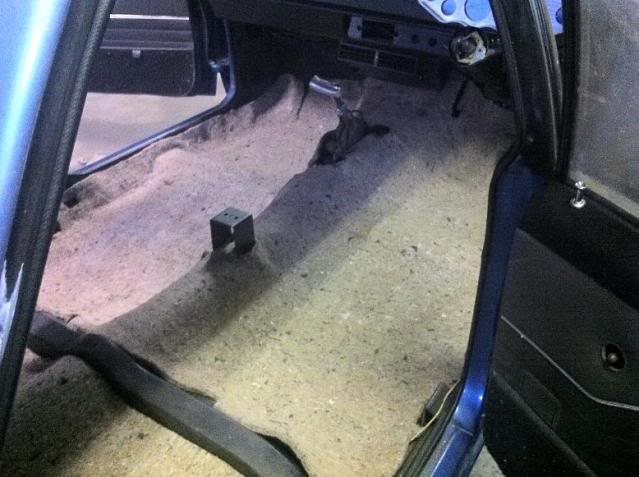
(have neated it a little more and cut all the holes out for the seat mounts etc since that pic too.
Was getting dark so I quickly threw the "Moulded" carpet in but wasnt a great fit but ill have to wait till tomorrow to play with that. Then chuck the seats in and then the cars pretty much ready to be put on the dyno.
Oh few small jobs to do, some vaccume hoses, earth lead meh im sure ill find more stuff
Also got a new indicator housing (coffee pot) from a HZ ute, which has the stalk with indicators, wipers n washer built in and even Hazard lights
so gave that a coat of black and wired it all in and fitted it... Only to find the ignition barrel wouldnt turn (hmm turned fine when it was out of the car). After abit of looking and pulling it off then back on then off found it was Just fowling a little bit on the inner shaft of the steering column in one spot so cut that off and all good. Too bad my brand new Torana ignition barrel doesnt fit it :( So bolted all the dash in properly. Still need to get a head unit and put a ciggy lighter fitting where the wiper switch used to be... Donno what ill put in the old choke spot?
Then fit the carpet underlay.... which was REALLY a kent to cut... I got some half decent upholstery scissors but yeh... got through it tho.
(have neated it a little more and cut all the holes out for the seat mounts etc since that pic too.
Was getting dark so I quickly threw the "Moulded" carpet in but wasnt a great fit but ill have to wait till tomorrow to play with that. Then chuck the seats in and then the cars pretty much ready to be put on the dyno.
Oh few small jobs to do, some vaccume hoses, earth lead meh im sure ill find more stuff
#123
ls2lxhatch
-

- Members
-
- 5,332 posts
- Location:Perth
- Car:LX Hatch
- Joined: 29-May 06
Posted 26 June 2011 - 08:55 PM
Look good. The raised lines on the lower dash are usually chrome. You can use a silver paint paint to repaint them. I think leaving black may suit the rest of the dash. I have a spare black lower dash with the chrome outlines if you want to compare with and without. Unless you are talking about the symbols on the heater control.
Uni Paint Marker 1.2 mm
Uni Paint Marker 2.8 mm
Uni Paint Marker 1.2 mm
Uni Paint Marker 2.8 mm
Edited by ls2lxhatch, 26 June 2011 - 08:56 PM.
#124
_Viper_
_Viper_
-
- Guests
Posted 26 June 2011 - 09:02 PM
Talking about the thin line that is like a border around each switch cluster... Before I sprayed it they were just white... I got 2 other lower sections here and from memory they were not chrome, but will check...
But either way its obviously not a original resto so whatever color looks good will be the go.
But either way its obviously not a original resto so whatever color looks good will be the go.
#125
ls2lxhatch
-
- Members
-
- 5,332 posts
- Location:Perth
- Car:LX Hatch
- Joined: 29-May 06
Posted 26 June 2011 - 11:07 PM
The original dash has chrome around the switches and the thin plastic border around each recess.
This is a restored dash done by dash original. They have used the silver paint.

This is a restored dash done by dash original. They have used the silver paint.


0 user(s) are reading this topic
0 members, 0 guests, 0 anonymous users

