Jump to content


My newer Monaro


  • Please log in to reply
529 replies to this topic

#201 _RdS_

_RdS_
  • Guests

Posted 04 February 2008 - 01:53 AM

jeez.. this has come a long way! just read through the whole thread! :o
love the quey's, and the paint and engine choices... all brill! :)

n dont worry about your floor repairs, as you've said, it all gets covered and just has to hold everyone inside! doesnt matter what it looks like
also, i see your still working around the wiper spline on the cowl panel. you do know theres just three little nuts holding it up there from the underside..?


have you gone past the place you got the car from since? its been two years, but is that other shell still there?? im real keen to get one now!


anyway, keep up the good work. need more updates! ;)

#202 _jabba_

_jabba_
  • Guests

Posted 04 February 2008 - 08:33 PM

jeez.. this has come a long way! just read through the whole thread! :o
love the quey's, and the paint and engine choices... all brill! :)

n dont worry about your floor repairs, as you've said, it all gets covered and just has to hold everyone inside! doesnt matter what it looks like
also, i see your still working around the wiper spline on the cowl panel. you do know theres just three little nuts holding it up there from the underside..?


have you gone past the place you got the car from since? its been two years, but is that other shell still there?? im real keen to get one now!


anyway, keep up the good work. need more updates! ;)

Thanks for the kind words mate! Unless i run someone over i dont think it will matter, its all solid and looks neat now... The underside of the car has been seam sealed and painted black so its a huge improvement :).

I was wondering how they came off, just never bothered to look haha :P. Is that a rubber gasket surrounding it or just some sealant?

#203 _jabba_

_jabba_
  • Guests

Posted 04 February 2008 - 08:51 PM

Engine/subframe is attached to the car!!! woot!

I cut 5mm slit out of a standard crossmember and hammered it down and welded it back up, i could then bolt the gearbox to the standard mounting holes but it looks like the gearbox is sitting too high. Ill have to remove cut the centre out of the crossmember and weld in a plate to lower it an inch or more.
Other than that small issue I feel like i've just passed a huge milestone, it feels more downhill from here :D. I have a few rust repairs left to complete but the front end of the car is ready for assembly, like wiring loom, steering coloum, dash and engine bits :rockon: :rockon: :rockon:.

Posted Image

Posted Image

Posted Image

Posted Image

#204 _Yella SLuR_

_Yella SLuR_
  • Guests

Posted 04 February 2008 - 09:12 PM

All that room in the engine bay, what luxury. Pics of HQ's and that ilk (stacks of room under bonnet) should be banned from this website. By god, repairs may even be easy on these vehicles!!!!

Edited by Yella SLuR, 04 February 2008 - 09:13 PM.


#205 Bart

Bart

    Shit a brick

  • Members
  • PipPipPipPipPipPip
  • 2,559 posts
  • Location:Sydney
  • Car:LJ Torana
  • Joined: 20-November 05

Posted 04 February 2008 - 09:59 PM

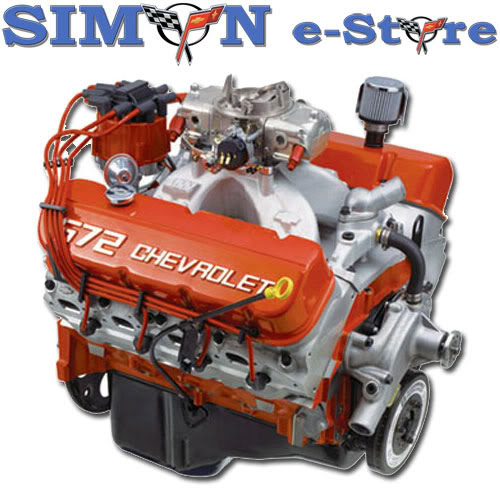
Standard fitment in a Monaro or Torana should be either one of these :spoton: The 572 would have enough torque to kick start a dead planet
Posted Image
Posted Image

Edited by Bart, 04 February 2008 - 10:00 PM.


#206 _RdS_

_RdS_
  • Guests

Posted 05 February 2008 - 02:47 AM

jeez.. this has come a long way! just read through the whole thread! :o
love the quey's, and the paint and engine choices... all brill! :)

n dont worry about your floor repairs, as you've said, it all gets covered and just has to hold everyone inside! doesnt matter what it looks like
also, i see your still working around the wiper spline on the cowl panel. you do know theres just three little nuts holding it up there from the underside..?


have you gone past the place you got the car from since? its been two years, but is that other shell still there?? im real keen to get one now!


anyway, keep up the good work. need more updates! ;)

Thanks for the kind words mate! Unless i run someone over i dont think it will matter, its all solid and looks neat now... The underside of the car has been seam sealed and painted black so its a huge improvement :).

I was wondering how they came off, just never bothered to look haha :P. Is that a rubber gasket surrounding it or just some sealant?

yep, 3 tiny little bolts. just look up from where the pedals go, and you'll see them. the whole unit just drops right in. :P

just felt like letting ya know as i left them there for wwway to long. stripped AROUND them etc. :lol:

#207 _jabba_

_jabba_
  • Guests

Posted 05 February 2008 - 09:16 PM

Standard fitment in a Monaro or Torana should be either one of these :spoton: The 572 would have enough torque to kick start a dead planet
https://cache.gmh-to.../untitled-1.jpg
https://cache.gmh-to...572Bigblock.jpg

hahahahha. Gotta love the yank tanks, bigger is always better.

If its worth doing, its worth overdoing :spoton:.

#208 _jabba_

_jabba_
  • Guests

Posted 23 February 2008 - 08:56 PM

Well i bought myself another money pit, i took it out for the first time last weekend and had a blast. Its been 6 years since i last rode a motobike and it felt like it, i cant wait to get out there and have another ride.

Its a 1999 KX 250

Posted Image

Posted Image


The friday before last i welded in all the repair patches on the left hand side of the car, i havent taken any pics yet. Today i've welded in the right hand rear 1/4 panel patches, now there are only two repairs left... The beaver panel and the rear window sill. Its starting to feel closer to the end of all of this, i cant wait to splash some colour on it :D.


Half welded in patch

Posted Image

Welded in
Posted Image

The other rusty part of the 1/4 panel
Posted Image

Posted Image

Welded in, the rough bit at the bottom was covered in factory lead filler.
Posted Image

Covered in por15
Posted Image

There was a dint in the beaver panel, someone drilled holes in it then tryed to pull it out and then bogged the holes up, made a bit of a mess of it.
Posted Image

I found shitloads of dust in the beaver, looks like she's seen alot of dusty dirt roads in its time. Its a dust trap by design, its not sealed so it scoops up the dust.
Posted Image

Everything inside the boot was smothered in por15, i trickled heeps down where you cant see where the rust starts. Hopefully it wont come back!


Damien

#209 toryman76

toryman76

    Forum Fixture

  • Members
  • PipPipPipPipPip
  • 1,082 posts
  • Location:Melbourne, Vic
  • Joined: 16-January 06

Posted 23 February 2008 - 09:06 PM

yeah the beavers are shocking... same as torana. thats a huge panel replacement! well done to not get warpage... i did on the small sections i done on my rear quarters but nothing major. i spent ages welding them in too... was too used to doing other areas where warpage wasnt going to occur. whats your plan with the por15 over the area? is that temporary or do you plan to bog/paint straight over it?

#210 _jabba_

_jabba_
  • Guests

Posted 23 February 2008 - 09:15 PM

There was some slight warpage but nothing bad, it just sucked in a little where i was welding. I spread the welding over 4 hours,and still it sucked in, oh well :P.

The por15 on the outside is to preserve the welds before i can bog and paint it, i will key the area with the por15 still on it and bog over the top. The tin says its fine to bog over, as long as you key it first. I figure it will seal the repair from moisture if it finds its way in there.

Edited by jabba, 23 February 2008 - 09:19 PM.


#211 _jabba_

_jabba_
  • Guests

Posted 24 February 2008 - 09:16 PM

Bit better than before :).

Posted Image

Posted Image

Now i only have the rear window sill left!!!! I have started the body prep work for paint, bogging, sanding etc. Not long now :clap: .

#212 toryman76

toryman76

    Forum Fixture

  • Members
  • PipPipPipPipPip
  • 1,082 posts
  • Location:Melbourne, Vic
  • Joined: 16-January 06

Posted 24 February 2008 - 09:36 PM

well done jabba! rear beaver looks the goods. what method have you used to bare metal it?

#213 _jabba_

_jabba_
  • Guests

Posted 24 February 2008 - 10:56 PM

well done jabba! rear beaver looks the goods. what method have you used to bare metal it?

I use these rapid strip disks, it took around 5 mins to strip its rear bare ;). Ill never strip paint off a car another way now (by hand that is).

Posted Image

Edited by jabba, 24 February 2008 - 10:56 PM.


#214 Bart

Bart

    Shit a brick

  • Members
  • PipPipPipPipPipPip
  • 2,559 posts
  • Location:Sydney
  • Car:LJ Torana
  • Joined: 20-November 05

Posted 24 February 2008 - 11:15 PM

Nice clean bare metal, go jabba go

#215 _TORANR AMORE_

_TORANR AMORE_
  • Guests

Posted 24 February 2008 - 11:19 PM

Nice job

.

#216 Tiny

Tiny

    Oh My, Don't you post alot

  • Administrators
  • PipPipPipPipPipPipPip
  • 10,018 posts
  • Name:Tiny
  • Location:Sydney
  • Joined: 04-February 07

Posted 25 February 2008 - 05:26 PM

Jabba: Mate you've gone to such an awesome extreme to get this monster right, I've gotto ask...

Are you going to learn how to file finish it? The work youve done is just so extensive that i think a really top job to finish the now rust-less body would do it justice!!

I'd hate to see all the hard yards covered by much bog to get everything 100% straight again!

Just curious mate!

#217 _jabba_

_jabba_
  • Guests

Posted 25 February 2008 - 06:40 PM

Jabba: Mate you've gone to such an awesome extreme to get this monster right, I've gotto ask...

Are you going to learn how to file finish it? The work youve done is just so extensive that i think a really top job to finish the now rust-less body would do it justice!!

I'd hate to see all the hard yards covered by much bog to get everything 100% straight again!

Just curious mate!

I wish i could say i was going to file finish it but i dont really have the time to learn how, so its just going to be bogged smooth :(. If i ever do learn how to panel beat id love do it properly one day, all the dints will be waiting for me im sure :blink:. Jobs i'd like to do *one day* would be replace the sills and beaver panels completely, and i'm sure in a few years ill be ready for a colour change so hopefully i have the balls to do it then :).

My main concern was to cut all the rust out and prevent it from coming back. Once the body is all painted up ill be drilling a few small holes in hidden areas that are prone to rust and pump lanolin oil into it, and ill continue to do that every 3-6 months.

Edited by jabba, 25 February 2008 - 06:42 PM.


#218 Tiny

Tiny

    Oh My, Don't you post alot

  • Administrators
  • PipPipPipPipPipPipPip
  • 10,018 posts
  • Name:Tiny
  • Location:Sydney
  • Joined: 04-February 07

Posted 26 February 2008 - 06:02 PM

Fair enough :) It's been a long time coming so i can understand the need to get it on the road!!

#219 _jabba_

_jabba_
  • Guests

Posted 27 February 2008 - 11:47 AM

I'm trying to put atleast an hour a day into the body work (sanding etc) on weekdays to get it upto scratch for painting, plus the usual work I do over the weekend (5ish hours a day) so hopefully it wont be too long until its in colour :D.

Probably wont be any pics for a while unless i do something interesting, but ill keep this thread upto date with how i'm going :).


Damien

#220 _HatchmanSS76_

_HatchmanSS76_
  • Guests

Posted 27 February 2008 - 10:36 PM

:spoton: love ya work jabba, you should be proud.

Those sort of repairs are so insiprational. :clap:

#221 _jabba_

_jabba_
  • Guests

Posted 16 March 2008 - 09:07 PM

Here she is, all primed up again. The bog is only thin to smooth to restore the correct shape :).

Posted Image
Posted Image
Posted Image
Posted Image
Posted Image
Posted Image
Posted Image
Posted Image

#222 _jabba_

_jabba_
  • Guests

Posted 16 March 2008 - 09:14 PM

Next i have to guide coat and block it back, then high fill and paint.

All going well it should be painted by next weekend.

#223 Heath

Heath

    I like cars.

  • Administrators
  • PipPipPipPipPipPipPip
  • 18,322 posts
  • Name:Heath
  • Location:Eastern Suburbs, Melbourne
  • Car:Heavily Modified UC Sunbird Hatchback
  • Joined: 07-November 05
Garage View Garage

Posted 16 March 2008 - 10:01 PM

You're not guide coating after the high fill? :fool:

Awesome progress.

Edited by Heath, 16 March 2008 - 10:02 PM.


#224 _jabba_

_jabba_
  • Guests

Posted 17 March 2008 - 09:05 AM

I will be guide coating it now, then blocking it back and THEN high fill, block and paint.

Edited by jabba, 17 March 2008 - 09:07 AM.


#225 Tiny

Tiny

    Oh My, Don't you post alot

  • Administrators
  • PipPipPipPipPipPipPip
  • 10,018 posts
  • Name:Tiny
  • Location:Sydney
  • Joined: 04-February 07

Posted 17 March 2008 - 09:23 AM

:clap: That must be satisfying mate!!

Going from a rusted shell to a car with primer on it is a big step! Well done it looks great!


0 user(s) are reading this topic

0 members, 0 guests, 0 anonymous users