
 some harnesses
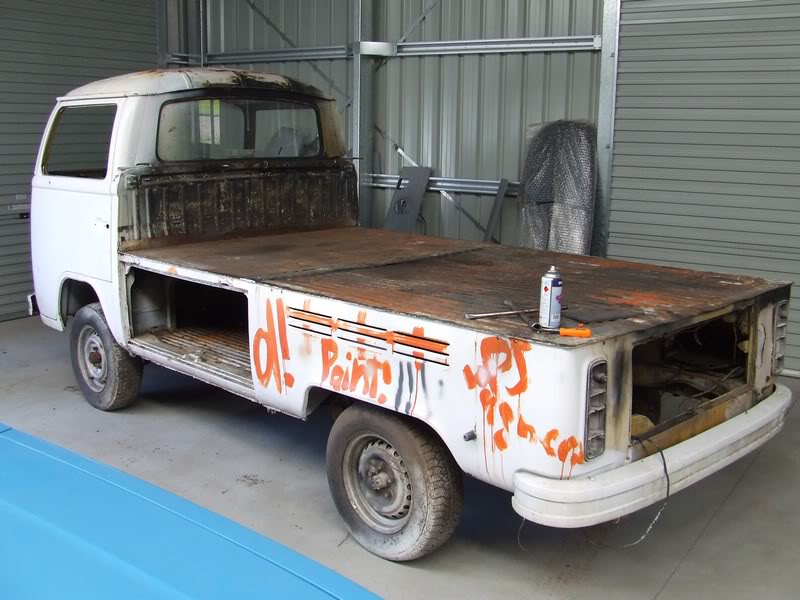
SINGLE CAB KOMBI UTE V8 BUILDUP
Started by
_dirtbag_
, Feb 02 2011 10:00 AM
225 replies to this topic
#151
 _L32M20_
_L32M20_
-

- Guests
Posted 26 August 2011 - 09:55 PM
yep ,thats gonna need a padded roof lining or some harnesses
some harnesses
#152
Mort
 View Garage
-

- Members
-

- 2,760 posts
Lotsa Posts!
- Name:Mort
- Location:Moranbah, QLD.
- Car:74 LH SL/R 4.2, 75 LH 4 door 186
- Joined: 16-December 07
View Garage
Posted 26 August 2011 - 10:53 PM
Wheelie bars too 
#154
wot179
-

- Members
-
- 6,784 posts
Green Eggs and Spam
- Name:Jesus Bloody Christ
- Location:Sunny Santa Maria
- Car:Goon
- Joined: 06-February 09
Posted 03 September 2011 - 11:58 AM
Some of you will have seen this,but its kinda relevent to this thread so I'll post the link up anyway.
http://vwrides.com/v...der=asc&start=0
http://vwrides.com/v...der=asc&start=0
#155
_dirtbag_
_dirtbag_
-
- Guests
Posted 05 September 2011 - 08:15 AM
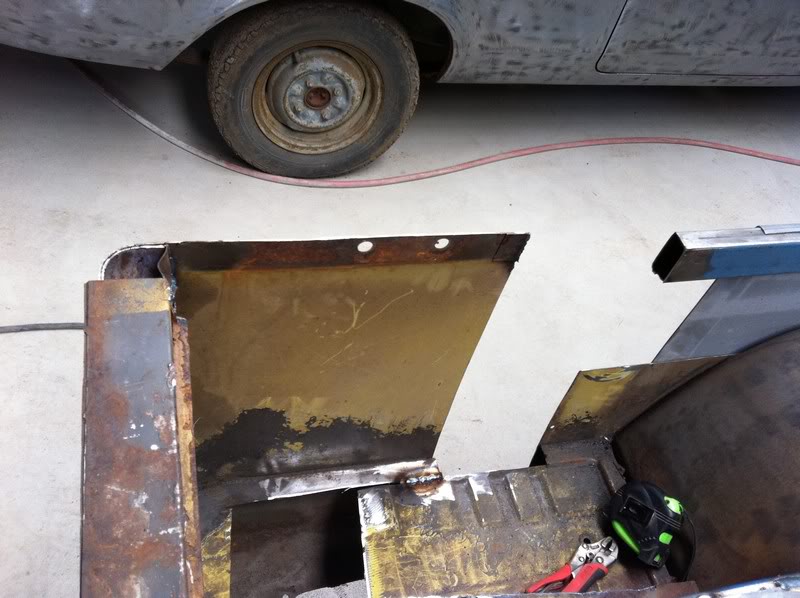
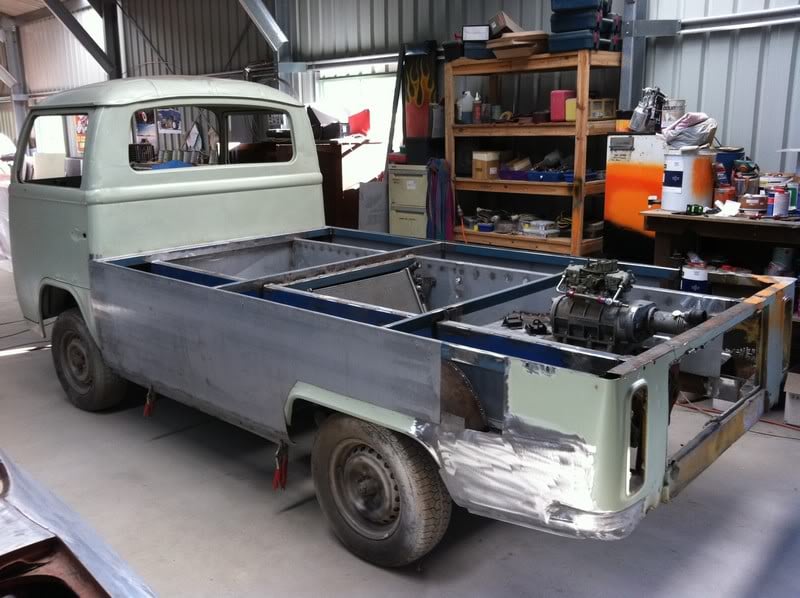
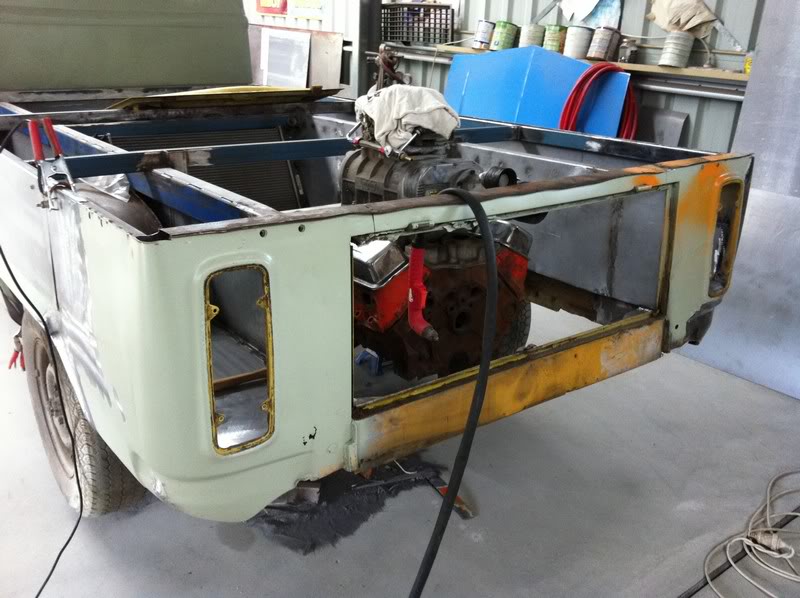
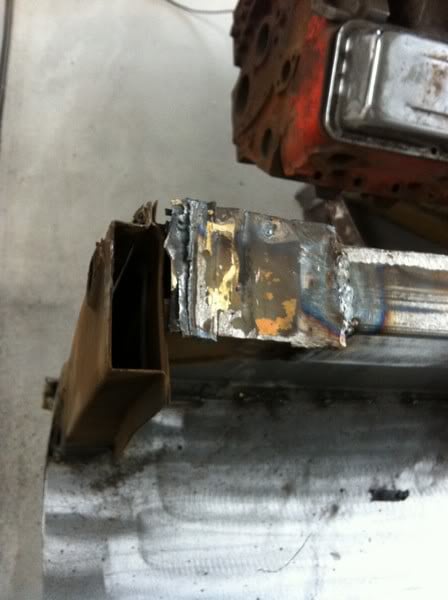
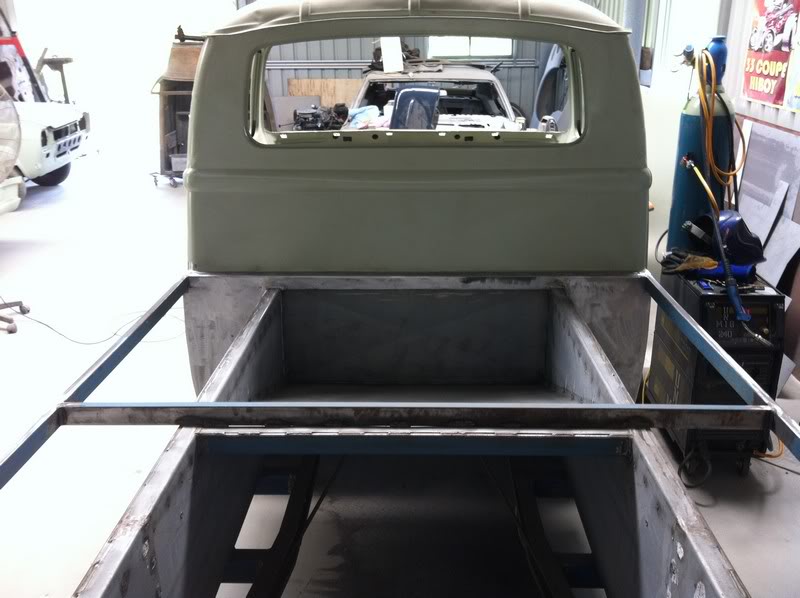
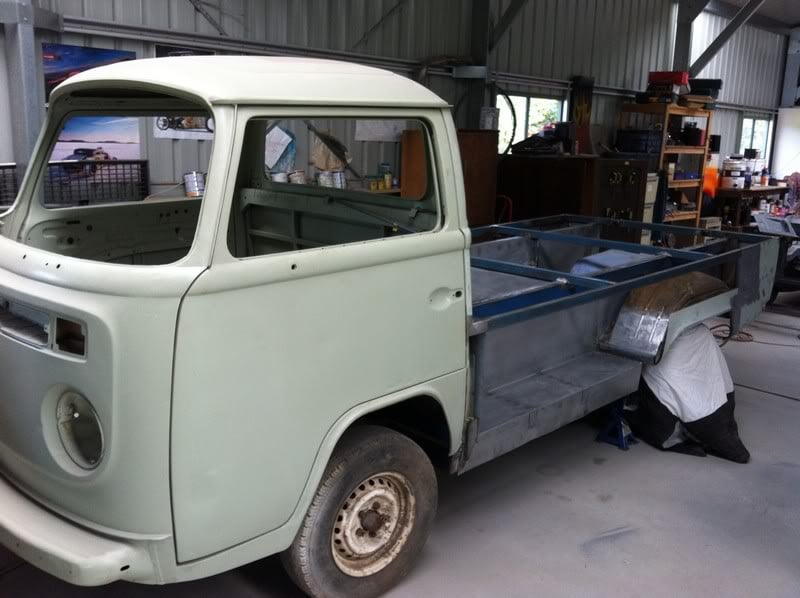
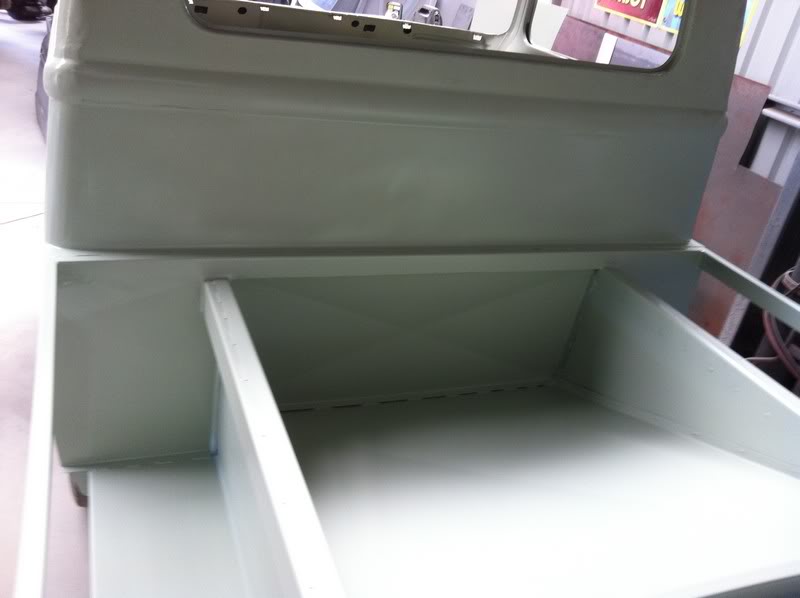
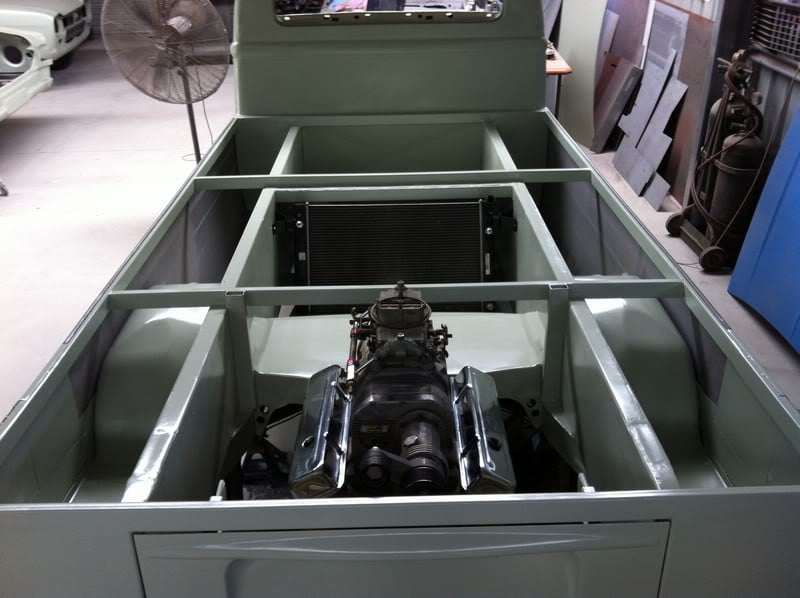
Well it was time to make the motor fit in the hole, which meant making the hole bigger.
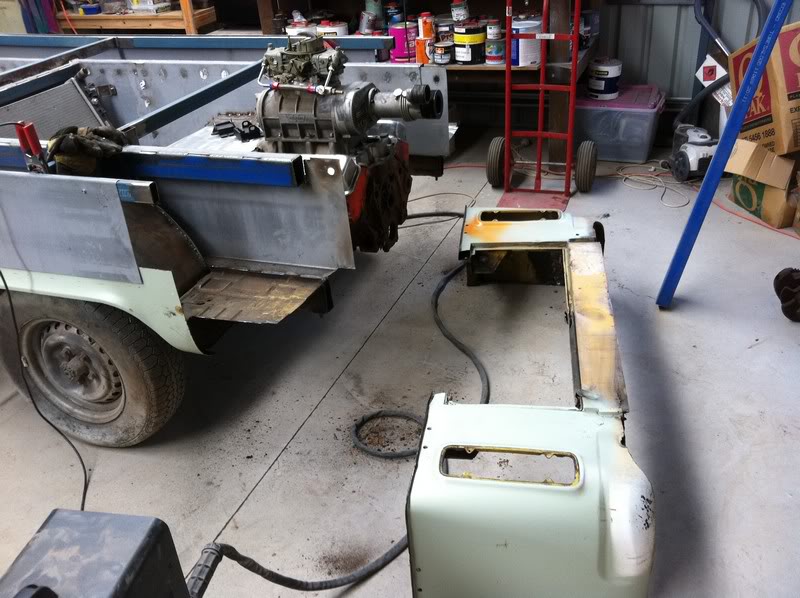
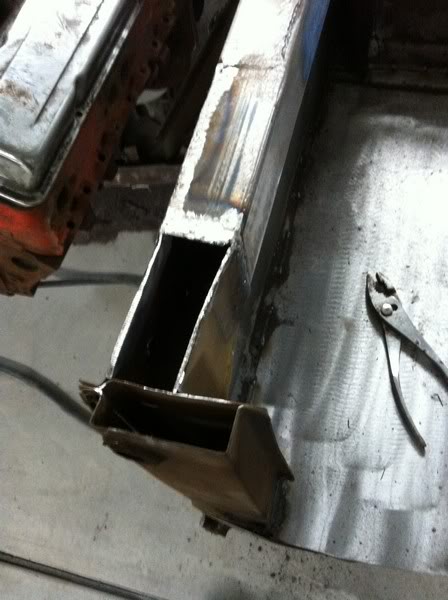
I'm going to extend the car 5 1/2 inches. The top rails are easy as they're just 50x75mm RHS but the lower rails are 100x35mm so I'll make them out of separate pieces.
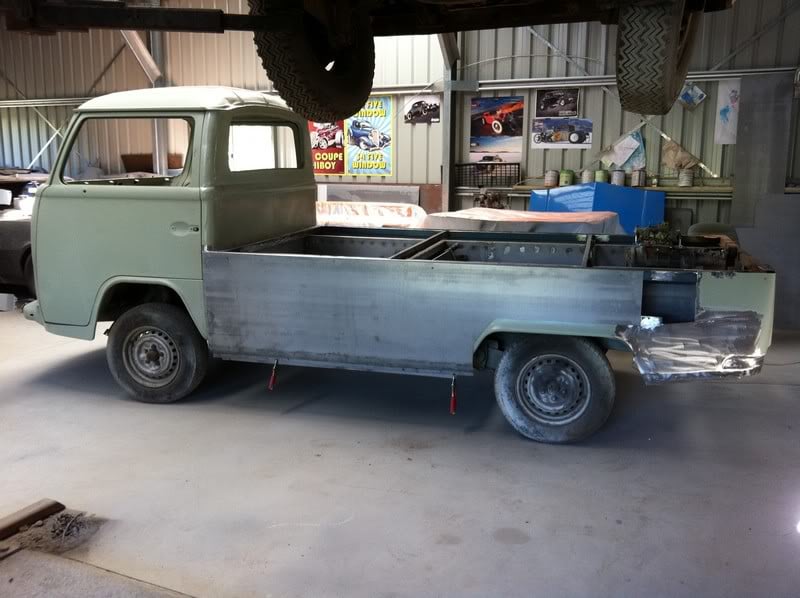
Here's the extensions welded on.

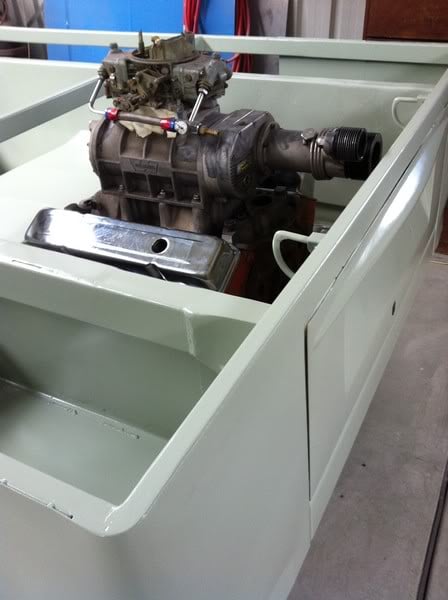
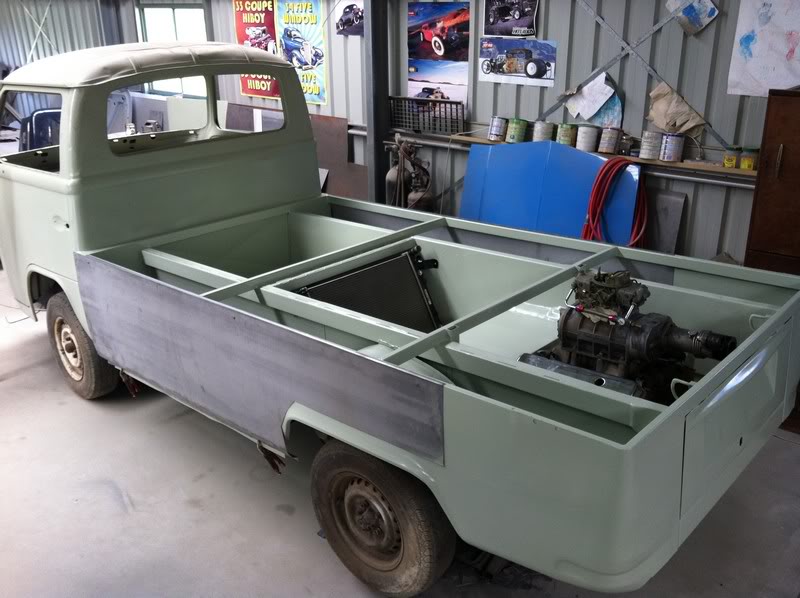
It just fits. But it fits. I didn't want to lengthen it any further as it will look too weird.
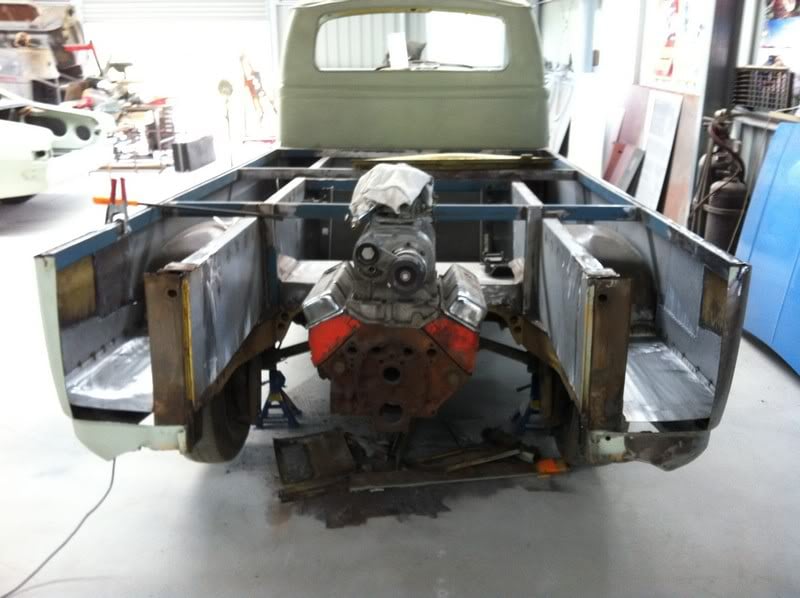
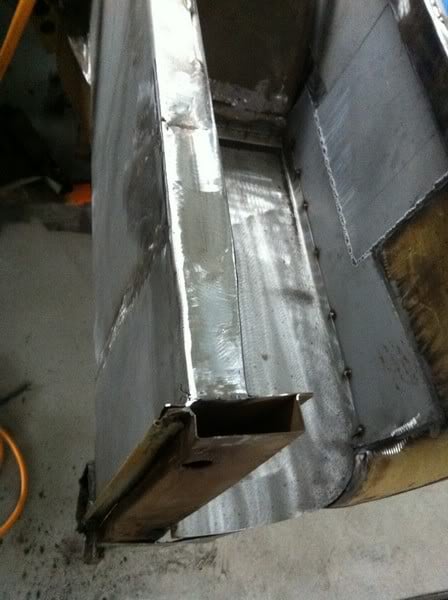
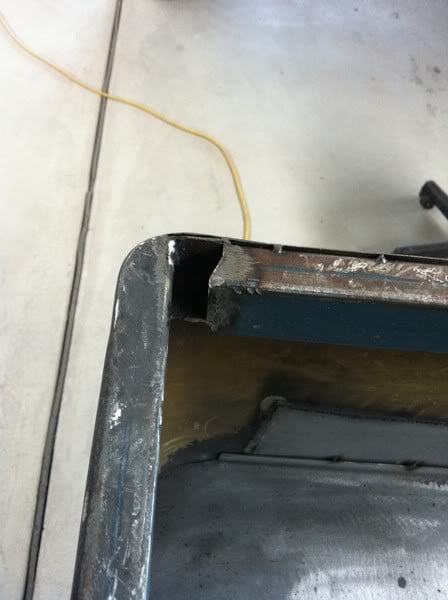
Next job was to remove the lip off the tray around the back. I started by cutting the lip and inner bracing off on one side.
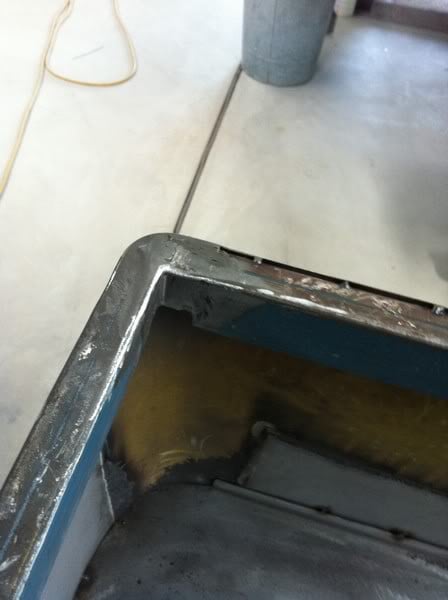
I then replaced the bracing with some more 25x50 RHS.
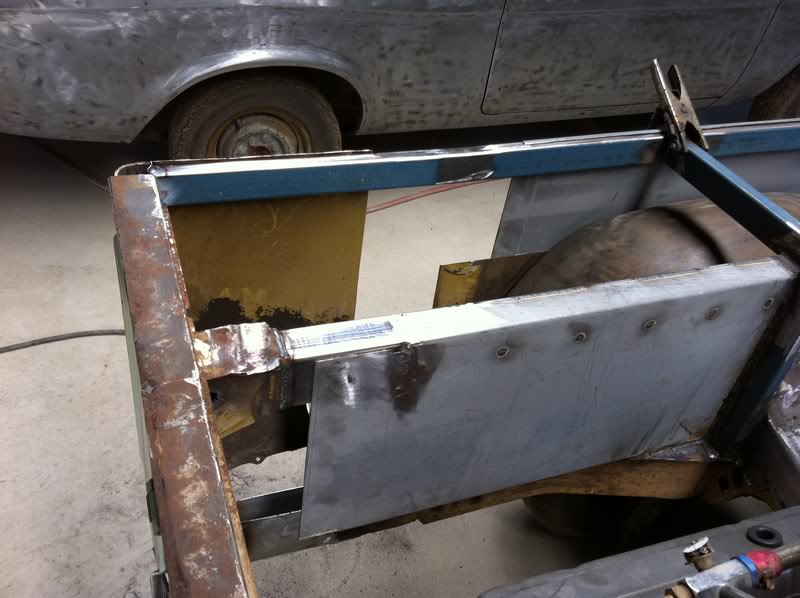
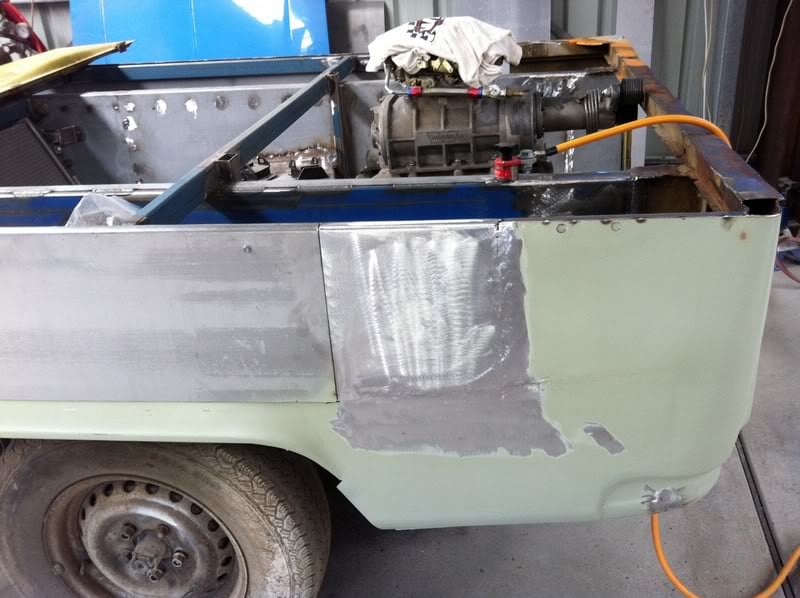
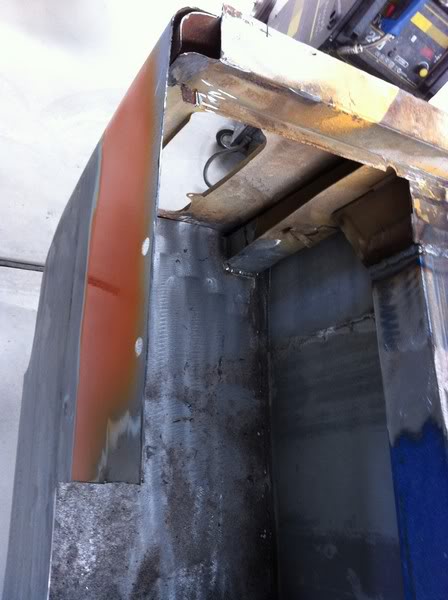
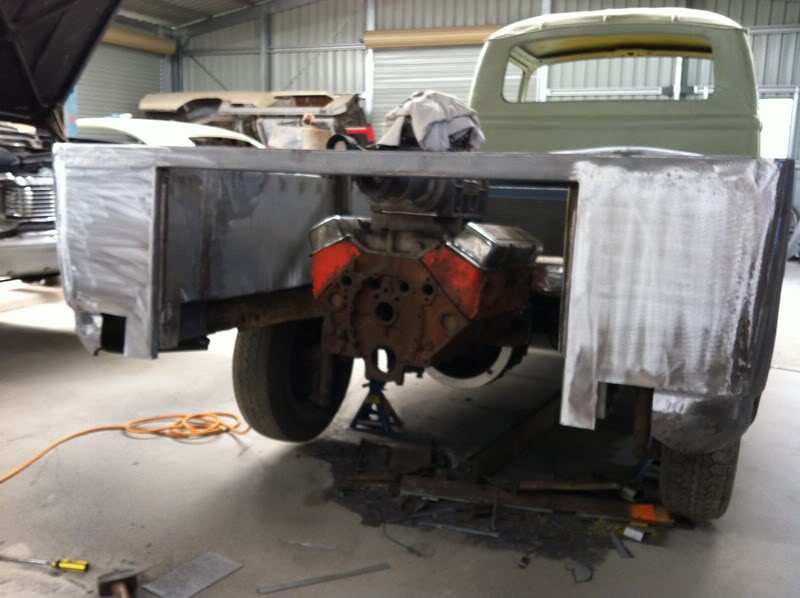
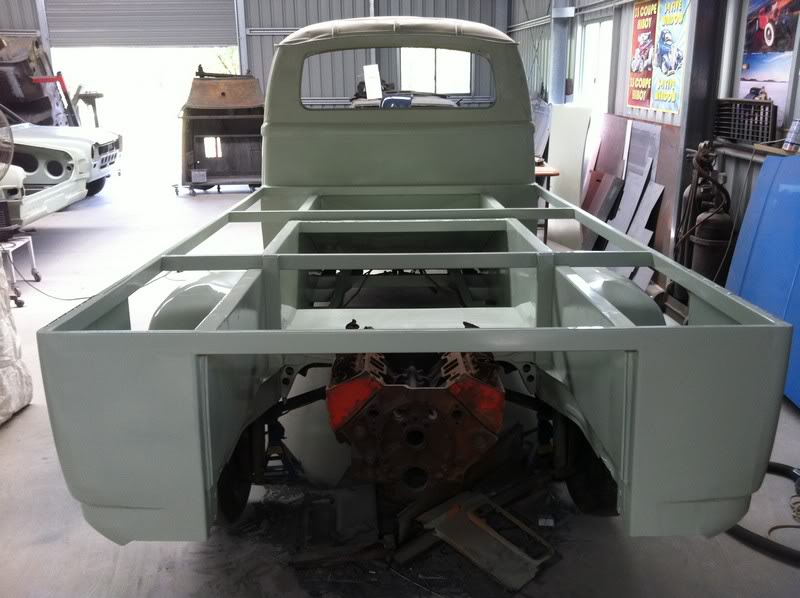
This shows how much it will stick out. The owner wants to run a polished shotgun scoop, so it'll be pretty amusing : )
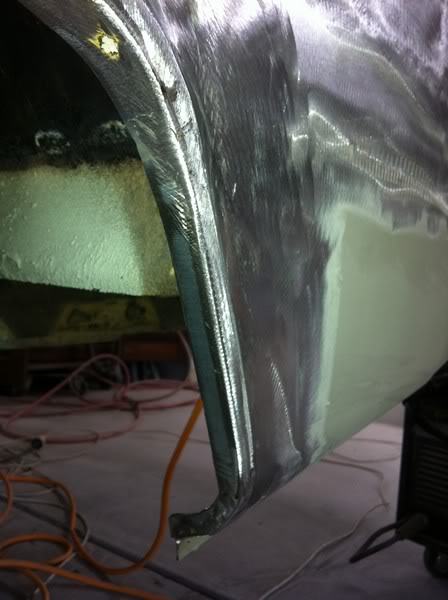
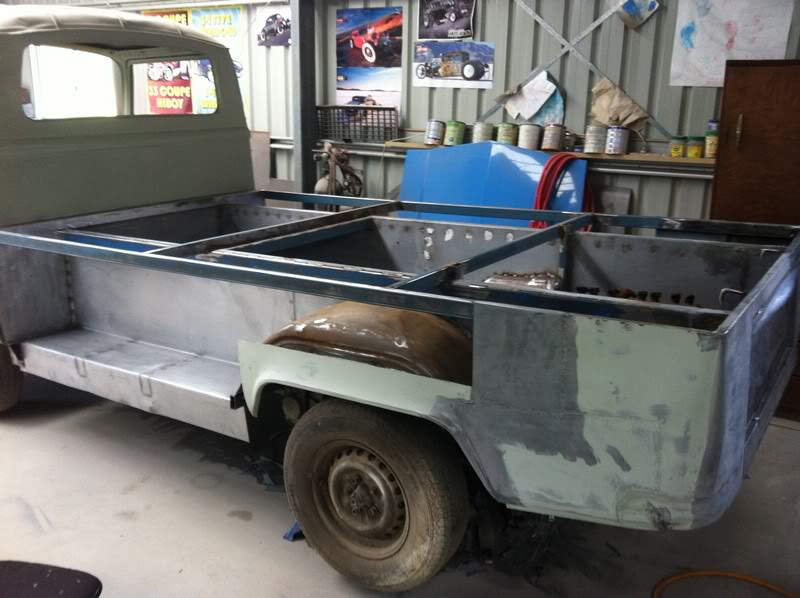
Next up was starting to sort out the rear of the rear guards. I started by making a new piece, then traced it onto the guard to mark where I had to cut.
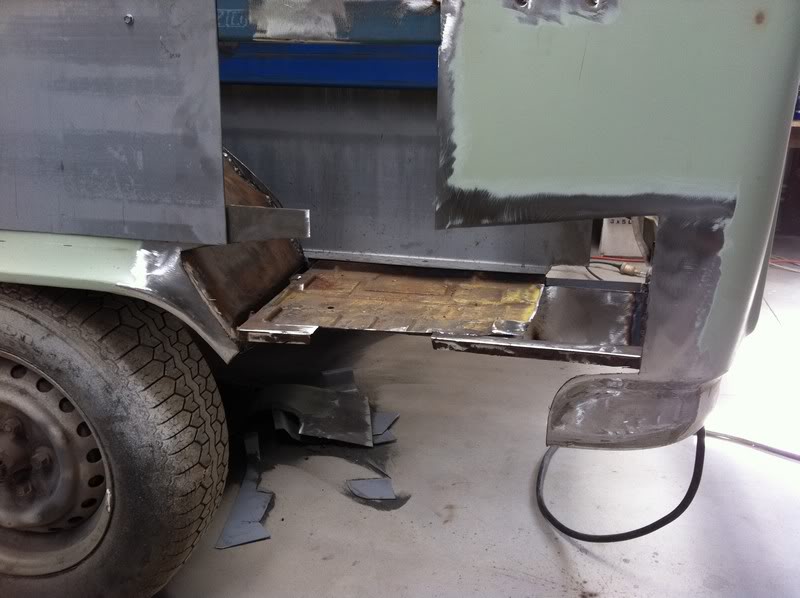
I've made the new piece with the same lower radius as the new side panels, and also incorporated a lip along the lower edge to match the sills better. It's also 2 1/2 inches lower at the front to line up with the deeper sills.
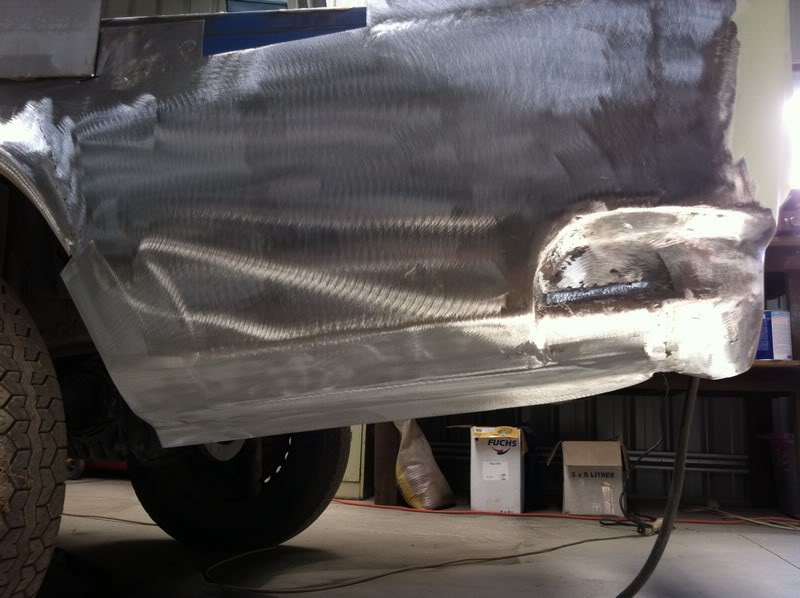
I've still got to finish where it joins into the wheel arch, but you get the idea.
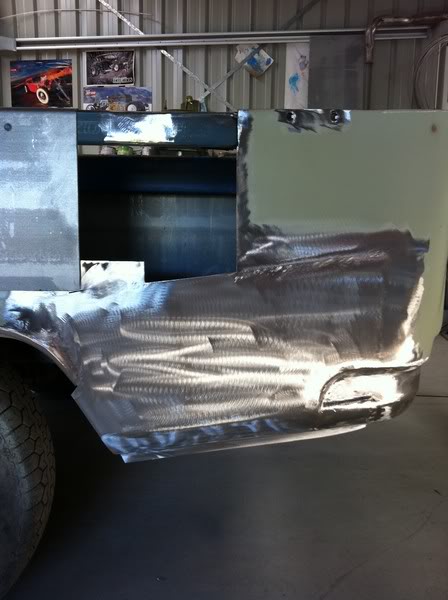
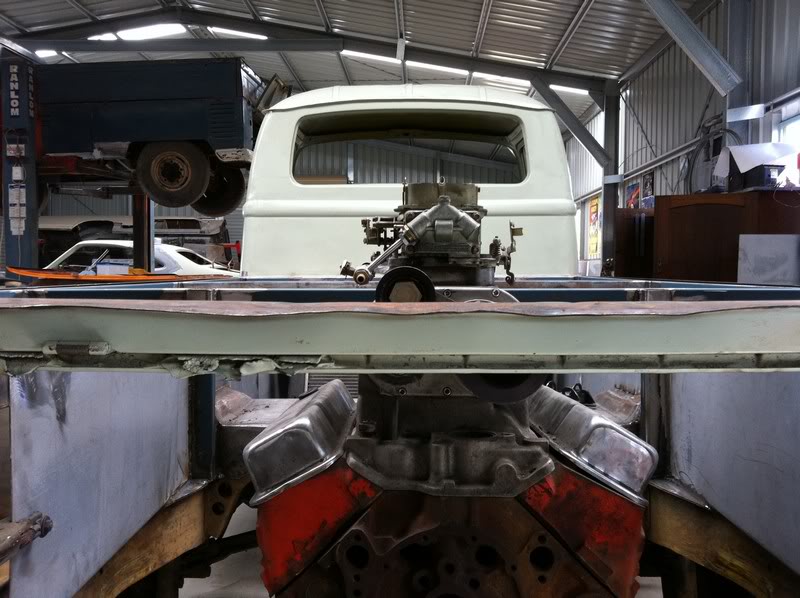
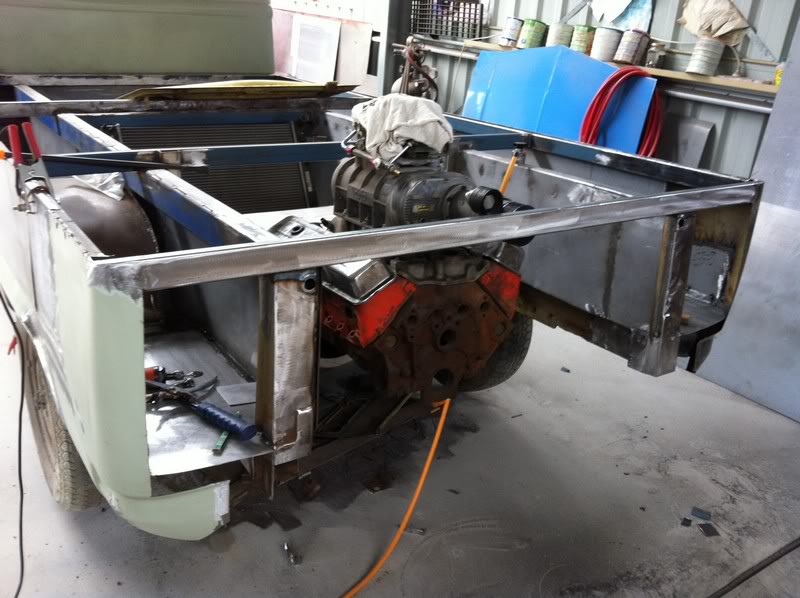
The blue RHS is giong to replace this top rail, so where the RHS shows how much clearance there will be for the blower snout.
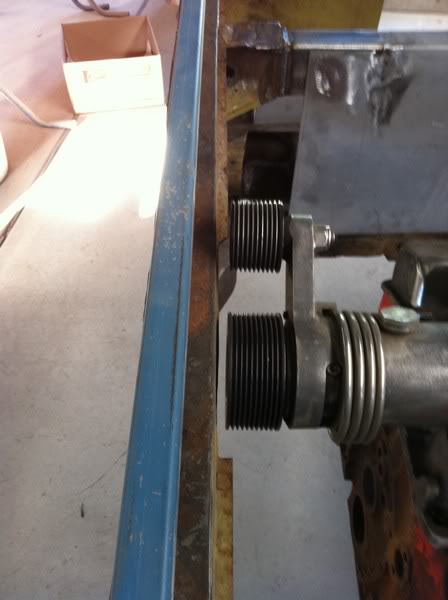
I'll chuck these next 2 pics in just because I think it's funny : )
I'm going to extend the car 5 1/2 inches. The top rails are easy as they're just 50x75mm RHS but the lower rails are 100x35mm so I'll make them out of separate pieces.
Here's the extensions welded on.
It just fits. But it fits. I didn't want to lengthen it any further as it will look too weird.
Next job was to remove the lip off the tray around the back. I started by cutting the lip and inner bracing off on one side.
I then replaced the bracing with some more 25x50 RHS.
This shows how much it will stick out. The owner wants to run a polished shotgun scoop, so it'll be pretty amusing : )
Next up was starting to sort out the rear of the rear guards. I started by making a new piece, then traced it onto the guard to mark where I had to cut.
I've made the new piece with the same lower radius as the new side panels, and also incorporated a lip along the lower edge to match the sills better. It's also 2 1/2 inches lower at the front to line up with the deeper sills.
I've still got to finish where it joins into the wheel arch, but you get the idea.
The blue RHS is giong to replace this top rail, so where the RHS shows how much clearance there will be for the blower snout.
I'll chuck these next 2 pics in just because I think it's funny : )
#156
_wblje_
_wblje_
-
- Guests
Posted 05 September 2011 - 10:11 PM
the way its unfolding i think it needs a roof chop
#157
_mumbo_
_mumbo_
-
- Guests
Posted 06 September 2011 - 10:17 AM
It is going to be hard to stear with the front wheels dangling in the air
#158
Toranamat69
-
- Members
-
- 2,117 posts
Forum R&D Officer
- Location:Brisbane
- Joined: 07-November 05
Posted 08 October 2011 - 09:39 AM
Again, awsome work Tim.
#159
_cazarak_
_cazarak_
-
- Guests
Posted 08 October 2011 - 06:14 PM
Please update this thread Dirtbag...
I'm a sad old man living precariously through your posts and buildups....
I'm a sad old man living precariously through your posts and buildups....
#160
frash da bucket
-
- Members
-
- 1,890 posts
Forum Fixture
- Location:NSW
- Joined: 23-April 07
Posted 08 October 2011 - 08:48 PM
Hi Tim,
A transformed kombi great work.
Cheers John.
A transformed kombi great work.
Cheers John.
#161
_SLR Torrie_
_SLR Torrie_
-
- Guests
Posted 15 October 2011 - 08:29 PM
Will have to agree on the steering issues this may present! 
#162
_Squarepants_
_Squarepants_
-
- Guests
Posted 18 October 2011 - 07:26 PM
It will be steered by the throttle pedal! 
#163
_dirtbag_
_dirtbag_
-
- Guests
Posted 06 December 2011 - 09:06 PM
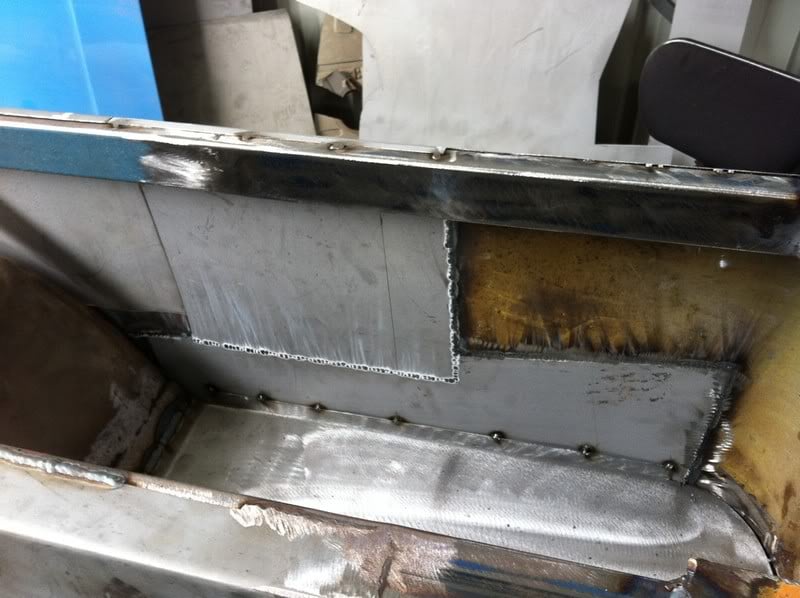
Well there's been a few little bits done to this one. Nothing major but it all helps : )
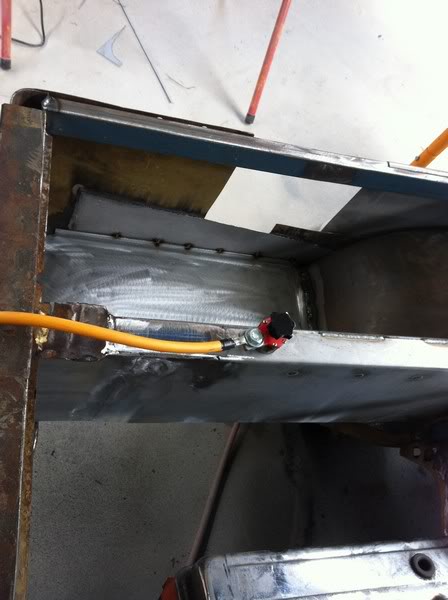
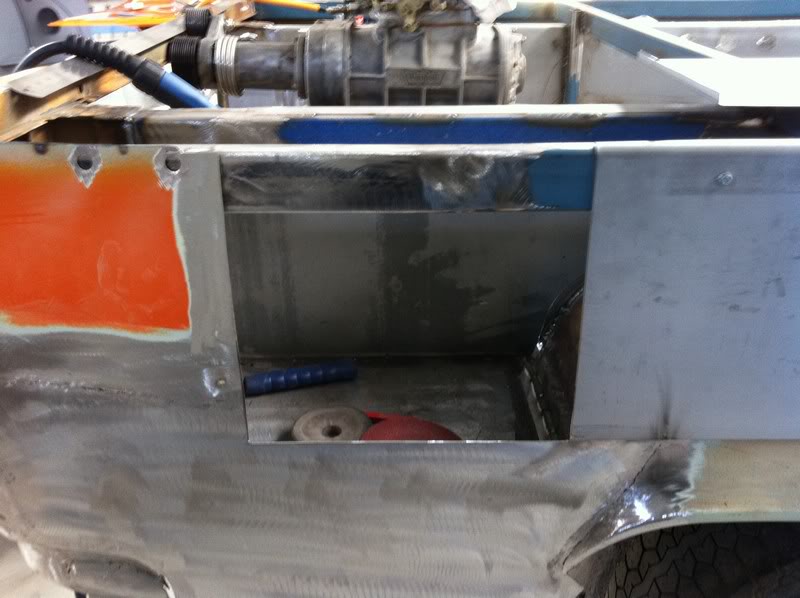
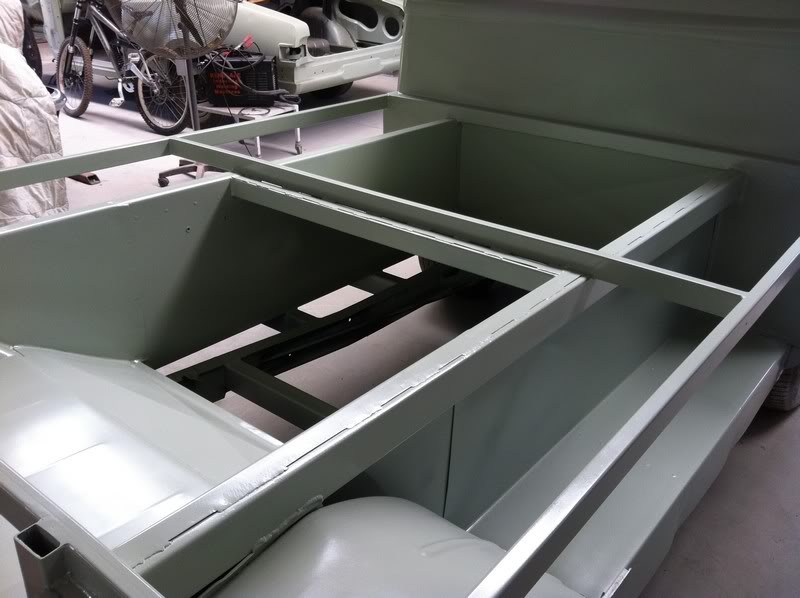
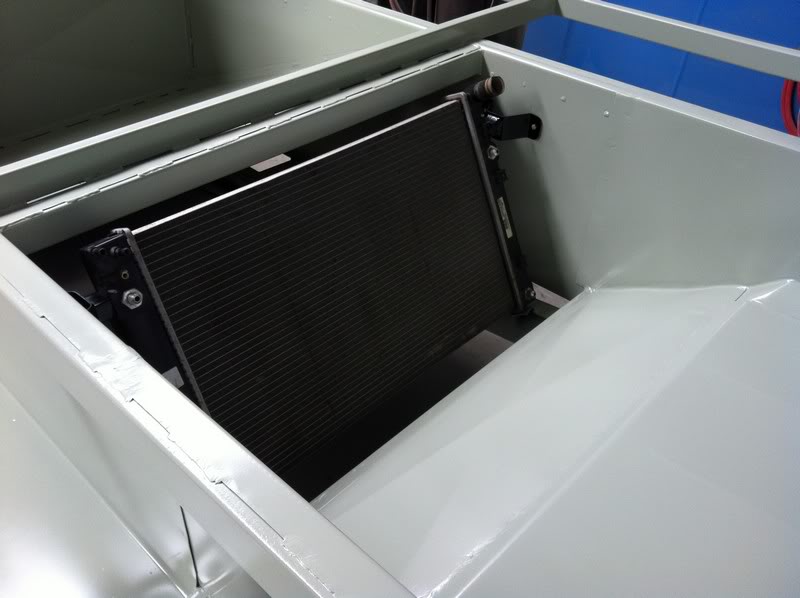
Seeing as I had to cut the back off and lengthen the car, there seems to be a gap now? How weird : )
I'm giong to replace both inner trays with longer ones, so no more gap.
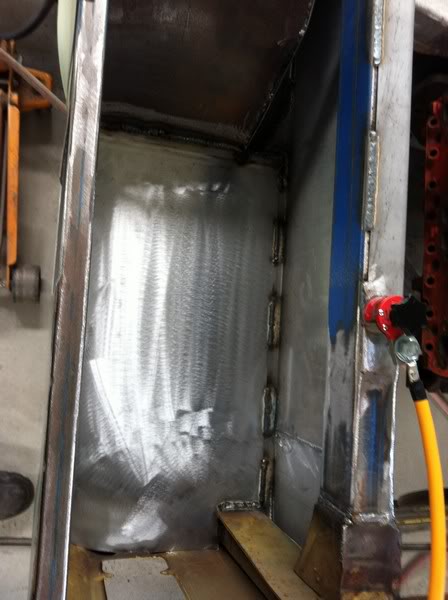
The worst part about doing things like this is getting the old metal out.
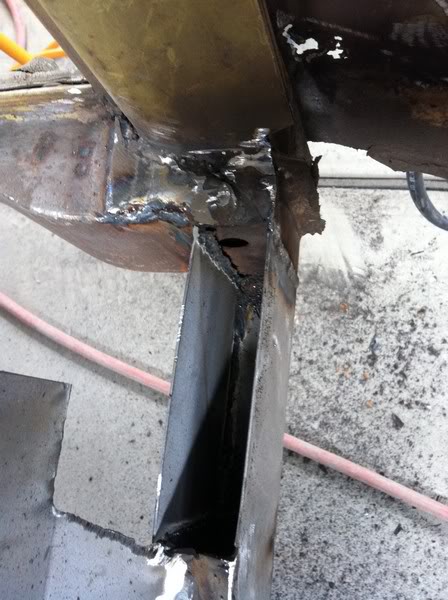
I then made the new tray. I have to fix a couple of things before I can weld this in though.
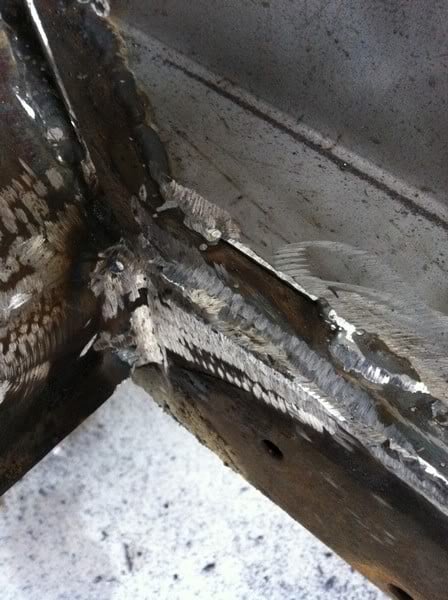
There's some dodgy bits where the wheel tub joins the chassis, and the chassis copped a blast from the plasma cutter. Whoops : )
All fixed.
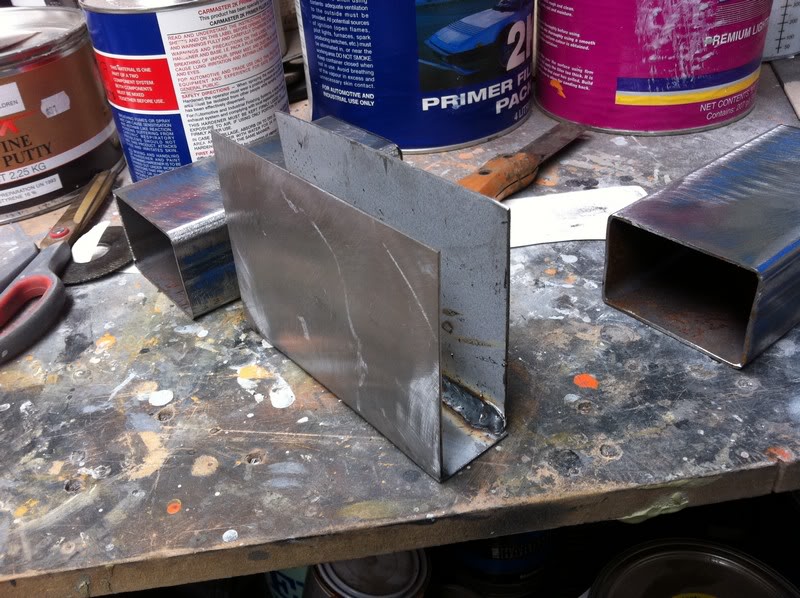
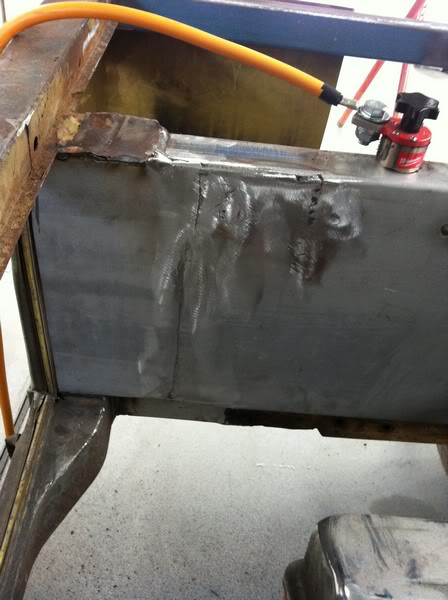
I then had to finish making the chassis rails. I just have to weld a lid on them. I made them as a U channel so I could weld them from inside as well as outside.
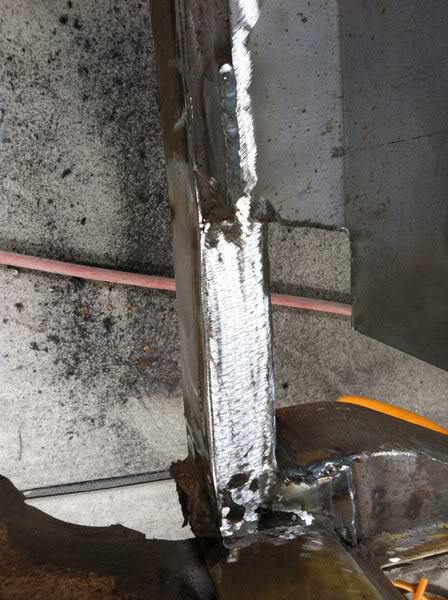
I then made an extension piece for the engine bay side. You can see I also have to fill a small hole where it joins the chassis.
All welded.
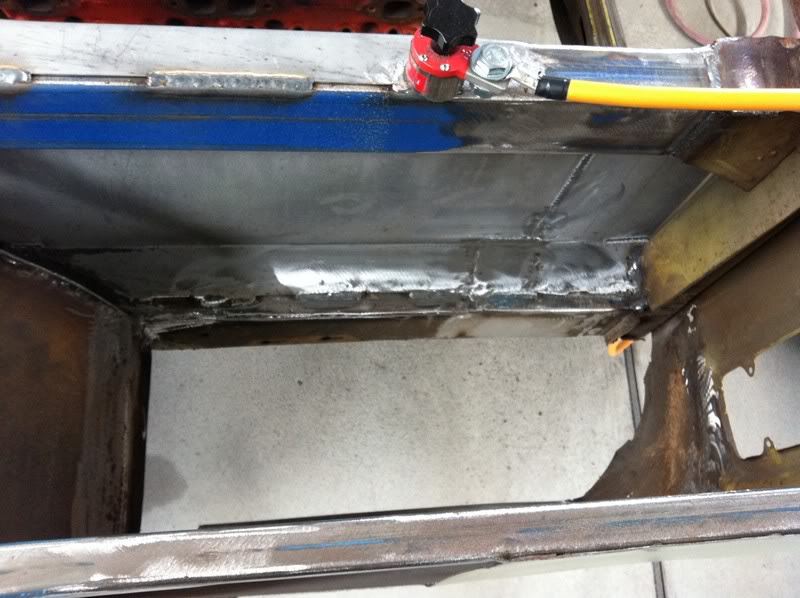
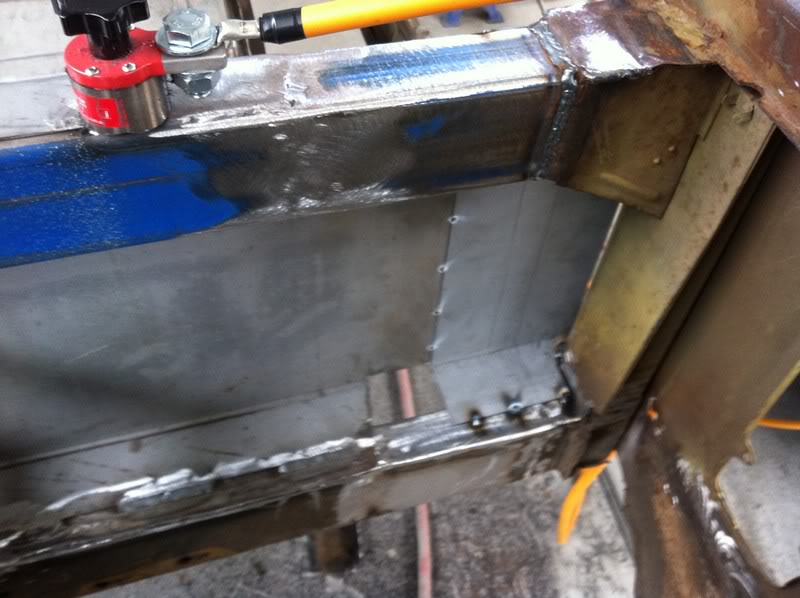
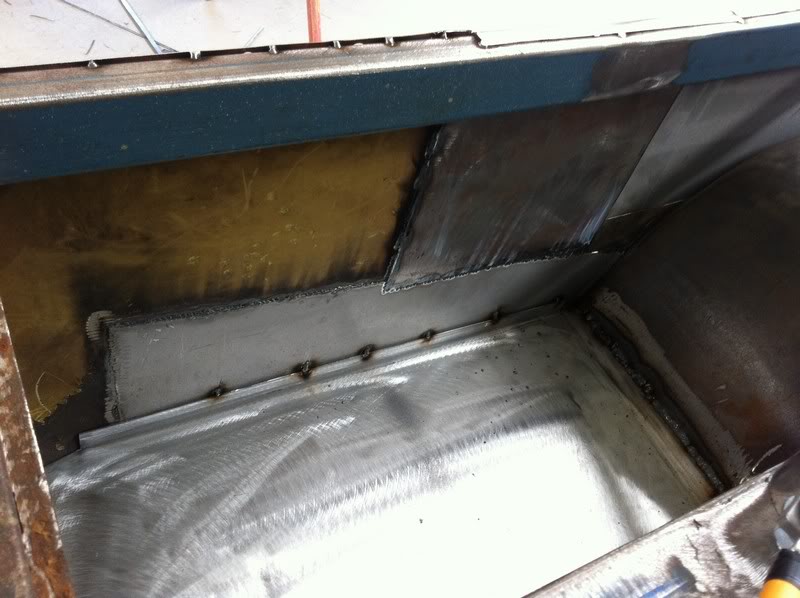
I was then able to weld the new tray in, as it goes over the top of these bits.
Next job was to fill the gap in the rer quarter panel. It was a weird shape due to the new lower piece I'd made and fitted so I cut it out square to make it easier to make the new piece.
Then I welded in the new piece : )
It's a bit of a jigsaw in here now : )
The other side was pretty much the same so I wont show the same process again, but I did still have to make the new lower section.
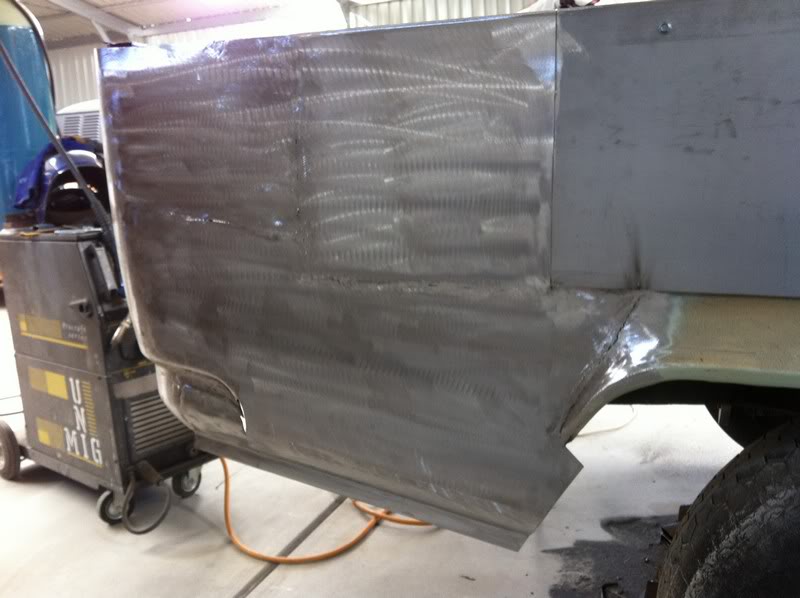
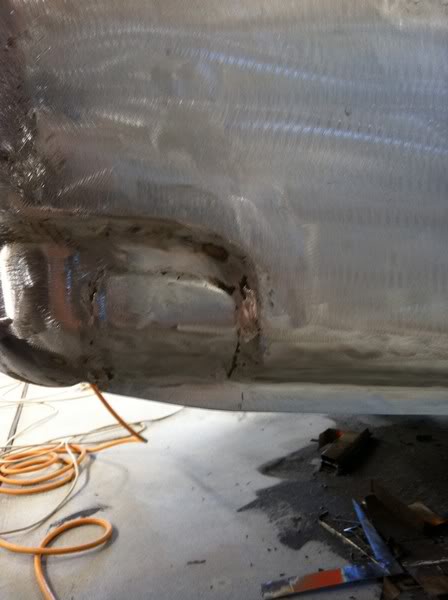
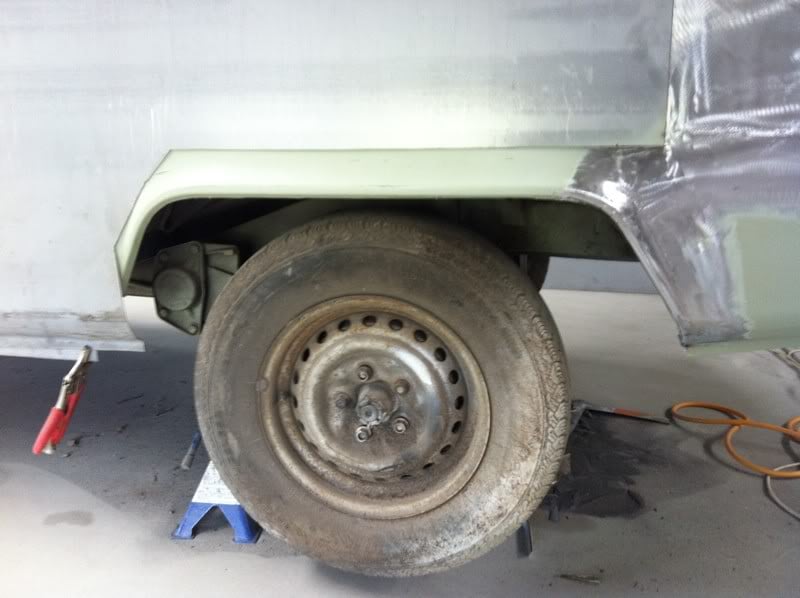
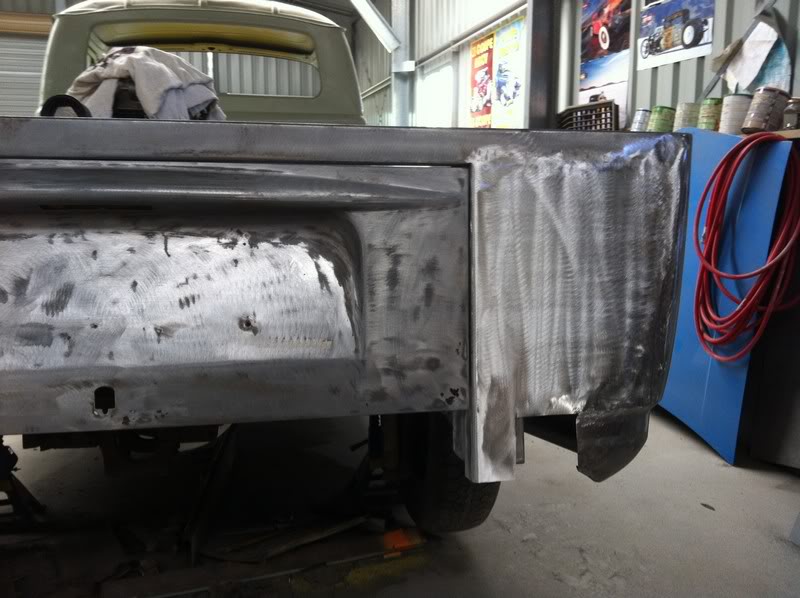
You can see how the lower edge of the rear guard is very high and in a straight line. I'm going to change it : )
The front is now about 2 and a half inches lower, tapering back to standard height at the back. Plus I've added the same lip at the base that the sills have, to make it look more uniform. It also makes it lower. Yay : )
The bumper recess still needs to be filled here.
Before I can fill the top of the quarter, I have to replace the top support with 25x50mm RHS like I did on the other side.
Here's the RHS welded in and the rear quarter hole cut square, same as the other side.
The hole in the quarter filled.
I also filled the hole in the bumper recess.
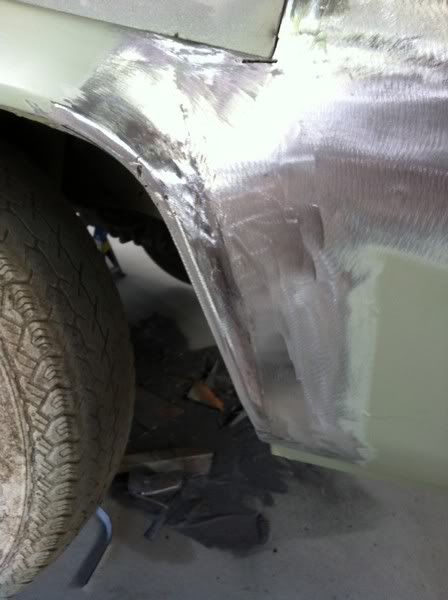
The next thing I wanted to get done was to fabricate the rear of the wheel arches. They're longer now as the sills are lower, so I have to stretch out the taper of the flare.
I think they turned out OK.
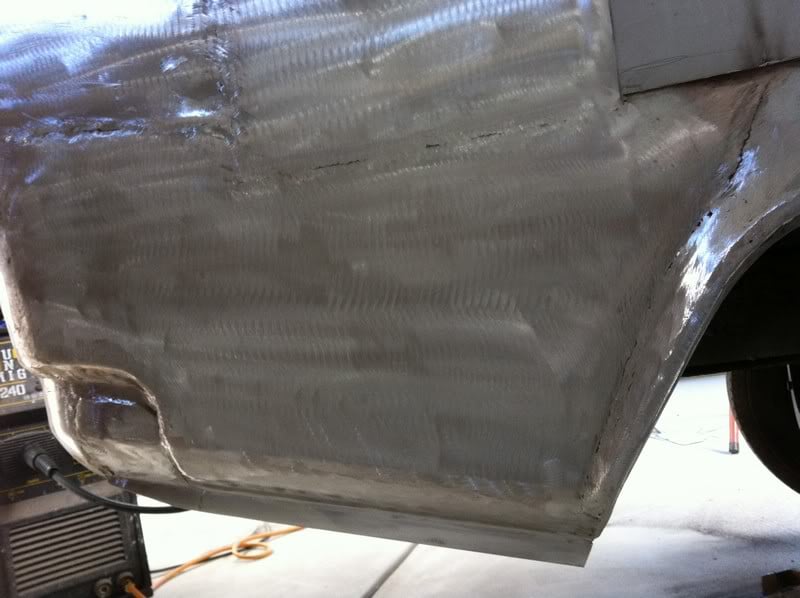

The other side.
Seeing as I had to cut the back off and lengthen the car, there seems to be a gap now? How weird : )
I'm giong to replace both inner trays with longer ones, so no more gap.
The worst part about doing things like this is getting the old metal out.
I then made the new tray. I have to fix a couple of things before I can weld this in though.
There's some dodgy bits where the wheel tub joins the chassis, and the chassis copped a blast from the plasma cutter. Whoops : )
All fixed.
I then had to finish making the chassis rails. I just have to weld a lid on them. I made them as a U channel so I could weld them from inside as well as outside.
I then made an extension piece for the engine bay side. You can see I also have to fill a small hole where it joins the chassis.
All welded.
I was then able to weld the new tray in, as it goes over the top of these bits.
Next job was to fill the gap in the rer quarter panel. It was a weird shape due to the new lower piece I'd made and fitted so I cut it out square to make it easier to make the new piece.
Then I welded in the new piece : )
It's a bit of a jigsaw in here now : )
The other side was pretty much the same so I wont show the same process again, but I did still have to make the new lower section.
You can see how the lower edge of the rear guard is very high and in a straight line. I'm going to change it : )
The front is now about 2 and a half inches lower, tapering back to standard height at the back. Plus I've added the same lip at the base that the sills have, to make it look more uniform. It also makes it lower. Yay : )
The bumper recess still needs to be filled here.
Before I can fill the top of the quarter, I have to replace the top support with 25x50mm RHS like I did on the other side.
Here's the RHS welded in and the rear quarter hole cut square, same as the other side.
The hole in the quarter filled.
I also filled the hole in the bumper recess.
The next thing I wanted to get done was to fabricate the rear of the wheel arches. They're longer now as the sills are lower, so I have to stretch out the taper of the flare.
I think they turned out OK.
The other side.
Edited by dirtbag, 06 December 2011 - 09:09 PM.
#164
_dirtbag_
_dirtbag_
-
- Guests
Posted 06 December 2011 - 09:25 PM
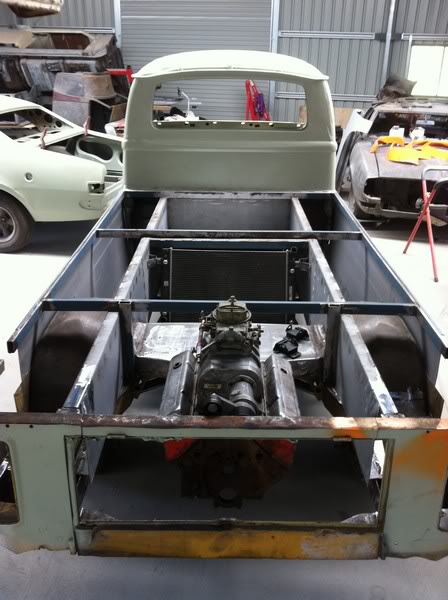
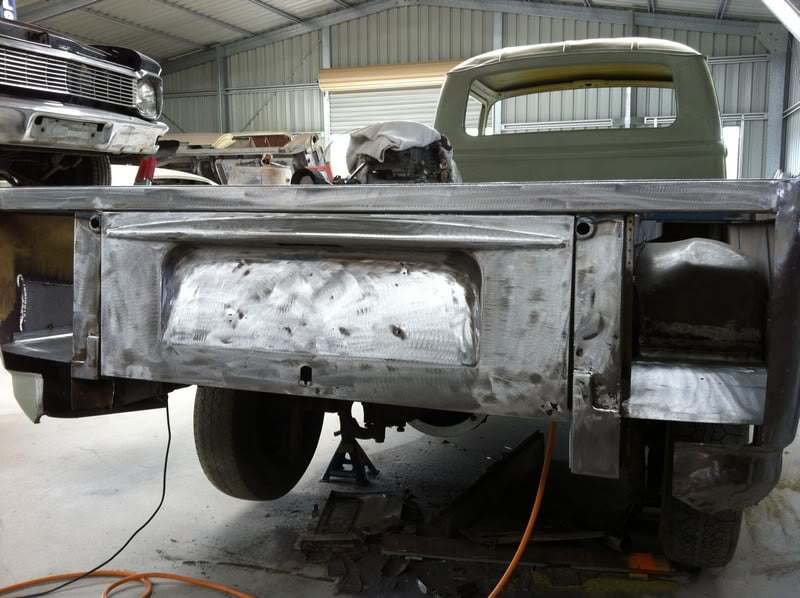
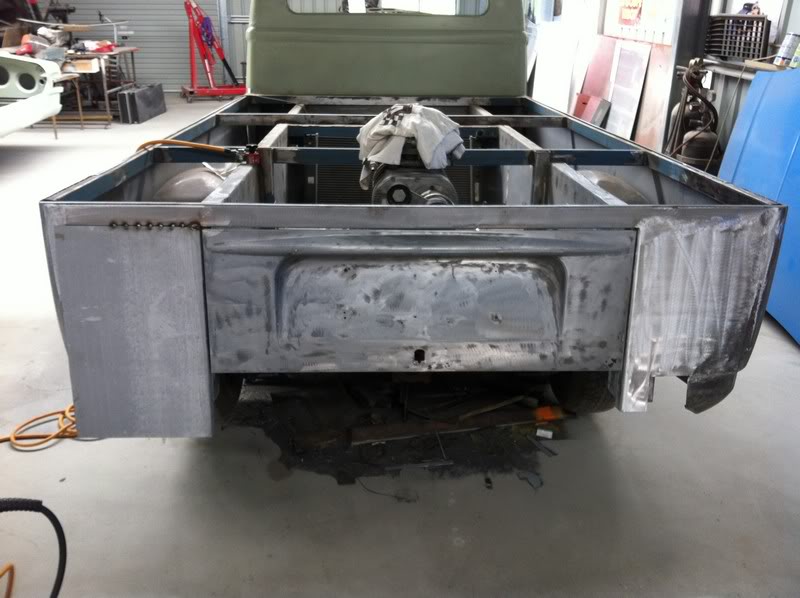
The next job I wanted to tackle was the rear end.
I need to remove the top and bottom horizontal supports, repair the base of both vertical supports, remove and replace the tail lights panels with smooth pieces and make internal hinges for the engine lid.
I want to clean up the top rails too where the old support used to sit.
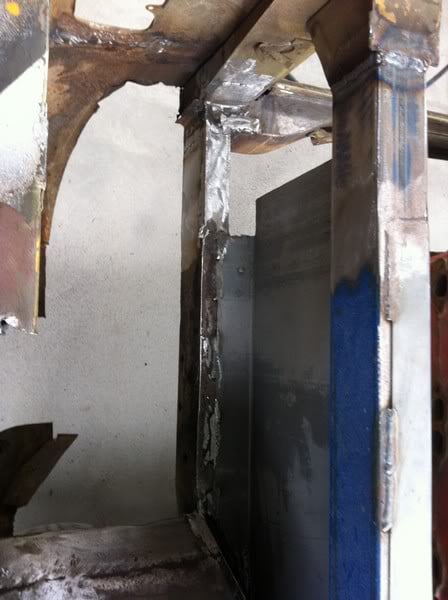
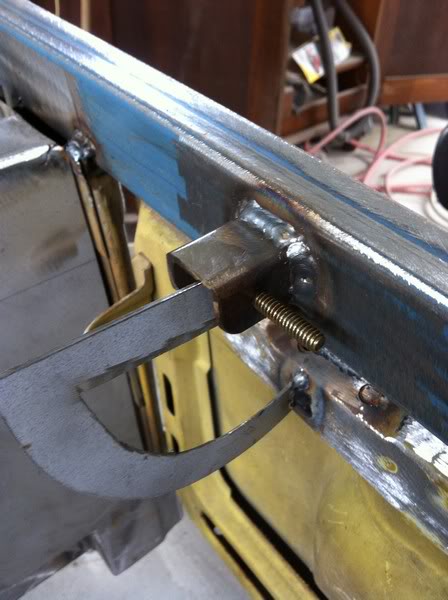
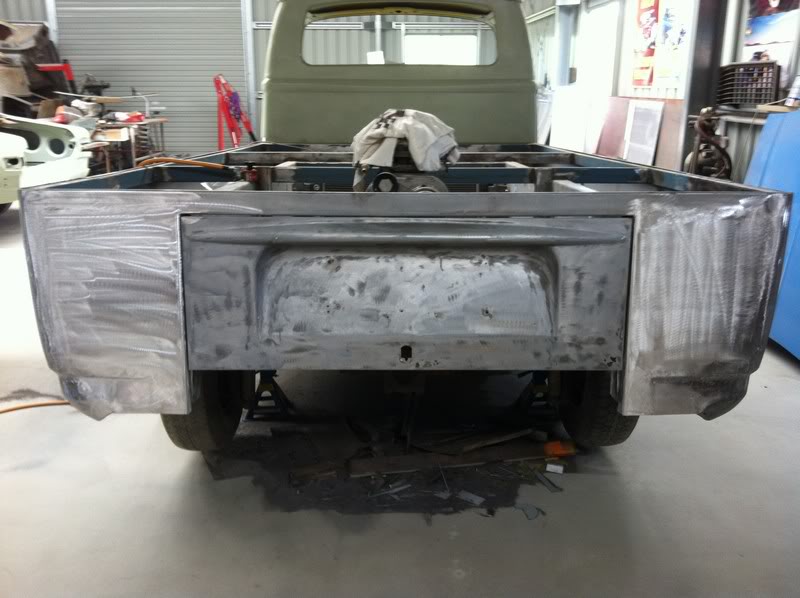
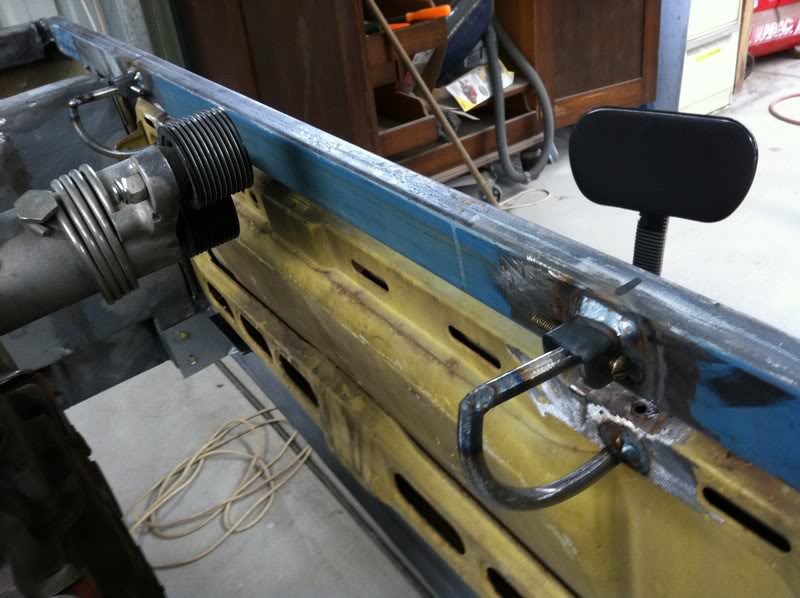
I then ran a piece of 25x50mm RHS as the top support. I had to notch it here and there to make it fit. I also notched the rear of it out so the remainder of the outer skin of the kombi would sit flush with the edge of the RHS, as the RHS is now the outer skin above the engine lid.
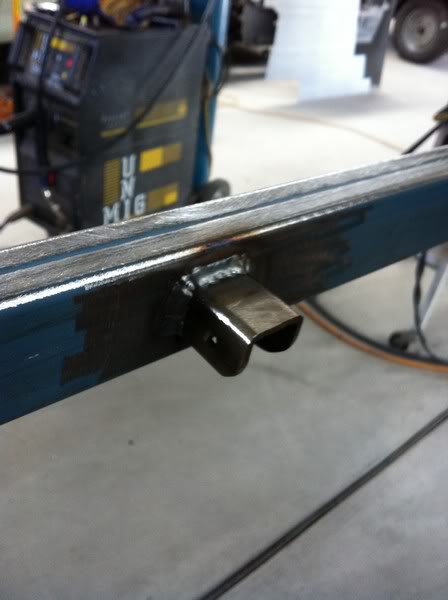
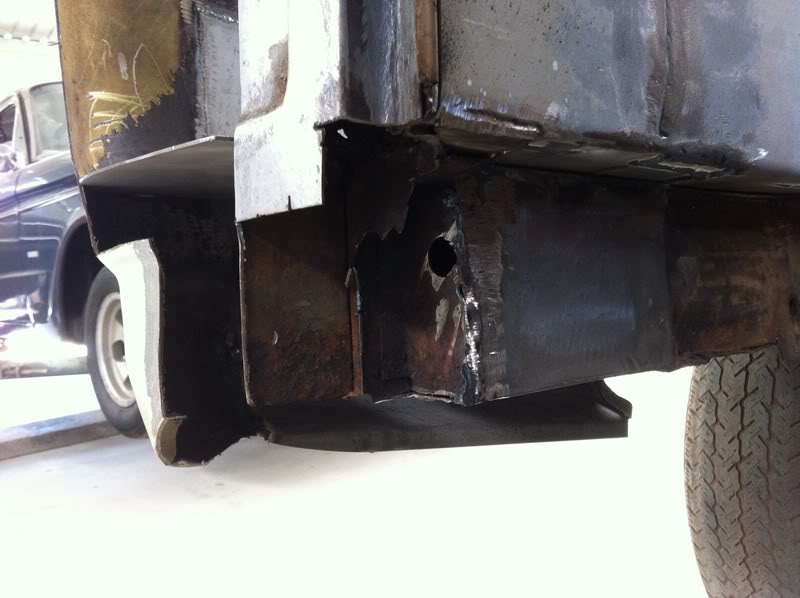
The lower parts of the vertical supports are a bit rusty, so they'll need fixing.
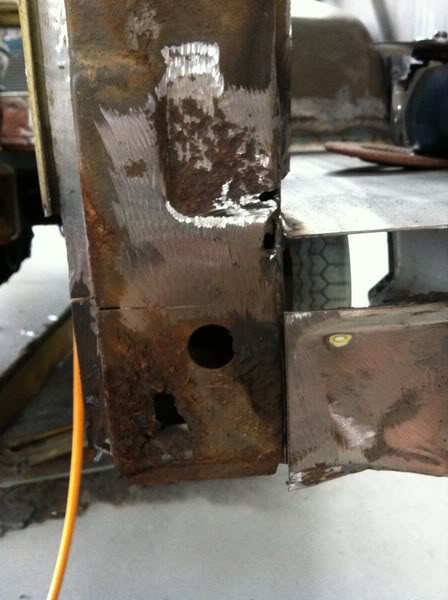
The original support is hollow. I'm going to cap the bottom off when I make the new piece. It was open before.

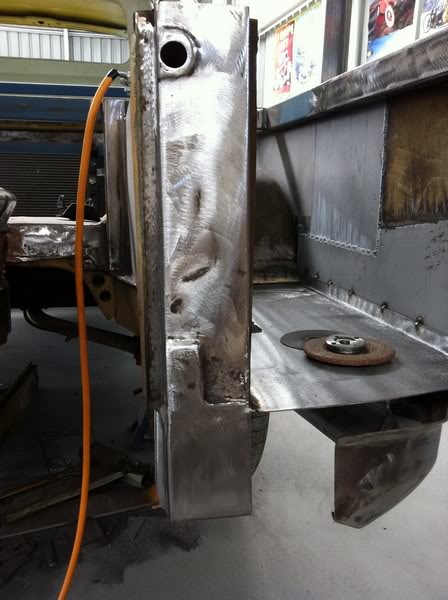
I made the new lower section from 2mm plate, as I'm going to make the bottom horizaontal support removable, so I need this part to be strong enough to support nutserts without bending.
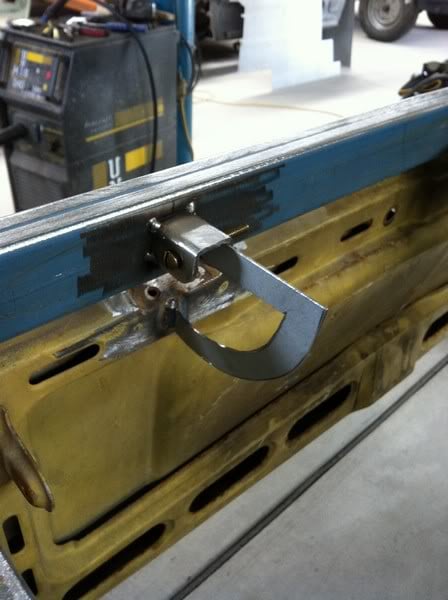
Next job was to make new hinges for the engine lid. I don't want the original external hinges, as everything else on the car will be fairly smooth, so I'll make some internal hinges and weld the old hinge holes up.

I've made some practice hinges from 2mm sheet just to make sure the idea will work before I transfer them onto some 5mm plate.
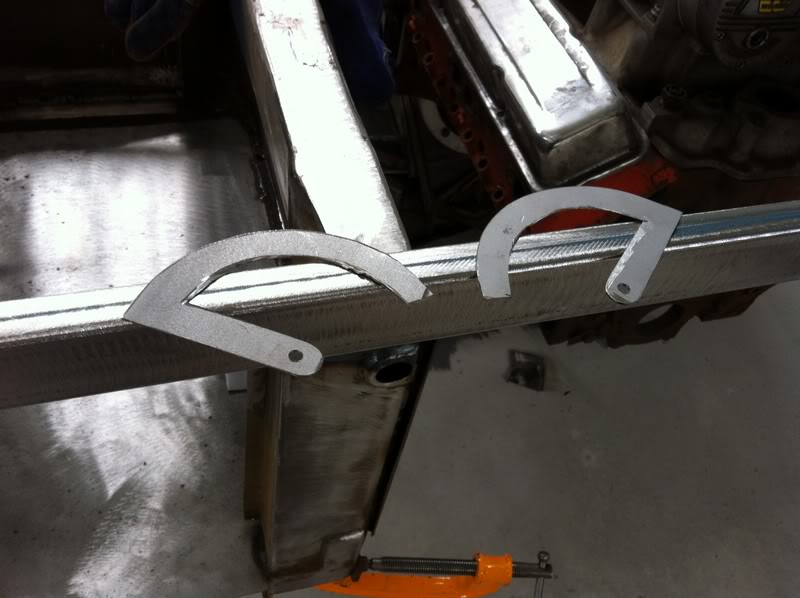
Simple is good.
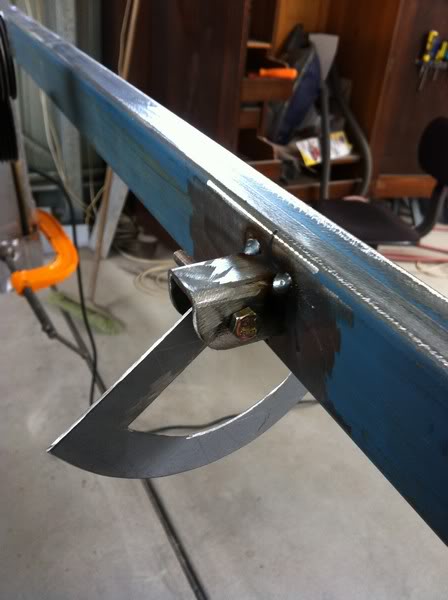
For this test I'm just welding the hinges to the engine cover, but the proper hinges will be bolted on.
With the first test run successful, I then fully welded the hinges mounts on.
I also welded up the holes in the engine lid the old hinges used to go through.
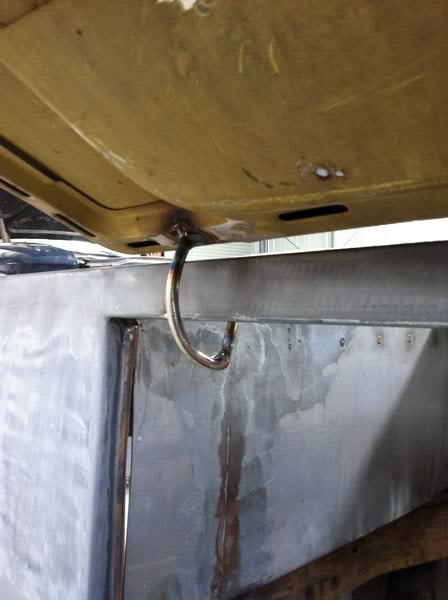
It even works : )

It does look neater without the hinges sticking out. Not that many people will notice, but I will : )
The idea with these hinges was that the engine lid be easily removable. Where the bolt is used as a hinge pin what will essentially be a tiny pair of bonnet pins. So they can be easily slid out and the lid removed.
That's about it for now.
I need to remove the top and bottom horizontal supports, repair the base of both vertical supports, remove and replace the tail lights panels with smooth pieces and make internal hinges for the engine lid.
I want to clean up the top rails too where the old support used to sit.
I then ran a piece of 25x50mm RHS as the top support. I had to notch it here and there to make it fit. I also notched the rear of it out so the remainder of the outer skin of the kombi would sit flush with the edge of the RHS, as the RHS is now the outer skin above the engine lid.
The lower parts of the vertical supports are a bit rusty, so they'll need fixing.
The original support is hollow. I'm going to cap the bottom off when I make the new piece. It was open before.
I made the new lower section from 2mm plate, as I'm going to make the bottom horizaontal support removable, so I need this part to be strong enough to support nutserts without bending.
Next job was to make new hinges for the engine lid. I don't want the original external hinges, as everything else on the car will be fairly smooth, so I'll make some internal hinges and weld the old hinge holes up.
I've made some practice hinges from 2mm sheet just to make sure the idea will work before I transfer them onto some 5mm plate.
Simple is good.
For this test I'm just welding the hinges to the engine cover, but the proper hinges will be bolted on.
With the first test run successful, I then fully welded the hinges mounts on.
I also welded up the holes in the engine lid the old hinges used to go through.
It even works : )
It does look neater without the hinges sticking out. Not that many people will notice, but I will : )
The idea with these hinges was that the engine lid be easily removable. Where the bolt is used as a hinge pin what will essentially be a tiny pair of bonnet pins. So they can be easily slid out and the lid removed.
That's about it for now.
#165
_SLEDGE_
_SLEDGE_
-
- Guests
Posted 11 January 2012 - 08:36 AM
dying to see some more progress on this. love your work!
#168
_cruiza_
_cruiza_
-
- Guests
Posted 13 January 2012 - 05:02 PM
x5
I am keener then most to see progress
I am keener then most to see progress
#171
_dirtbag_
_dirtbag_
-
- Guests
Posted 22 January 2012 - 10:01 AM
OK well I guess I should update this thread.
There's been a couple of things done since last time I posted.
First thing was to fix the bottom of the other vertical support.
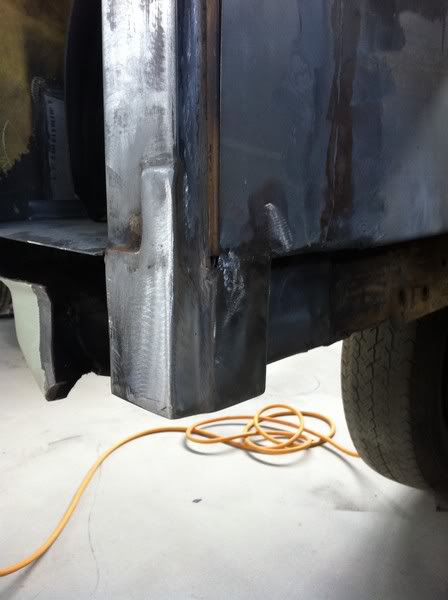
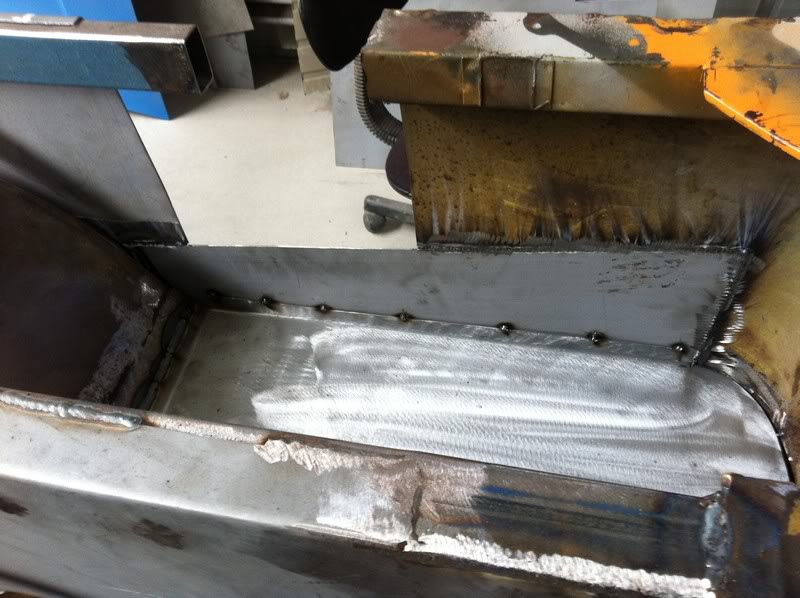
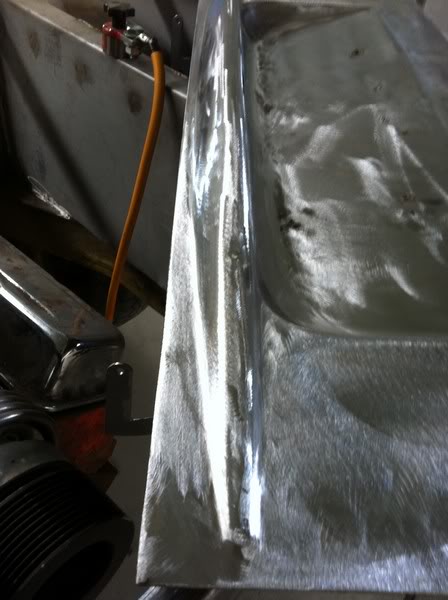
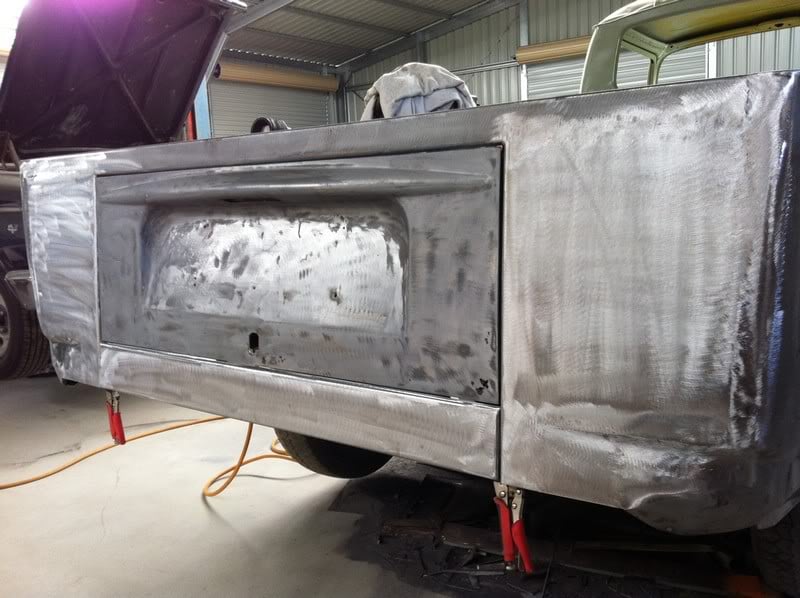
Then I started to remake the outer skin where the tails lights go. I just folded a return onto a piece of 1.2mm zinc to create the edge of the jam for the engine lid.

Starting to look like a car again. Sort of : )
I then filled the two little square gaps that were along the bottom of the new panels.
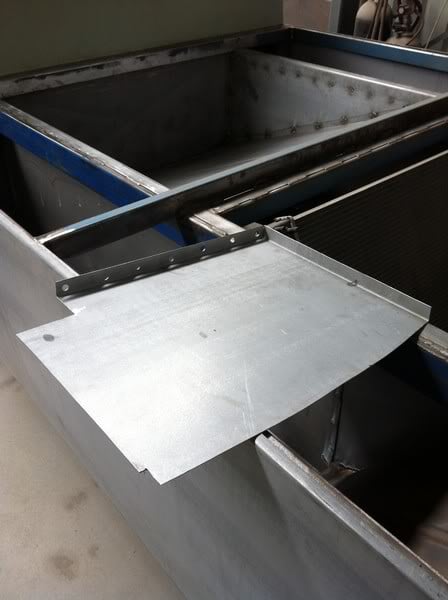
Next up was to make a new removable lower panel. I used 2mm Zinc and just folded all the edges to give it some strength.
Of course it'll be held on with nut serts : )


With that bit sorted I decided I should make the new hinges. I went off the idea of using 5mm flat instead going with 10mm round bar.
I machined up a couple of little pieces to be the pivot points.
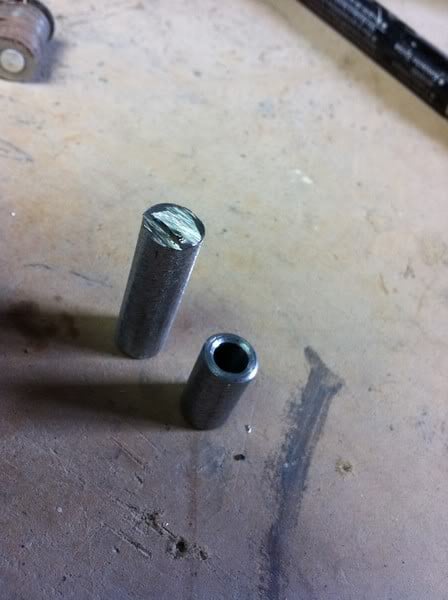
These are probably the most basic/agricultural hinges in existence, but they work, so who cares?
I also decided against having them bolt onto the engine lid. It just seemed like more work for no benefit. So they're welded.
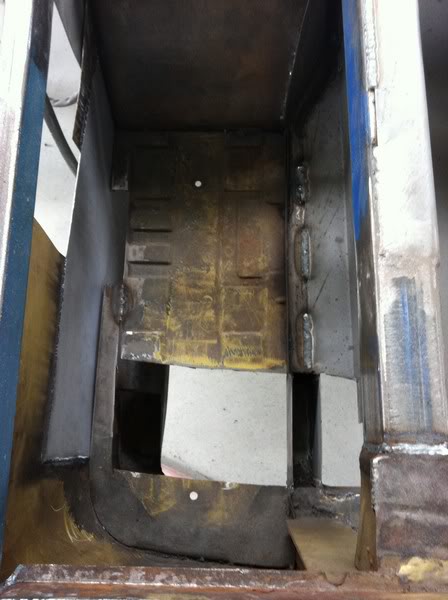
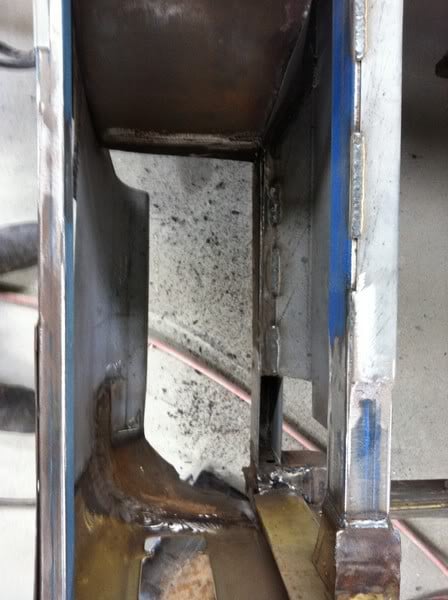
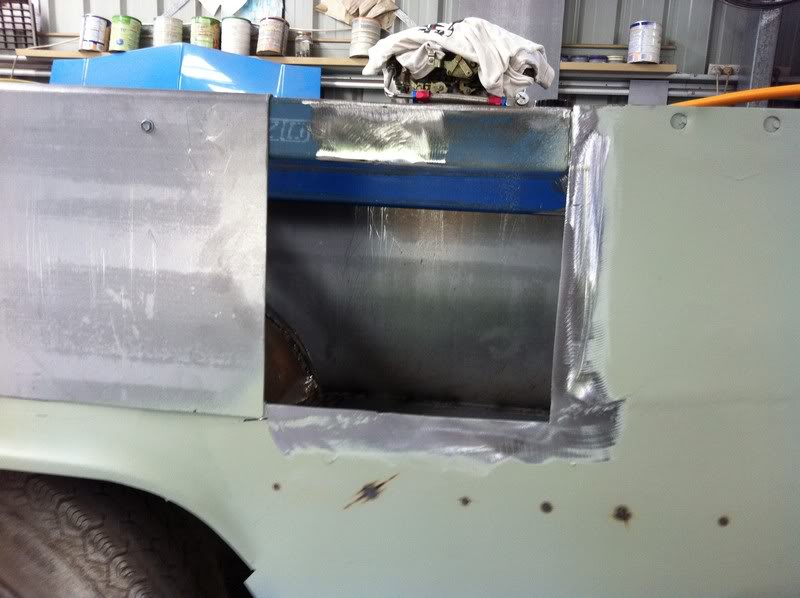
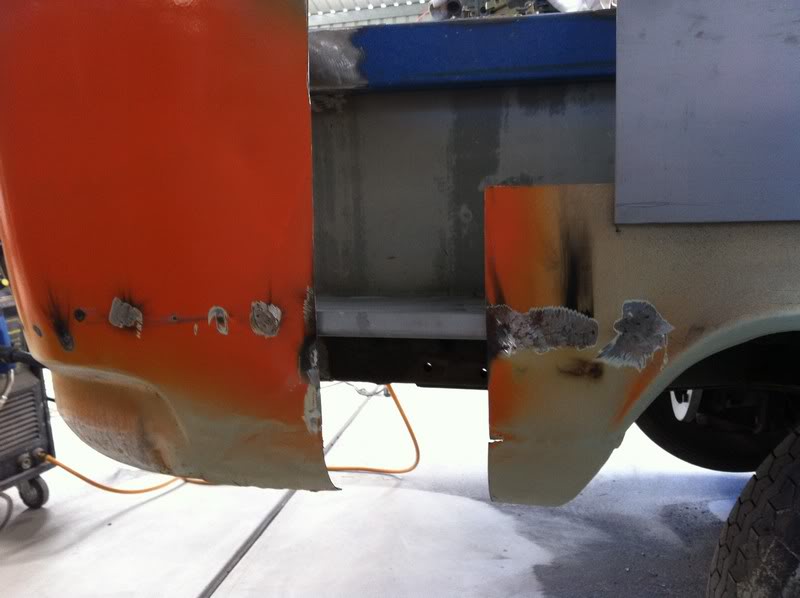
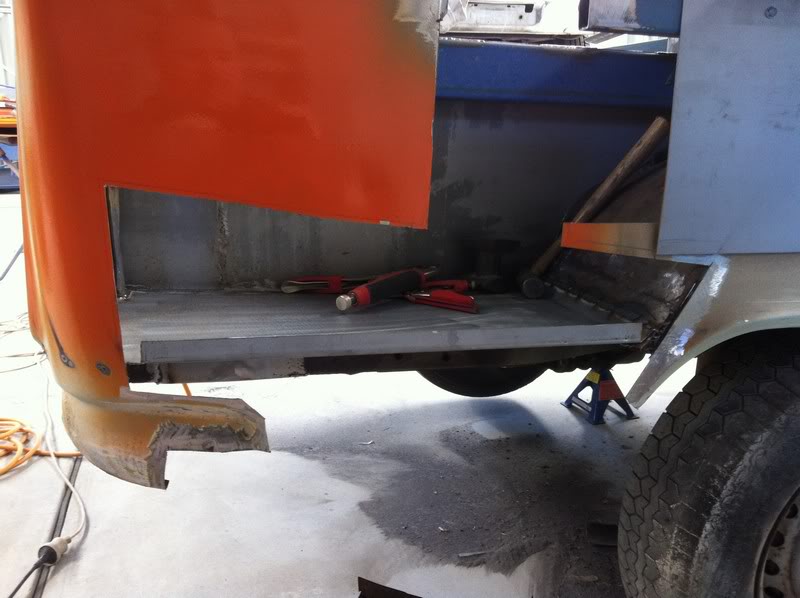
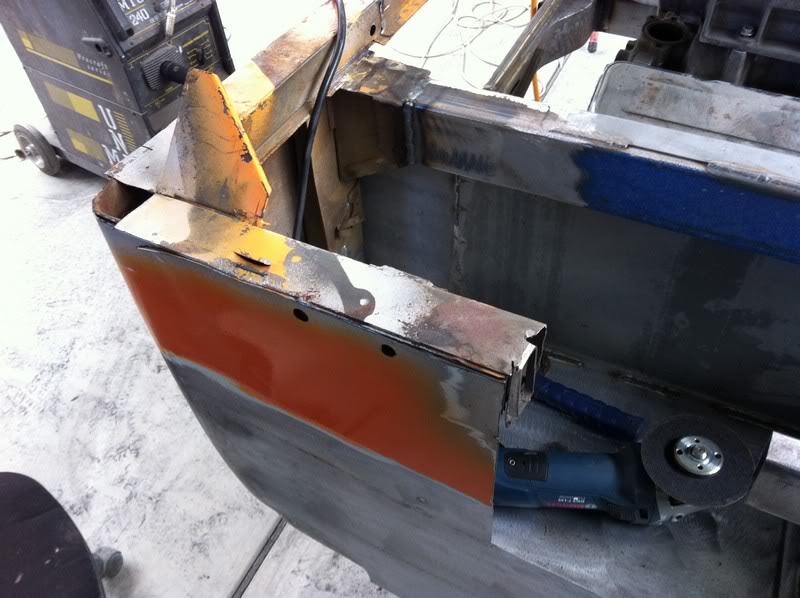
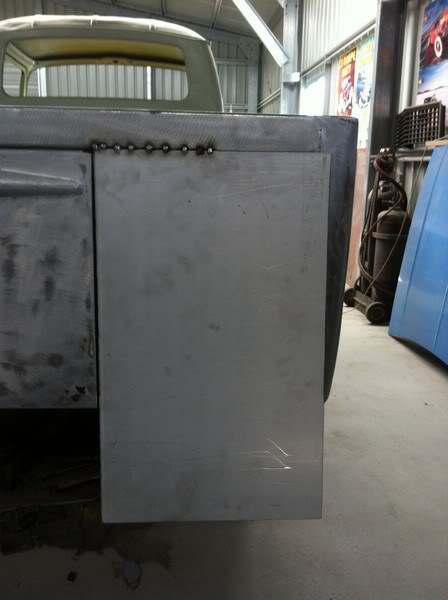
Next job was to make new panels for the front of the side compartments. To hide the lower part of the cab.
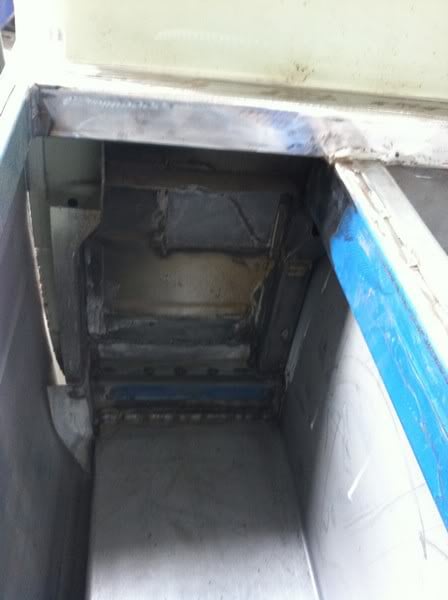
So they got a clean up and quick etch prime from a rattle can.
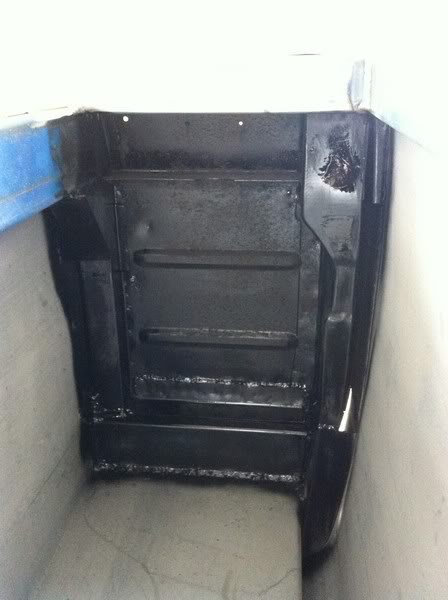
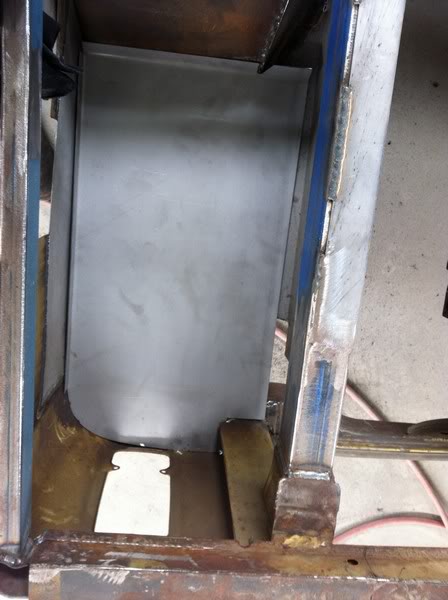
Here's the new piece ready to go in.
Same deal on the other side.
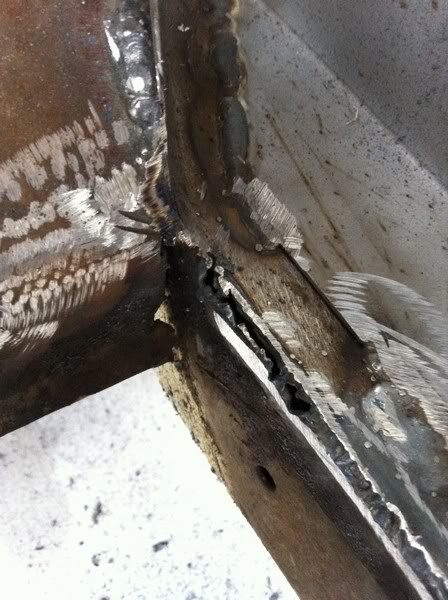
Then there were just lots of little things to finsih off. Like the corners.
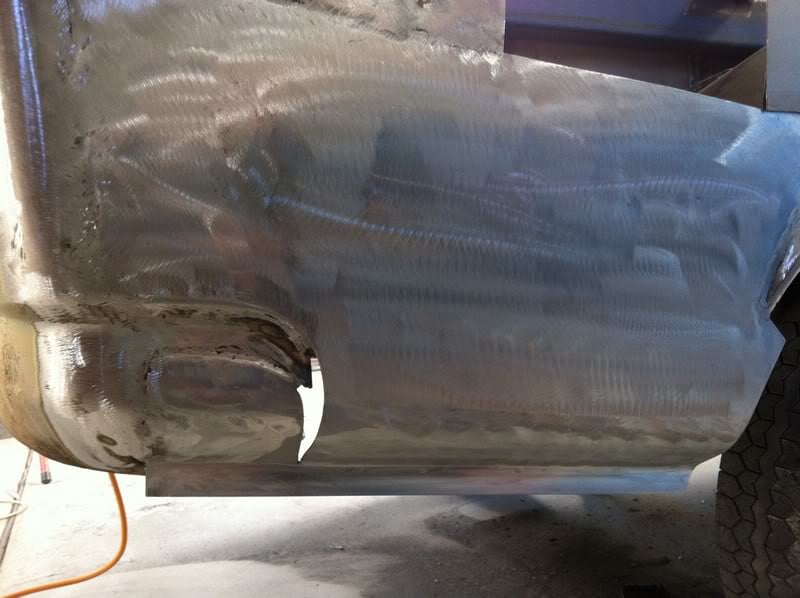
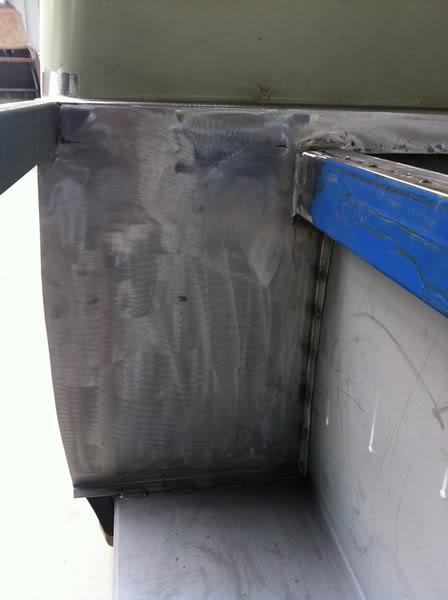
There were other various little things that needed doing, but not much and nothing really worth showing. The main annoying thing I had to do was to sand and paint prep all the new metal. Plus the couple of bits of original metal, so I could etch prime it all.
I used the air sander to sand all the new metal.

It took a full day to clean and sand the rear where I was happy for it to be primed. What a fun day that was!
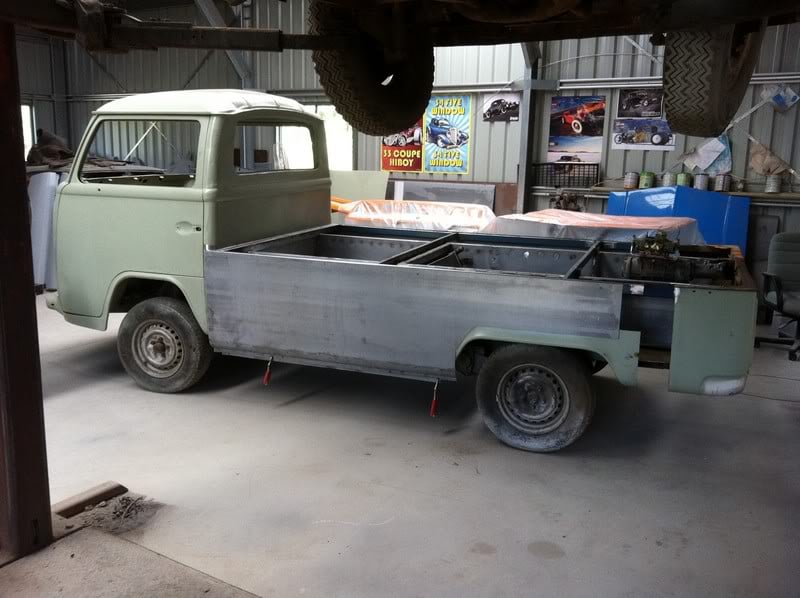
But then it was time to colour it in!
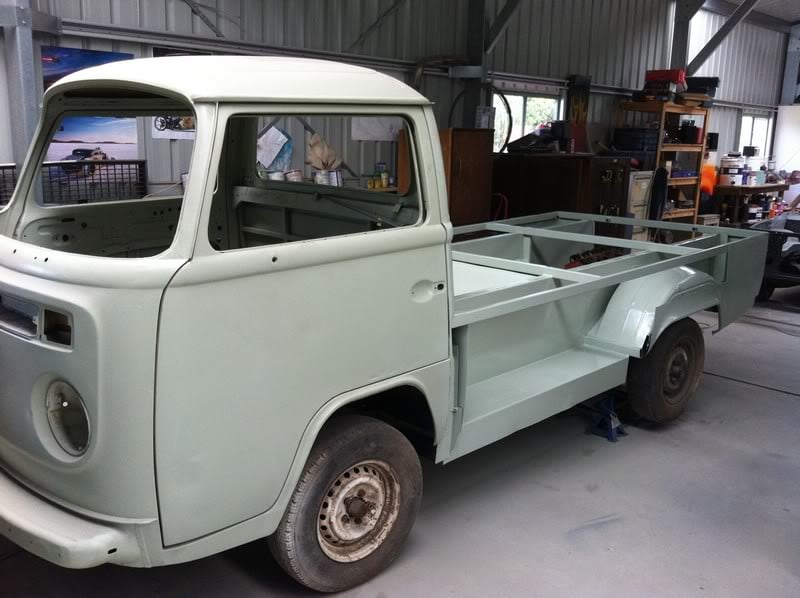
I know all these pics are pretty boring, but it was a real benchmark in the build for me, getting all this primed at last.
So now all the inner areas are sealed up the next thing I can do is to start welding the sides on! So next time I work on this, that's what I'll do : )
There's been a couple of things done since last time I posted.
First thing was to fix the bottom of the other vertical support.
Then I started to remake the outer skin where the tails lights go. I just folded a return onto a piece of 1.2mm zinc to create the edge of the jam for the engine lid.
Starting to look like a car again. Sort of : )
I then filled the two little square gaps that were along the bottom of the new panels.
Next up was to make a new removable lower panel. I used 2mm Zinc and just folded all the edges to give it some strength.
Of course it'll be held on with nut serts : )
With that bit sorted I decided I should make the new hinges. I went off the idea of using 5mm flat instead going with 10mm round bar.
I machined up a couple of little pieces to be the pivot points.
These are probably the most basic/agricultural hinges in existence, but they work, so who cares?
I also decided against having them bolt onto the engine lid. It just seemed like more work for no benefit. So they're welded.
Next job was to make new panels for the front of the side compartments. To hide the lower part of the cab.
So they got a clean up and quick etch prime from a rattle can.
Here's the new piece ready to go in.
Same deal on the other side.
Then there were just lots of little things to finsih off. Like the corners.
There were other various little things that needed doing, but not much and nothing really worth showing. The main annoying thing I had to do was to sand and paint prep all the new metal. Plus the couple of bits of original metal, so I could etch prime it all.
I used the air sander to sand all the new metal.
It took a full day to clean and sand the rear where I was happy for it to be primed. What a fun day that was!
But then it was time to colour it in!
I know all these pics are pretty boring, but it was a real benchmark in the build for me, getting all this primed at last.
So now all the inner areas are sealed up the next thing I can do is to start welding the sides on! So next time I work on this, that's what I'll do : )
#173
_DomDom_
_DomDom_
-
- Guests
Posted 22 January 2012 - 11:21 AM
Woo Hoo! An update.
Very nicely done. Always looks better in primer doesn't it?
Dom
Very nicely done. Always looks better in primer doesn't it?
Dom
#174
_jabba_
_jabba_
-
- Guests
Posted 22 January 2012 - 07:48 PM
Very nice!
Please don't leave us hanging for so long next time!
Please don't leave us hanging for so long next time!
#175
Mort
View Garage
-
- Members
-
- 2,760 posts
Lotsa Posts!
- Name:Mort
- Location:Moranbah, QLD.
- Car:74 LH SL/R 4.2, 75 LH 4 door 186
- Joined: 16-December 07
View Garage
Posted 24 January 2012 - 03:16 PM
Yes, quite a few of us would have been going through withdrawals with no Dirtbag updates to read.


0 user(s) are reading this topic
0 members, 0 guests, 0 anonymous users

