Jump to content


FJ Ute respray


  • Please log in to reply
63 replies to this topic

#1 _cruisindoug_

_cruisindoug_
  • Guests

Posted 13 March 2012 - 10:42 AM

G’day everyone

Thought I would throw up some pics of my ute respray project.

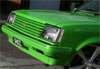
I have had the car for about 13 years now and when I bought it you could tell there were some problems with the paint, but being 2pac it still had a great shine. The shine stayed with it but from being a 10 metre paint job it got steadily worse over time until it was more like a 50 metre paint job!

Here’s some pics of it as it was …

Posted Image

Posted Image

Posted Image

Posted Image

I am also into old caravans …

Posted Image

So I made the decision to repaint the car, so saved my pennies and waited my turn at the panel beaters, finally the car went into the workshop at the end of January, having come off the road on the 7th, it was stripped, sandblasted and back in etch on the 30th!! The goal is to have it back on the road by the middle of April, being only one month away that goal is looking a little shaky … well a LOT shaky, but that was the initial goal. No big deal if it isn’t, I just wouldn’t mind taking it to the Vintage Caravan Nationals at the end of April… Anyway, here’s the pics of the strip down and how it landed at the panel beaters …

Posted Image

Posted Image

Posted Image

Posted Image

Posted Image

Posted Image

Posted Image

Posted Image

Posted Image

Posted Image

Posted Image

Posted Image

#2 _mick74lh_

_mick74lh_
  • Guests

Posted 14 March 2012 - 09:51 PM

Jeez sure was a shock to see what was hiding under the skin. Looks like an interesting project. Any more pics?

#3 _the gts_

_the gts_
  • Guests

Posted 14 March 2012 - 10:27 PM

Awsome, Love the FJ utes, looks good in black too
pleas put up more pics!

#4 _cruisindoug_

_cruisindoug_
  • Guests

Posted 15 March 2012 - 09:08 PM

Thanks for that guys, yes I was a bit surprised at how it looked after the sandblasting, but I guess thats old cars. The rust wasn't too bad, just more than I thought. I was suprised at how straight the car isn't, given how straight it looked before the paint came off. For all those that knock the use of bog, I can tell you that this car was on the road for about 15 years (previous owner drove it for about 3 years) with a moderate amount of use (I used as a daily driver for about three years) and the bog had one small crack on the firewall, and one crack on the passenger gaurd. The bog was up to 25mm thick in places but hung in there surprisingly well. Anyway, heres some more pics, there won't be anywhere the amount of bog being put back though!

Posted Image

Posted Image

Posted Image

Posted Image

Motor getting a freshen up while the car is off the road ...

Posted Image

Posted Image

These guide plates were on it, carefully marked "top", but were then put on upside down ....

Posted Image

Also making a hard cover for the ute, frame and hinges nearly there

Posted Image

Posted Image

Cleaning up the rear with a rolled pan, looks good I reckon

Posted Image

As it sits now, panels getting lined up, nearly at block back stage

Posted Image

I've just posted an abbreviated look at the progress so far given that this is the Torana forum, I really come here to check out the Toranas! If you want to see more pics I have heaps more in my garage on the FX FJ forum, the link is in my signature. I'll keep adding a few here though.

Cheers
Doug.

Edited by cruisindoug, 15 March 2012 - 09:18 PM.


#5 _the gts_

_the gts_
  • Guests

Posted 16 March 2012 - 07:18 AM

keep the pics coming

#6 _nicko61_

_nicko61_
  • Guests

Posted 16 March 2012 - 07:35 AM

amazing how good it looked before considering what you found underneath,checked out your link,i bet it must have been a slow and loud trip home when you broke your header in half especially towing a caravan

Edited by nicko61, 16 March 2012 - 07:35 AM.


#7 _red roar_

_red roar_
  • Guests

Posted 24 March 2012 - 06:44 AM

keep the pics coming


Yep, keep em rollin in

#8 _cruisindoug_

_cruisindoug_
  • Guests

Posted 25 March 2012 - 08:54 PM

Yep it was a long loud trip home, I actually thought it was a flange gasket because the exhaust tape held it together pretty well.

Not much to see in progress but have now got all the panels lined up and the gaps right, so now is rub rub rub time!! Hoping to see some colour go on over the next week or two.

Posted Image

Posted Image

Oh, and this followed me home today!!


Posted Image

Posted Image

Posted Image


I have my '70s Holden coupe ... but its not a Torana!!

Cheers
Doug.

Edited by cruisindoug, 25 March 2012 - 09:02 PM.


#9 Stinga

Stinga

    .

  • Members
  • PipPipPipPipPip
  • 2,114 posts
  • Name:Stinga
  • Location:Wollongong, NSW
  • Car:HD Holden ute, and sedan, UC torana
  • Joined: 05-December 05

Posted 25 March 2012 - 10:15 PM

Awesome project, are you planning to fibreglass the hard cover?

#10 _cruisindoug_

_cruisindoug_
  • Guests

Posted 26 March 2012 - 08:05 AM

Thanks Stinga the plan is to cover the hard cover with some 3mm ply, then trim it up as a tonneau.

#11 _the gts_

_the gts_
  • Guests

Posted 28 March 2012 - 11:24 PM

why not glass it or do it in carbon?

#12 Stinga

Stinga

    .

  • Members
  • PipPipPipPipPip
  • 2,114 posts
  • Name:Stinga
  • Location:Wollongong, NSW
  • Car:HD Holden ute, and sedan, UC torana
  • Joined: 05-December 05

Posted 29 March 2012 - 09:04 PM

+1 vote for glassed hard cover, in body colour

#13 SHEEL

SHEEL

    Forum Fan

  • Members
  • PipPipPipPip
  • 313 posts
  • Name:Daniel
  • Location:Melbourne
  • Joined: 09-October 09

Posted 30 March 2012 - 09:30 AM

+2 .... you could even make it up as you had planned with 3mm ply, Then glass over the ply. Basically making it a composite cover. Similar to a lot of old boats that have glass over timber frames...makes for great strength...

#14 Stinga

Stinga

    .

  • Members
  • PipPipPipPipPip
  • 2,114 posts
  • Name:Stinga
  • Location:Wollongong, NSW
  • Car:HD Holden ute, and sedan, UC torana
  • Joined: 05-December 05

Posted 31 March 2012 - 01:12 PM

would look good if it had a lip that curved over the side of the body like the late model commodore hard covers. not sure how you would go about doing it though?

#15 _cruisindoug_

_cruisindoug_
  • Guests

Posted 02 April 2012 - 07:45 PM

The lip to go over the side is planned, I might have a think about a glass finish, but to do it properly would require a mould. Unless I went with Sheel's suggestion but I'm not sure how straight that would end up ... As we all know, painted black over a wobbly panel looks absolute crap, so going that way adds heaps to the degree of difficulty!

Should be a couple of more pics in the next couple of days, the car is back in pieces getting prepped for the sealer / primer. Its back on the trolley so it can get moved into the booth yay!

Cheers
Doug

#16 SHEEL

SHEEL

    Forum Fan

  • Members
  • PipPipPipPip
  • 313 posts
  • Name:Daniel
  • Location:Melbourne
  • Joined: 09-October 09

Posted 04 April 2012 - 10:57 AM

Yeh it would be hard to get it straight... on a big flat area it would be near impossible...

making a mould may not be as hard as you think...could be the way to go....

that being said I still think trimming up ply as you are planning would still look pretty good anyway!

#17 _cruiza_

_cruiza_
  • Guests

Posted 04 April 2012 - 11:51 AM

Cheers for posting Doug always have had a soft spot for Humpy utes that thing looks like it was shot at repeatity with a shot gun what a mess and job well done

#18 _cruisindoug_

_cruisindoug_
  • Guests

Posted 16 May 2012 - 08:56 AM

The ute's getting close now
:party: :party: :party: :party: :party: :party: :party:

Grille bar was the only bad chrome on the car, so it got some work ...
Posted Image
Into the booth!!
Posted Image
All painted!!!
Posted Image
Just kidding thats a guide coat!
Ready for some more paint soon though...
Posted Image

Posted Image

More pics added in my garage link for those that want more, click the link and then click the first photo with the caption "The ute gets a respray" there are heaps of pics of the whole trip so far.

Obviously didn't meet my goal of having the car on the road to take to Cowra ... so have set a new goal to get it ready for Cooly Rocks On!!

Cheers
Doug

Edited by cruisindoug, 16 May 2012 - 09:05 AM.


#19 _cruisindoug_

_cruisindoug_
  • Guests

Posted 30 May 2012 - 08:12 AM

The body now has some colour!!!!

Posted Image

Posted Image

Posted Image

Posted Image

Posted Image

Who's a happy lad then????

This is straight off the gun and before buffing, and with the obligatory layer of paint shop dust over it ....

Cheers
Doug

Edited by cruisindoug, 30 May 2012 - 08:14 AM.


#20 frash da bucket

frash da bucket

    Forum Fixture

  • Members
  • PipPipPipPipPip
  • 1,890 posts
  • Location:NSW
  • Joined: 23-April 07

Posted 30 May 2012 - 03:21 PM

Hi Doug,

Very nice and straight its comming along very well thanks for posting the photo's.

Cheers John.

#21 _cruiza_

_cruiza_
  • Guests

Posted 30 May 2012 - 05:17 PM

I think I can see a ugly blemish just to the left of your camera, just kidding happy days now all you have to do is put it together a days work at most cruising again by the weekend yay :mellow:

#22 _greenmachine215_

_greenmachine215_
  • Guests

Posted 30 May 2012 - 10:40 PM

Bloody brilliant, I think any car done in black looks great, but this looks killer,

Can't wait to see the final product

#23 _cruisindoug_

_cruisindoug_
  • Guests

Posted 31 May 2012 - 02:14 PM

Thanks John its taken a fair bit longer than planned but I guess thats always the way aye ... cruiza if the ute was a woman you would definately say I was batting above my average!

Greenmachine what can I say, I've got to agree with you! :driving:

#24 _mick74lh_

_mick74lh_
  • Guests

Posted 01 June 2012 - 06:49 PM

Looks beautiful mate. I'll also be interested to see how your hard cover for the tray comes up.

#25 _cruisindoug_

_cruisindoug_
  • Guests

Posted 04 June 2012 - 01:03 PM

Thanks Mick, getting closer to bringing it home now. Went up and put the front subframe, front and rear wheels back on it so its easy to tie down for the trip. Amazing how much difference that makes - looks like it could be a car again one day!

Posted Image

Posted Image

Using Rare Spares rubbers, there has been a lot of discussion over on the FXFJ site about RSP rubbers and their fit. The new compound looks quite good and there is now a utube video of installing them. They look good so far in the fit into the channel, and they look like they will work well - but time will tell once the doors go on. I have put them on at this stage so the doors can be fitted up, the doors need to be off the car to fit the rubbers.

Posted Image

I had an LJ Torrie years ago with RSP rubbers in it, could never get it so you didn't have to slam the doors ... don't know if things have changed for the Torana rubbers or not.

Cheers
Doug.

Edited by cruisindoug, 04 June 2012 - 01:05 PM.


0 user(s) are reading this topic

0 members, 0 guests, 0 anonymous users