Jump to content


Photo
- - - - -

LJ Sedan


  • Please log in to reply
339 replies to this topic

#301 4dabush

4dabush

    Forum Member

  • Members
  • PipPipPip
  • 162 posts
  • Name:Adam
  • Location:Cairns
  • Car:73 LJ S
  • Joined: 04-February 19

Posted 09 January 2024 - 09:34 PM

The inner sill repair is mostly done and I think it's pretty close to being in the right spot.  The welding still sucks but it seems to be getting better slowly.


The next question is whether to do the floor first or finish off the outer sill.  I was planning on the floor first but I'm guessing the new floor pan is a part that will take a whole heap more bashing to get it into place, so it might be better to get the sill on first to make sure the inner sill doesn't move?

I can only tell you what I did…inner first to allow the floor pan to be welded to the inner sill.  
My best mate (RIP) always said for repairs whether damaged or replacement, look at how the thing was built and do the repair in the same order. I might be wrong, but to me it looked like the floor pan was welded to the inner sill then seam sealed. If you look from underneath the floor, where it joins the inner sill, it’s a seamless folded joint and I think you’d struggle to duplicate that putting the floor in first. 
 

Speaking of the floor repair, are you replacing the outer half or the whole thing? I had one of each. The half I cut out the old one carefully and joined it on the existing lip of the chassis rail. Gave me plenty to weld to and next to nothing to clean up underneath. The full one, unpicked all the spots and cut about 1cm up on the trans tunnel second skin. Joined the rear half at the drain plug, and effectively that left me about 10cm to grind and clean up to make the repair invisible. Predrilled both repairs to do plug welds for the pan to the rails. From memory, I did the floor to inner sill last, as once it was stiff, made it easier to dolly up the join nice and tight. Might not be the right way, or the only way, but my engineer was happy with the repairs. ( I didn’t brace the body as I have a full chassis kit in place which you can see in the photo) 
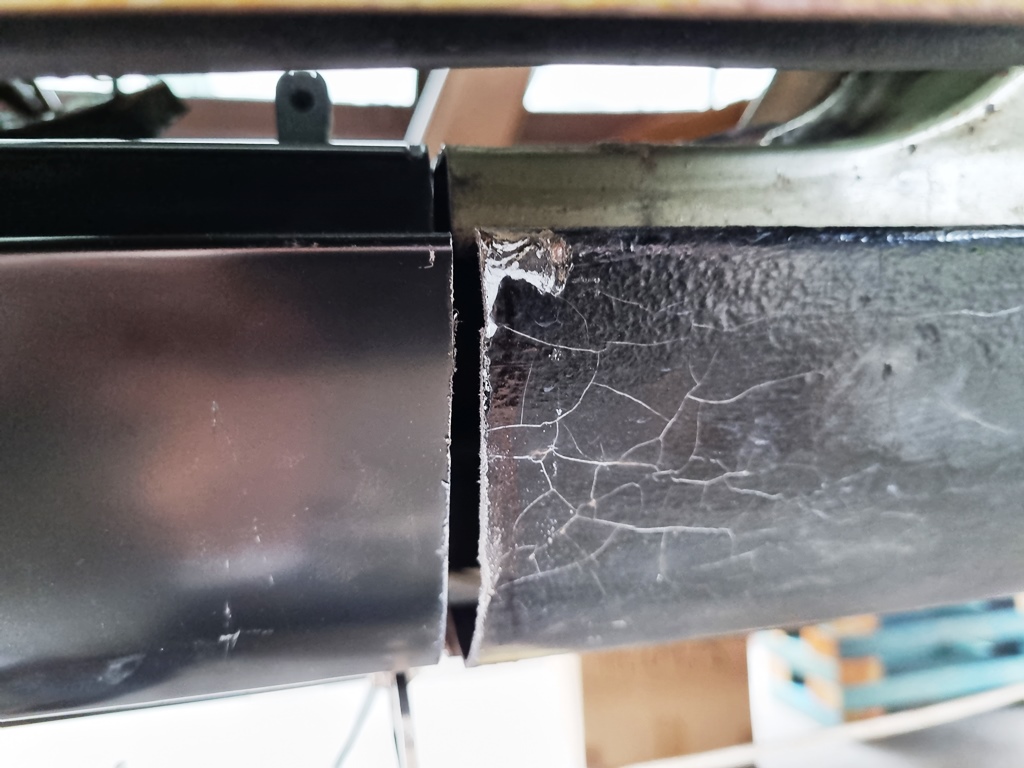
Attached Files


#302 stevemc32

stevemc32

    Forum Fan

  • Members
  • PipPipPipPip
  • 297 posts
  • Name:Steve
  • Location:Sydney
  • Car:LJ 4 Door
  • Joined: 14-September 12

Posted 13 January 2024 - 08:00 PM

Cheers Adam, floor to inner sill last, copied!  I'll be doing the full floor pan, thanks for the advice on fitting and welding.


So onto the outer sill and bottom of the A pillar inner repairs.  I tried shaping up a small cap for the A pillar and it seemed to go ok.  Once that was done I trimmed off the inner sill repair section and got to removing the rest of the outer so I can fit the new one.


Might have stuffed it up a bit and left about a 3mm gap between the new outer and the start of the original sill panel that will remain in place.  I'm guessing I'll be able to weld across the gap but will have to wait and see.


Attached File  20240113_114614.jpg   312.47K   2 downloads


Attached File  20240113_134626.jpg   390.74K   2 downloads


Attached File  20240113_152456.jpg   304.76K   2 downloads


Attached File  20240113_184246.jpg   277.88K   3 downloads


#303 stevemc32

stevemc32

    Forum Fan

  • Members
  • PipPipPipPip
  • 297 posts
  • Name:Steve
  • Location:Sydney
  • Car:LJ 4 Door
  • Joined: 14-September 12

Posted 15 January 2024 - 04:57 PM

Might have missed the mark in a couple of spots...


The gap where I cut the new sill to match up with the existing one is bigger than the 3mm I thought it was so I might need to cut a small strip to fill it.  The other is the bottom edge of my inner sill repair.  I didn't really have anything to line it up with so just tried to match the angle on the top half of the inner sill to get it into the right spot.  Might need a little bit of bashing to move it out to match the new outer sill bottom.


Attached File  20240115_165327.jpg   208.86K   0 downloads


Attached File  20240115_165357.jpg   222.15K   2 downloads


#304 4dabush

4dabush

    Forum Member

  • Members
  • PipPipPip
  • 162 posts
  • Name:Adam
  • Location:Cairns
  • Car:73 LJ S
  • Joined: 04-February 19

Posted 16 January 2024 - 02:53 PM

Have you cut the new sill? If so, might be best to buy a new one and start again. Looks like the new one is a bit tight against the A pillar area, if you look at one of the Adamson Auto Body youtube vids on the GTR they are restoring, they had to massage their replacement panel a bit to make it work. They also did a stepped L shaped repair, Mine fitted well, I must have been lucky,  but none of these bodies are identical - especially after 50 years.


#305 stevemc32

stevemc32

    Forum Fan

  • Members
  • PipPipPipPip
  • 297 posts
  • Name:Steve
  • Location:Sydney
  • Car:LJ 4 Door
  • Joined: 14-September 12

Posted 17 January 2024 - 05:41 PM

Cheers Adam.  Thanks for pointing me in the direction of the Youtube videos, I've definitely came upon the same problems they've detailed.


Some good ideas in there though so I should be able to make it work I reckon.  I might even be able to weld a little step join into the new sill before I fit it up to clear my stuff up on the length cut.


#306 stevemc32

stevemc32

    Forum Fan

  • Members
  • PipPipPipPip
  • 297 posts
  • Name:Steve
  • Location:Sydney
  • Car:LJ 4 Door
  • Joined: 14-September 12

Posted 20 January 2024 - 06:47 PM

Spent plenty of time getting frustrated trying to get the replacement sill lined up and looking spot on. Then I took a step back and reminded myself that the goal is a roadworthy car not a show piece and since I'm just a beginner at this stuff I'd never be able to achieve the perfection I was hoping for anyway.  The bottom of the door above it isn't even straight so I really was just wasting time.


One thing that does bother me is that both the front doors have dropped significantly but I think it's beyond my abilities to sort them out.  I really don't want to take the guards off at this stage and can't see a way of fixing the doors without doing this.


Anyhow, the sill is close enough and I'll get onto some rust converting of the metal behind it before welding it all up.


Attached File  20240120_162430.jpg   254.74K   3 downloads


#307 stevemc32

stevemc32

    Forum Fan

  • Members
  • PipPipPipPip
  • 297 posts
  • Name:Steve
  • Location:Sydney
  • Car:LJ 4 Door
  • Joined: 14-September 12

Posted 24 January 2024 - 06:59 PM

First time using the KBS gear and it seemed to work well.  Do I need to grind off the zinc coating that was left by the Rustblast before welding?


Attached File  20240122_171028.jpg   199.06K   3 downloads


Attached File  20240124_182614.jpg   178.78K   3 downloads


The inside front curve of the outer sill just didn't quite reach where it was supposed to.  Not skilled enough to reshape it in one piece so I just made a few cuts and created this mess.  Should hopefully work out ok once it's all welded up and covered in filler!  I think it'll probably need a little more bashing once it's welded in place too.


Attached File  20240124_182449.jpg   230.87K   5 downloads


#308 4dabush

4dabush

    Forum Member

  • Members
  • PipPipPip
  • 162 posts
  • Name:Adam
  • Location:Cairns
  • Car:73 LJ S
  • Joined: 04-February 19

Posted 24 January 2024 - 08:41 PM

Don’t stress too much Steve, have your hammer and dolly/drift handy.. As you do each of the spots and have some heat in the panel, hammer the top in to where you want it.  Re clamp as you go. You should find that the heat from the welds is enough to close the gaps right up tight. If you have to do the other side, you might find you don’t even need the slots cut as I found the panel repairs quite pliable once the spots had good penetration.   Cant answer the KBS question.  Follow the PDS.  I cleaned all my internal repairs and sprayed weld thru copper primer. After the repairs, I’m old-school and drowned the inner sills with fisholine on a body cavity / body deadener gun with the Pressure up high. Still leaking out after about a year!   :lol:


#309 yel327

yel327

    Oh My, Don't you post alot

  • Members
  • PipPipPipPipPipPipPip
  • 13,088 posts
  • Joined: 10-February 08

Posted 25 January 2024 - 05:57 AM

I've sprayed some of this stuff inside the Monaro in rust prone areas post repairs. Not as runny as traditional stuff.


Knockout Rust


#310 S pack

S pack

    Scrivet Counter

  • Members
  • PipPipPipPipPipPipPip
  • 15,541 posts
  • Name:Dave
  • Location:Luggage Point
  • Car:73 LJ
  • Joined: 25-January 10

Posted 25 January 2024 - 07:18 AM

post-29461-0-74129400-1705301621.jpg


I reckon it would be easier to fabricate and tack a backing strip inside your new sill to bridge that gap to the original sill. Then you can weld up the gap and finish with filler.


#311 stevemc32

stevemc32

    Forum Fan

  • Members
  • PipPipPipPip
  • 297 posts
  • Name:Steve
  • Location:Sydney
  • Car:LJ 4 Door
  • Joined: 14-September 12

Posted 27 January 2024 - 06:08 PM

I reckon it would be easier to fabricate and tack a backing strip inside your new sill to bridge that gap to the original sill. Then you can weld up the gap and finish with filler.


Cheers Dave, that was exactly as I'd planned after watching the youtube video that Adam had directed me towards.  I plan on splitting the bottom of the sill to bring the new one out to the same position as the original and the strip inside will also help get it lined up.


Attached File  20240127_172944.jpg   162.7K   6 downloads


Thanks for the recommendations on the rust proofing fellas, I'll check out the KO-66 and see if I can get my hands on some for finishing it up.


#312 claysummers

claysummers

    Lotsa Posts!

  • Members
  • PipPipPipPipPipPip
  • 3,334 posts
  • Name:Clay
  • Location:Willunga
  • Car:186 FB Ute, 3.3 EK sedan
  • Joined: 13-December 18

Posted 28 January 2024 - 08:23 AM

Be sure and get weld through primer on the lapped surfaces and follow up with fisholene, or the rust will eventually return.


Sent from my iPad using Tapatalk

#313 stevemc32

stevemc32

    Forum Fan

  • Members
  • PipPipPipPip
  • 297 posts
  • Name:Steve
  • Location:Sydney
  • Car:LJ 4 Door
  • Joined: 14-September 12

Posted 11 February 2024 - 05:55 PM

I assume the fisholene goes in after the final painting is done, is that correct.  Guessing it'd make a pretty big mess otherwise.


Got the sill in place, still more work to finish it off though.  Split the bottom to bring it out to meet the original but I think I might need to go further with the split as pulling it out at the end has caused a little depression along the bottom line in the middle of the new section.


You guys think I need to put a filler piece in the split or should I be able to get away with just welding across it?  It's probably opened up to about 3.5mm at the largest part.


Attached File  20240211_164702.jpg   320.46K   1 downloads


Attached File  20240211_175239.jpg   309.1K   2 downloads


#314 claysummers

claysummers

    Lotsa Posts!

  • Members
  • PipPipPipPipPipPip
  • 3,334 posts
  • Name:Clay
  • Location:Willunga
  • Car:186 FB Ute, 3.3 EK sedan
  • Joined: 13-December 18

Posted 12 February 2024 - 07:32 AM

Inside the sills if you are confident you got all the rust, you could use cavity wax. Fisholene will soak in and isolate any residual rust that isn’t trapped under paint. Either way you can either flood it in from a hole in the gop of the sill, hidden under the scuff plate, or run a plastic hose with 360deg nozzle on a shutz gun.


Sent from my iPad using Tapatalk

#315 4dabush

4dabush

    Forum Member

  • Members
  • PipPipPip
  • 162 posts
  • Name:Adam
  • Location:Cairns
  • Car:73 LJ S
  • Joined: 04-February 19

Posted 12 February 2024 - 10:53 PM

Inside the sills if you are confident you got all the rust, you could use cavity wax. Fisholene will soak in and isolate any residual rust that isn’t trapped under paint. Either way you can either flood it in from a hole in the gop of the sill, hidden under the scuff plate, or run a plastic hose with 360deg nozzle on a shutz gun.


Sent from my iPad using Tapatalk

As Clay says, and yes, whatever you use, after paint. I like Fisholine as it’s what I am used to. And using a Shultz gun or body deadner gun with the long hose and air pressure up high. There are other products. Fisholine tends to leak out for a long time, but it’s easy enough to clean up and I have never found it to attack paint, even acrylics, it just wipes off…sort of the consistency of honey as it ages and drips out. 


#316 stevemc32

stevemc32

    Forum Fan

  • Members
  • PipPipPipPip
  • 297 posts
  • Name:Steve
  • Location:Sydney
  • Car:LJ 4 Door
  • Joined: 14-September 12

Posted 26 February 2024 - 05:43 PM

So I spent about 2 weeks welding up the split on the bottom of the sill and still managed to warp it...  I don't know how I could go any slower with the welding, maybe I was grinding a little too aggressively?


Anyhow, filler will cover it up!


Attached File  20240226_165858.jpg   266.12K   2 downloads


#317 4dabush

4dabush

    Forum Member

  • Members
  • PipPipPip
  • 162 posts
  • Name:Adam
  • Location:Cairns
  • Car:73 LJ S
  • Joined: 04-February 19

Posted 27 February 2024 - 06:41 AM

I bought one of these…

https://www.ebay.com...7hoC5hsQAvD_BwE


my mates resto shop got one in the early 1990’s and it was a game changer…it was many thousands of dollars… the one of these I have will weld about 10 pins before it needs to cool down, but awesome for getting things like your sills better. Anywhere you can’t get behind so well, these might be the solution. 


#318 stevemc32

stevemc32

    Forum Fan

  • Members
  • PipPipPipPip
  • 297 posts
  • Name:Steve
  • Location:Sydney
  • Car:LJ 4 Door
  • Joined: 14-September 12

Posted 03 March 2024 - 05:44 PM

Just a quick question on the pin welder.  If I weld the pins on and start pulling on them I'm worried that I'd just make little pimples in the panel and since the panel has shrunk wouldn't it just pull it in elsewhere to counter the part that I'm pulling outwards?  It does look like a nice little tool though and the price is good!


The final piece of the passenger side A-pillar is underway, still got some rust repairs to make in the rear of the passenger side sill then I'll get onto the floor.


Attached File  20240302_165330.jpg   302.89K   3 downloads


#319 4dabush

4dabush

    Forum Member

  • Members
  • PipPipPip
  • 162 posts
  • Name:Adam
  • Location:Cairns
  • Car:73 LJ S
  • Joined: 04-February 19

Posted 03 March 2024 - 06:55 PM

Yes, yes, you can “pimple” the repair, but if you google their use, you can either pull on the individual pins, or grab a number at once to pull. It depends how big the dent is you are trying to get out.  In my rear beaver panel I had 2 x dents from bumper over riders digging in to it. I reckon i used about 40 at a time to get the area back out …probably 2 or 3 goes. So you move back and forwards along the pins, trying to pull the panel back into shape, just like if you were hammer and dollying a dent, you don’t get it all out in one hit, its many small ones.  The dent puller is the same principle. On mine, The bigger dent was creased close to the bumper recess and about 1/2 a football size about 1cm deep.  Still needed filler at the end, but literally a see through skim.  If you go too hard, yes, you can even pull the pin clean out, then you have a hole to weld!  
Maybe someone with more experience can chip in with what they would do. But you don’t have a lot of options on these sealed panels, unless you do like the Adamson Auto Body guys, unpick the whole thing, fix it on the bench and then refit it.  Hope that helps a bit. 


#320 stevemc32

stevemc32

    Forum Fan

  • Members
  • PipPipPipPip
  • 297 posts
  • Name:Steve
  • Location:Sydney
  • Car:LJ 4 Door
  • Joined: 14-September 12

Posted 18 March 2024 - 05:39 PM

That makes a lot of sense Adam, thanks heaps for your help with it and for the price I reckon I can afford to grab one and give it a go.


Progress has been pretty slow lately but I got a few hours in today and worked on sorting out the rear of the passenger side sill panel.  Got a couple of patches done and another one underway.  I've still got to get to the final patch in the sill and finish grinding up the A-pillar repair patch.  Once that's done I'll get onto the passenger side floor pan.  I'm kinda avoiding the big hole in the bottom of the front passenger door at the moment but I am looking forward to giving the floor panel a go.


Attached File  20240318_122135.jpg   328.94K   2 downloads


Attached File  20240318_174416.jpg   232.98K   3 downloads


#321 4dabush

4dabush

    Forum Member

  • Members
  • PipPipPip
  • 162 posts
  • Name:Adam
  • Location:Cairns
  • Car:73 LJ S
  • Joined: 04-February 19

Posted 18 March 2024 - 06:48 PM

Hey Steve, looking good!
little tip ( if you aren’t already doing it).
when you have those blind repairs to do, tack a washer on one side onto your patch to hold it in place while you get the first tacks in. You should be able to get the patches flush with the original metal. Quick wiggle after and the washer should  break away barely leaving a mark. Once ground down, should need very little filler…or if you get as good as the Adamsons, file finish it

Cheers Adam


#322 stevemc32

stevemc32

    Forum Fan

  • Members
  • PipPipPipPip
  • 297 posts
  • Name:Steve
  • Location:Sydney
  • Car:LJ 4 Door
  • Joined: 14-September 12

Posted 22 March 2024 - 07:16 PM

Haha, not much chance of a file finish on this one!!  There'll definitely be a fair bit of filler in it but as long as it's roadworthy I'll be happy.


I had been leaving the repair patch just a little below the surface of the original so that I didn't get any high spots but I'll try to get it flush on the last one and see how it goes.


#323 stevemc32

stevemc32

    Forum Fan

  • Members
  • PipPipPipPip
  • 297 posts
  • Name:Steve
  • Location:Sydney
  • Car:LJ 4 Door
  • Joined: 14-September 12

Posted 31 March 2024 - 06:20 PM

Took the last rust patch out of the end of the passenger side sill and of course found a whole heap more rust...  The inner sill was rusted and damaged from someone jacking the car on the sill so I decided to take a big section off the front and replace the inner sill.  Quick question, should there be a drain hole in the rear inner sill like there is at the front and half way along at about the red circle position?  Both sides at the rear have been previously welded up so I'm not sure what it should look like.


Found a few holes straight though the inner guard into the cabin as well so that also needed repairing.


Attached File  20240331_113735.jpg   296.77K   2 downloads


Attached File  20240331_130701.jpg   315.92K   1 downloads


#324 4dabush

4dabush

    Forum Member

  • Members
  • PipPipPip
  • 162 posts
  • Name:Adam
  • Location:Cairns
  • Car:73 LJ S
  • Joined: 04-February 19

Posted 01 April 2024 - 11:29 AM

Here’s mine Steve on the non-repaired side.  Other side is the same but had quarter panel replaced in the 1970’s. Location (centre of hole) is About 50mm down from floor, 60mm from leading edge of rear guard and about 18mm diameter. Mines July 1973 build. 

Attached Files


#325 stevemc32

stevemc32

    Forum Fan

  • Members
  • PipPipPipPip
  • 297 posts
  • Name:Steve
  • Location:Sydney
  • Car:LJ 4 Door
  • Joined: 14-September 12

Posted 06 April 2024 - 01:52 PM

Thanks for the photos Adam, I did actually see a hole like that one on the other side but I didn't think it was that way from the factory. 


I'd already cut a drain out of my replacement piece so it went on as it was and I can fill it later and cut the round hole if it turns out to be necessary.


Attached File  20240401_154057.jpg   303.29K   3 downloads


0 user(s) are reading this topic

0 members, 0 guests, 0 anonymous users