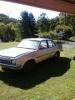
Front panel.
Attached Files
-
 Nose Cone.jpg 218.34K
5 downloads
Nose Cone.jpg 218.34K
5 downloads


Forum Fixture


Posted 15 April 2013 - 10:00 PM
Posted 15 April 2013 - 10:54 PM
What are you doing with the flares. If there in good nick im interested cheers
Hey mate, I am going to keep them for the moment as I am already thinking of doing another 'fully sick' Torrie but you my man have first offer on them.
Forum Fixture
Posted 15 April 2013 - 10:55 PM
Posted 19 April 2013 - 10:40 PM
Got the guards off today and was holding my breath when I undid the last bolt on each of them and actually saw the underneath for the first time.
I was pleasantly surprised. It was dirty and lots of surface rust that I already knew about but the 'hidden' bits looked just fine.
One thing I did find was that I am pretty sure the inner guard on the left hand side has been replaced at some time. Check out the welds in the pics. Apart from looking dodgy everything was lined up Ok so I dont see any real problems for the rebuild. This would mean the outer guard is a replacement and possibly the bonnet as well and even the front nose cone. The radiator support seems to be the original one. I bet my mate I bought the car off doesn't even know this.
After wire buffing off years of red dirt and slapping on a bit of rust converter it looked heaps better and I felt much more relaxed knowing what was there.
Both guards are all cleaned up as well. Both will need a bit of work. Man when you look at the design of them they dont stand much of a chance do they? Perfect for catching dirt, rocks and water right behind the wheels.
All this exploring is great. Dont you wish you could go this far in a pre-purchase inspection? 
Guard Front Left.jpg 117.87K
2 downloads
Guard Body.jpg 155.88K
3 downloads
Guard Off.jpg 154.41K
4 downloads
Guard front Right.jpg 114.92K
4 downloads
Guard Hinges.jpg 148.12K
5 downloads
Posted 19 April 2013 - 10:43 PM
The replacement welds
Guard Replaced.jpg 166.19K
4 downloads
Guard Welds.jpg 129.42K
4 downloads
Guard front Right Weld.jpg 120.68K
3 downloads
Guard front Right Weld2.jpg 126.94K
3 downloads
Guard Front Welds.jpg 148.1K
3 downloads
Guards Dust Gone.jpg 158.61K
3 downloads
Guards Dust Gone2.jpg 142.33K
3 downloads
Posted 22 April 2013 - 10:55 PM
Well not all work is panel and paint ay?
Cleaned up the centre console on Sunday and I must say it looks pretty good compared to what I started with.
Some aircraft grade surface cleaner and a soft brush did most of the work. I fixed up some small cracks with my model aeroplane glue and it has stuck very well.
I still have to build up one of the mount areas with some carbon fibre as it is missing a little bit but the rest is solid as. The arm rest looks a little 'hollow' at the back so if I get brave I will try disassemble it and add some padding.
I love the idea of just cleaning up the interior as best I can so it looks like a nicely looked after original rather than a totally rebuilt one but in saying that I will need to replace the chamois door tops as it looks like they have been glued and it has come through the vinyl.
Console Cleaned.jpg 141.35K
3 downloads
Console Cleaned2.jpg 131.77K
3 downloads
Console Cleaned3.jpg 119K
4 downloads
Posted 22 April 2013 - 11:11 PM
Posted 23 April 2013 - 09:40 PM
Congrads on yr purchase.but that car needs some major repair. Have you done work like roof replacements before?
Console has come up neat and a bit of "patina" gives that authentic feel.
Will watch with interest, Cheers,
Nope, not done too much in the way of panel repairs or roof replacements Matvex. I will be calling on the right people to do those kinds of jobs when I can find them. I have a long bumpy road ahead I know mate but I just love every bit of the car and will work my best to bring it back to how it deserves to be. From what I can see (and I do find more damage every time I work on it) it is not half as bad as some guys have started with so I think I am very lucky.
I have a mate down south going to do four doors for me that are in pretty good condition as they are, I have a spare roof with zero rust and am scraping new bits for it all the time.
I will be able to strip the whole car, do basic rust repairs, rebuild the engine and put it all back together again. Final panel work and paint will be done by someone who knows what they are doing. Hopefully!
Cheers man, thanks for watching.
Posted 28 April 2013 - 06:50 PM
The Missus is away so I get to play.
After hurting my back while moving some stuff around I was just going to take it easy and do some cleaning of bits and pieces so the first thing I thought of was to clean my drivers seat. I had to lift it onto the patio table and F me that thing is heavy. They must weigh a good 40-50 kgs I reckon. So after I lifted it up I though I can do any thing I want after doing that so I got stuck in and did a bit more on the car.
I wanted to remove the rest of the bumper mounts and engine stone guards to check how things looked there and after not too much trouble they were off and I got to inspect the bottom of the chassis rail up front. Looks good but in other places in the engine bay there is evidence of a front end 'incident' or two with a couple of little creases here and there.
Next was to remove the wipers and wiper grill and start checking in under there and the fan blower box where so many Torries seem to rust right out. Man I was stuffed if I could work out how to unclip the wiper arms for a while. Had me buggered how anyone could do it on the actual wiper motor arm in the position it is in but it works out it is a different type of clip in there and I got it off (Dickhead)
Well I was pleasantly surprised when I finally had the guts to look up under the dash after removing the blower box. The first good indication was when I removed it I didnt have handfuls of rust scale fall down after it. In the picture you can see one extra little rust hole and the rest looks pretty shocking but it was only surface rust and after a quick scrub with some emery cloth it looked a million dollars. I sprayed almost a whole tin of DW40 around the area including the 'access' holes' where the wiper arms are right across the front. I even took out the wiper grill plastic mount thingies and spayed in there as well. One of those was missing and I ended up finding it in the drivers side white plastic drain that exits at the inner guard.
So, I am still just exploring and F'ing around really but I think it is important to find out what I am up against in little bits instead of Whack!!!
I am also restricted in what I can do in the carport so now I will concentrate on cleaning up things I have removed and getting them into shape. My list of new shiny things I will require is growing as well.
Time to order a new lower rad support.
Cheers, Brad
Clean Seat.jpg 167.79K
4 downloads
Chassis Rail.jpg 140.95K
4 downloads
Wiper Clip.jpg 198.05K
5 downloads
Plenum Exploring.jpg 155.18K
5 downloads
Plenum Inner.jpg 135.17K
4 downloads
Fan Box.jpg 140.32K
4 downloads
Fan Box Mount.jpg 115.27K
6 downloads
Edited by Red One, 28 April 2013 - 06:53 PM.
Forum Fixture

Posted 29 April 2013 - 12:33 PM
Seen plenty worse!
Posted 04 May 2013 - 07:56 PM
After a huge shutdown at work I felt like doing F'all today but after reading through some threads here I thought I had at least do something on the car so I had a go at fixing the cracks in my boot spoiler. Being plastic, heat was going to be the go so I dragged out the 100W soldering iron and had a bit of a go on the inside to see how things would go. OK, this seems to be working,,,, so I had a bit more of a play and ended up with a pretty good finish and it is plenty strong as well. What I did was 'dig' the pictured tip into the crack about half way through the spoiler material and slowly work in a zig zag pattern the length of the crack. The big crack was almost 3/4 the way across the top of the spoiler,,, (Hmmm thought I had a picture of the crack) and it had spread a bit as well, kind of stress relieved and sitting how it wanted to so I didn't force it closed at all but filled it instead. I had some filler in the way of swarf from cutting out the mounting bolts and nuts from the inside that I will remake in stainless steel so they dont rust again.
It will need some filler/bog but at least it is in one piece again. Now to get the paint off and prep.
Spoiler Mount.jpg 105.35K
4 downloads
Spoiler Repair.jpg 174.06K
5 downloads
Spoiler Repair2.jpg 97.4K
6 downloads
Spoiler Repair3.jpg 140.04K
4 downloads
Spoiler Repair4.jpg 111.73K
4 downloads
Still Lurking

Posted 07 May 2013 - 03:35 AM
Looks like your enjoying yourself there Brad.
That red dirt gets into every bloody where! Evry time i go home i find another peice of clothing has been 'Newmanised'
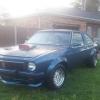
Just from the pics without the flares it looks better already.Dunno it it was because of the black flares or not.
I'm not surprised its had a bit of a knock in the front if its from up that way with lots of roo's and 'moving trees' (cows) on the roads
Hope things keep moving on your car and you dont find too many more little suprises!
Posted 08 May 2013 - 09:39 PM
Thanks damo,
yeah,,,, red dust ay? Lovely stuff.
I wish I could rip into the car and have it striped like most of the other guys do but I can't so just do different stuff at the moment. But it is stuff I wont have to do later.
Just not as exciting as ripping into the rusty bits and removing the donk and stuff.
Cheers.
Posted 03 August 2013 - 03:04 PM
I have not been totally idle. Been doing lots of reading here and still looking on fleebay and the tree for bits and pieces.
My old mate left town and I helped him clean up his house and shed and yard. He gave me this neat little 14 to 1 gearbox that will work a treat on my rottissary when the time comes.
Also me and another NW member have got our new repro boot mats from Reproduction Rubber. I have not seen mine yet as just have to pick it up but sounds like they are really the goods.
Cheers, keep holden on. Brad
DSC_3668.JPG 246.05K
4 downloads
DSC_3669.JPG 189.95K
4 downloads
Forum Fixture

Posted 03 August 2013 - 10:03 PM
Goodonyamate! Looks great. I too am doing a very similar project. Same colour and everything.
I notice youre pulling things off left right and centre which is great, and youre asking questions and getting advice from everyone, and basically havin a go which is awesome. Not sure if anyone has worded you up, but I strongly recommend that you put everything you take off, including parts, bolts, screws etc, into tins and plastic bags etc and mark what everything is. As these jobs can go from months to years and you can soon find yourself looking for a long lost part or staring at a bag of bolts thinking, 'what the hell are these??'
Dont mean to tell you how to suck eggs, but that was a great piece of advice that someone gave me, and i was very thankful.
Keep up the good work!
Forum Member
Posted 04 August 2013 - 02:32 AM
Brad are you going to incorporate a locking mech into the rotisserie with that system? (Handbrake etc?)
Posted 04 August 2013 - 05:16 PM
Goodonyamate! Looks great. I too am doing a very similar project. Same colour and everything.
I notice youre pulling things off left right and centre which is great, and youre asking questions and getting advice from everyone, and basically havin a go which is awesome. Not sure if anyone has worded you up, but I strongly recommend that you put everything you take off, including parts, bolts, screws etc, into tins and plastic bags etc and mark what everything is. As these jobs can go from months to years and you can soon find yourself looking for a long lost part or staring at a bag of bolts thinking, 'what the hell are these??'
Dont mean to tell you how to suck eggs, but that was a great piece of advice that someone gave me, and i was very thankful.
Keep up the good work!
Cheers hainzy, I'll look for your build if you,ve got one going or how bout a picture or two? (all Mandarin Red Torries welcome here) Yeah mate I have even given the advice of bagging and labelling so all good there. Not much off the old girl actually but what is is all stored.
Brad are you going to incorporate a locking mech into the rotisserie with that system? (Handbrake etc?)
Tefa, yes I'll get on the mill at work and sort some disk type set up with about 32 holes in a PCD for a locking pin.
Luckily our cars can be pretty well balanced on a rotisserie so not a whole heap of load on the gearbox.
Cheers guys, I'm off to start her up for a short while. Just love that 308 sound even with holes in the exhaust. Might just cut them off and enjoy the sound even more.
Brad
Forum Fixture
Posted 07 August 2013 - 09:56 PM
Cheers hainzy, I'll look for your build if you,ve got one going or how bout a picture or two? (all Mandarin Red Torries welcome here) Yeah mate I have even given the advice of bagging and labelling so all good there. Not much off the old girl actually but what is is all stored.
No worries mate. Havent added anything for a little while but hoping to have some colour layed down in the next few weeks.
You can check it out here. Cheers - http://www.gmh-toran...andarin-red-lx/
Posted 11 August 2013 - 11:43 AM
Just posting some pictures of the interior for Kirk. Cant seem to add them to a PM.
And yeah, found your thread hainzy, I have visited it before mate, lookin good.
Pre Purchase Inspection5.jpg 160.09K
5 downloads
SLR Roof Lining.jpg 200.04K
4 downloads
Dash.jpg 148.89K
5 downloads
Rear Trim.jpg 130.23K
5 downloads
Clean Seat.jpg 167.79K
4 downloads
Console.jpg 145.21K
4 downloads
Edited by Red One, 11 August 2013 - 11:46 AM.
Posted 11 August 2013 - 01:28 PM
Couple more for you Kirk.
Interior Front.jpg 213.86K
4 downloads
Interior Rear.jpg 179.04K
5 downloads
Forum Fixture
Posted 11 August 2013 - 02:43 PM
The interior looks like a bought one.love the colour.Some idiot put a speaker in my doors as well.Brad just remember this an SLR 5000 WITHOUT FLARES IS LIKE A TIGER WITHOUT TEETH
Posted 28 October 2013 - 10:54 PM
Well guys, for better or worse I have packed up the Torrie and taken it down south a bit so it can be under cover.
I borrowed my mates trailer and he threw in his Prado as well all geared up for the brakes etc. What a mate.
I took a couple of weeks off and had a great road trip with my daughter and meeting fellow member Swarbs along the way was a bonus as well. We had a bit of a chat on the side of the highway and then I was travelling again.
Fifteen hours later I was where I was going and the Torries new home for a while. I finally have my car in the Ol' Man's shed hahaha, only taken me 23 years.
After a couple of days I headed off to the big smoke and picked up my doors another mate has been working on. Totally rust free and looking good. Picked up my spare roof, rims and tyres, haggled on and purchased a spare 3.08 fine diff centre and 'K' frame and another set of Hotwires in gold. Also picked up four car skates a trolly bed and big engine stand. Awesome.
Got it all home and sorted it out. Very pleased. With the beaut smooth roads in this new rural area where it will be I could not help but go for a few drives of the old girl just to be able to live on the dream while it is down there.
At the end of the day the Ol' man announces he needs to build shelves and sort the shed so the car ended up in the Garage!!!
So I am still looking for stuff every day for it and planning on getting down there to work on it but It will be a while.
My next step is to ask lots of questions about what to get where like engine parts, brake bits, should I rebearing the gearbox etc, etc.
Cheers,
Ella Driving.jpg 176.8K
4 downloads
Torana Rig.jpg 205.42K
7 downloads
Torana Shed.jpg 159.59K
4 downloads
Torana Down South.jpg 211.3K
5 downloads
In The Shed.jpg 139.2K
6 downloads
Double Wrapped.jpg 130.82K
4 downloads
Edited by Red One, 28 October 2013 - 10:55 PM.
Forum Fixture
Posted 29 October 2013 - 05:18 PM
Looks great mate. I wish my daughter would look that enthusiastic when she sees my traana! At least the 2 year old son is into it...
Posted 29 October 2013 - 06:10 PM
Ha ha yeah she is a Holden girl for sure mate.
She goes for the 'PAWS' V8 super car driven by Vangisbergan and slips in the odd "we hate Fords don't we dad?"


0 members, 0 guests, 0 anonymous users

