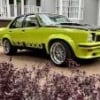
UFO304 Tidy up
#251
 _LS1 Taxi_
Posted 30 April 2015 - 08:36 AM
#252
 _UFO304_
Posted 20 May 2015 - 06:45 AM
So I had some cracks in the paint in the battery tray on both sides, so I started chipping away and I found that the guy who painted my engine bay years ago filled both sides in with about half an inch of body filler!
The battery tray has a piece of sheet metal glued into place with seam sealer . . . . .
Attached Files
#253

Posted 20 May 2015 - 08:14 AM
#254

Posted 20 May 2015 - 09:53 AM
#255
 _UFO304_
Posted 21 May 2015 - 06:26 AM
Yeah, no good!
Ive half pulled it apart now.
So now i need to weld up the holes in the drivers side which isnt too bad, but I will have to cut out the whole battery tray and weld abit of metal in.
I cant find any rust replacement panels that are a blank without the battery tray so I will have to make something.
I wonder if I can replicate the ribs from the drivers side onto the battery side to make it a perfect reverse mirror image.
Attached Files
#256

Posted 21 May 2015 - 03:16 PM
I wonder if I can replicate the ribs from the drivers side onto the battery side to make it a perfect reverse mirror image.
A bead roller (also known as a Swager or Jenny) would normally be used to make those ribs, you can buy cheapies off eBay for about $300 but for a one-off job I'd ask a local metal fabrication business to do 'em for you, some old school panel beaters may still have the equipment too?
Get the beads rolled before you cut the panel for final fit though as the roll will stretch the metal somewhat.
#257

Posted 21 May 2015 - 05:43 PM
#258
 _UFO304_
Posted 22 May 2015 - 06:58 AM
A bead roller (also known as a Swager or Jenny) would normally be used to make those ribs, you can buy cheapies off eBay for about $300 but for a one-off job I'd ask a local metal fabrication business to do 'em for you, some old school panel beaters may still have the equipment too?
Get the beads rolled before you cut the panel for final fit though as the roll will stretch the metal somewhat.
I just finished fitting those two panels.....I done away with the battery tray and made a mirror image of the drivers side
Thanks guys!
I did look for a replacement panel but it looks like noone does one.
Do you feel like making me up another Big Kev lol?
#259

Posted 22 May 2015 - 04:01 PM
~ it looks like noone does one ~
Buggered if I know why not, how many Torana guys have relocated the battery out of the engine bay, probably better than half the cars customised?
If somebody made both the standard tray and a blank tray, I'd be surprised if the blank one didn't out-sell the standard.
#260
 _LS1 Taxi_
Posted 22 May 2015 - 04:59 PM
Buggered if I know why not, how many Torana guys have relocated the battery out of the engine bay, probably better than half the cars customised?
If somebody made both the standard tray and a blank tray, I'd be surprised if the blank one didn't out-sell the standard.
Disagree. There are more date coded original brake pad guys about than there are hot rodders IMO.
Go to a car show and see how many monaros, GTs and SL/Rs roll in with cheese cutters and hubcaps.
#261

Posted 24 May 2015 - 09:37 PM
"date coded original brake pad guys" hahaha!! love it. Cars looking schmick man love that colour ![]()
#262
 _UFO304_
Posted 25 May 2015 - 06:50 AM
HAHA.
Thats a fair point, Original seems to be the in thing at the moment.
Im now thinking i might just slice down the middle of the ribs on the drivers side, tap them flat, and weld it closed and then that way I can just weld in a flat piece of steel where the battery was.
#263

Posted 25 May 2015 - 07:29 AM
For your replacement Panels for your Torana try Retro Rods 07 54454007
they have both the panels you need and very good to deal with .....
I ended up making my own and yes i made a mirror image of the drivers side with the ribs came out very neat just painting all the bay black this week
#264

Posted 26 May 2015 - 06:18 AM
What does everyone do with the two outer bumper bracket bolts on each side when replacing these panels, assuming you no longer want to see the heads in the engine bay of course?
#265

Posted 26 May 2015 - 07:35 AM
When I had my car on the rotissierie I had these two panels removed and the car was fine with all that weight so two bolts missing just to hold a front panel and bar ...I just didn't use them
#266
 _UFO304_
Posted 26 May 2015 - 08:04 AM
What does everyone do with the two outer bumper bracket bolts on each side when replacing these panels, assuming you no longer want to see the heads in the engine bay of course?
I am just going to grind the heads flat and weld them to the panel, then grind it all flat of course.
G'day Ken
For your replacement Panels for your Torana try Retro Rods 07 54454007
they have both the panels you need and very good to deal with .....
I ended up making my own and yes i made a mirror image of the drivers side with the ribs came out very neat just painting all the bay black this week
Good stuff!
I just dropped them an email, I'll see what they come back with.
#267

Posted 26 May 2015 - 09:28 AM
I used a couple of Retro Rods panels, and while they weren't a perfect fit, I didn't expect them to be. In service terms, they were great and the price seemed fair to me (rad support and lower rear quarter).
#268
 _UFO304_
Posted 17 June 2015 - 06:11 AM
Ive started attacking the tray area.
Attached Files
#269

Posted 17 June 2015 - 06:32 AM
#270
 _UFO304_
Posted 18 June 2015 - 06:12 AM
I cant wait to start start grinding!
Attached Files
#271

Posted 24 June 2015 - 09:15 AM
Neat! I just made fully flat panels there but that panel is quite a nice design IMO - much better than an empty battery tray!
Edited by Heath, 24 June 2015 - 09:16 AM.
#272
 _UFO304_
Posted 25 June 2015 - 06:27 AM
Thanks heath-
I had to decide to go either flat, or factory look.
Going the way I did, I didnt have to replace the drivers side panel.
#273
 _UFO304_
Posted 16 July 2015 - 06:19 AM
With abit of help from other guys on the forum I worked out a hidden wiper motor assembly- its a VY motor and just modified linkages.
Attached Files
#274

Posted 16 July 2015 - 10:32 AM
Looking good Ken, any idea on where to run the wiring?
I was thinking of a grommet from the inside (up high so it won't leak)?
#275
 _UFO304_
Posted 17 July 2015 - 08:18 PM
I had a hole toward the rear from an old screw that I had silicone up.
I just scraped out the silicone and drilled the hole bigger and ran a nice tight grommet.
The cable comes out basically in the centre of the glovebox and behind.
Theres plenty of room in that area, . . . . . it would have been an awesome place to mount if from Factory if holden wanted to!
1 user(s) are reading this topic
0 members, 1 guests, 0 anonymous users


 View Garage


