Jump to content


Photo
* * * * * 1 votes

My LC 2dr project!


  • Please log in to reply
309 replies to this topic

#51 _2runa_

_2runa_
  • Guests

Posted 13 May 2009 - 01:10 PM

Jeff
Just another thought
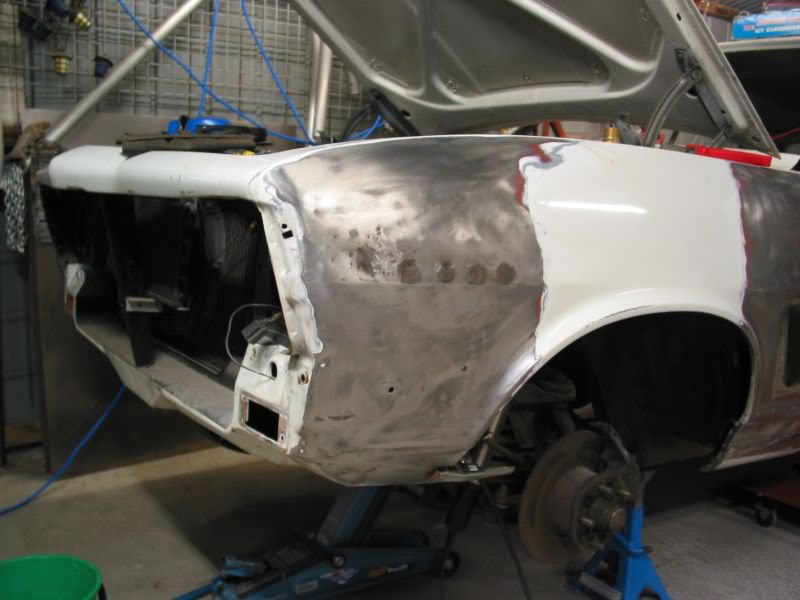
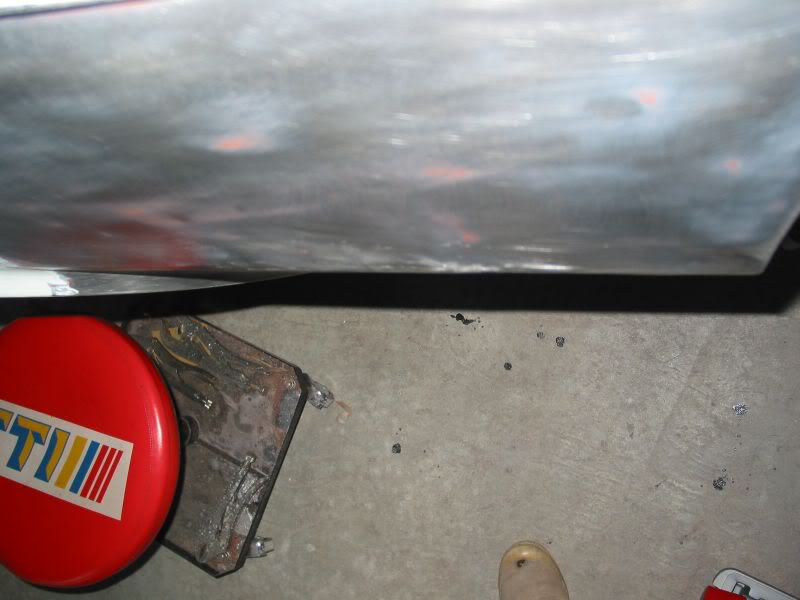
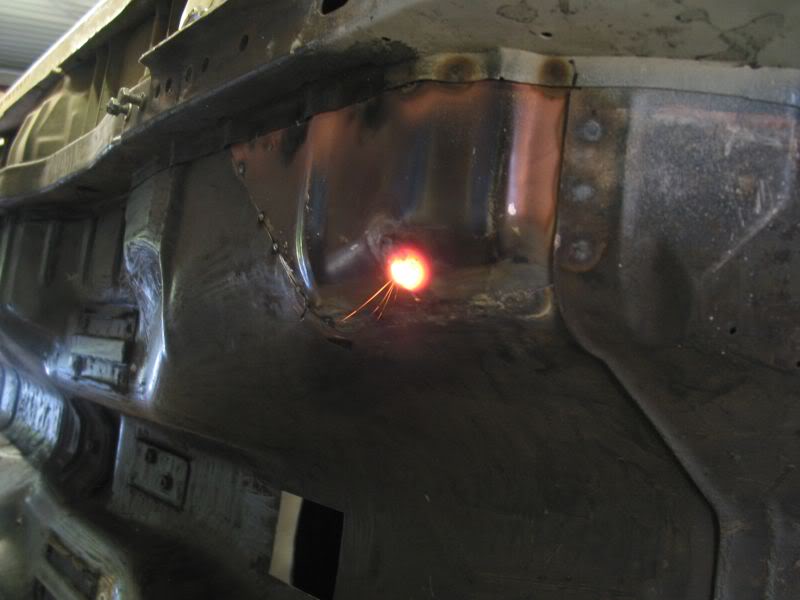
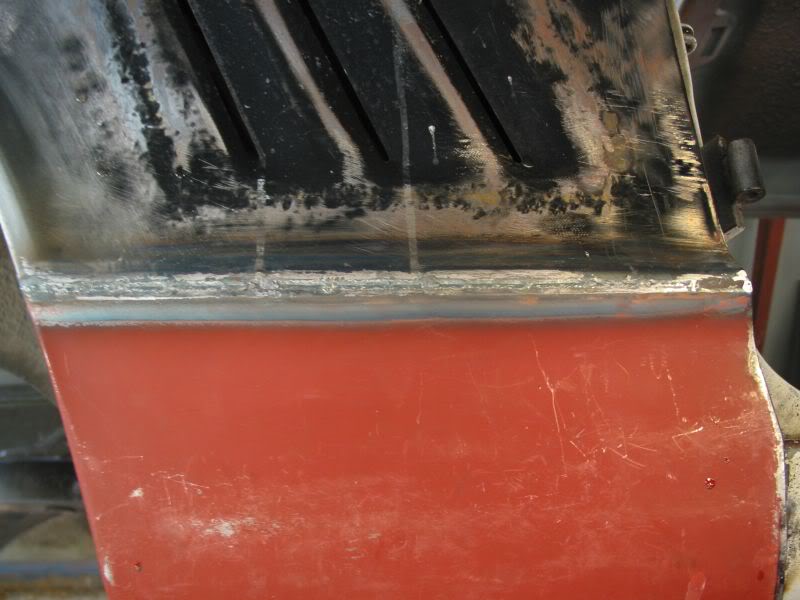
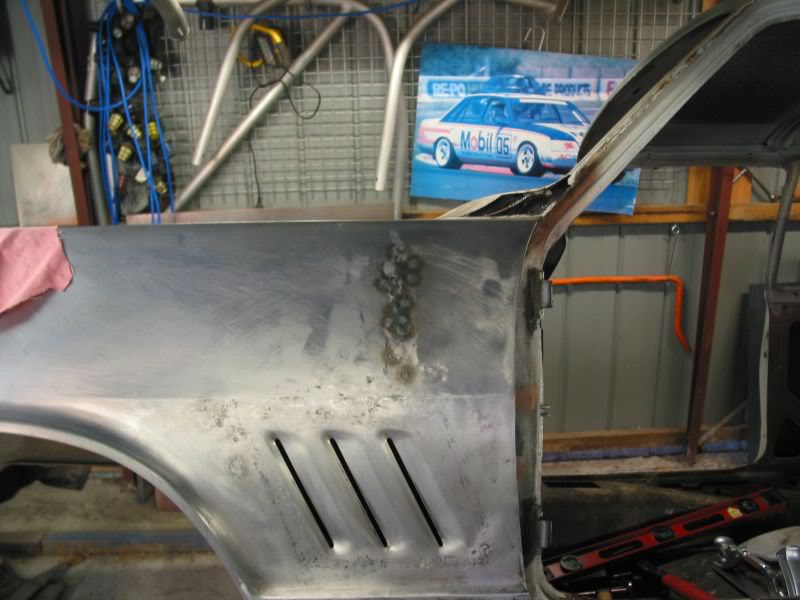
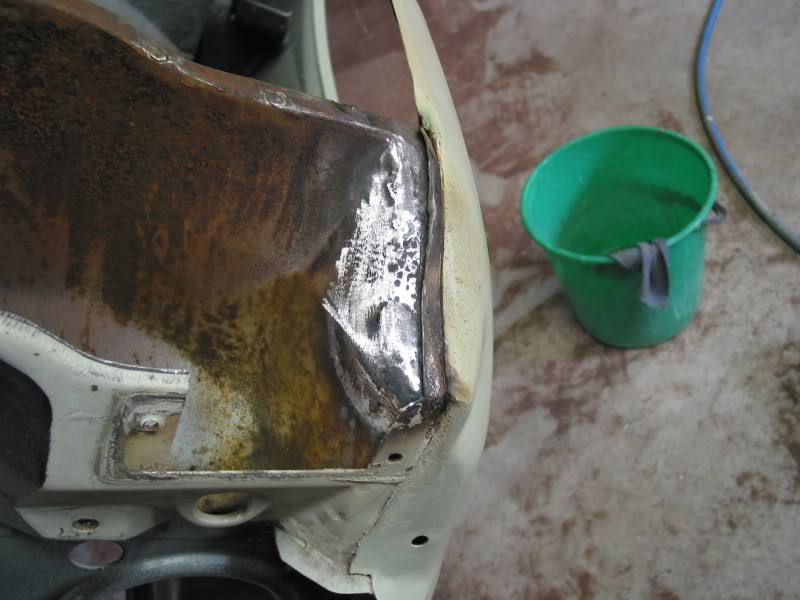
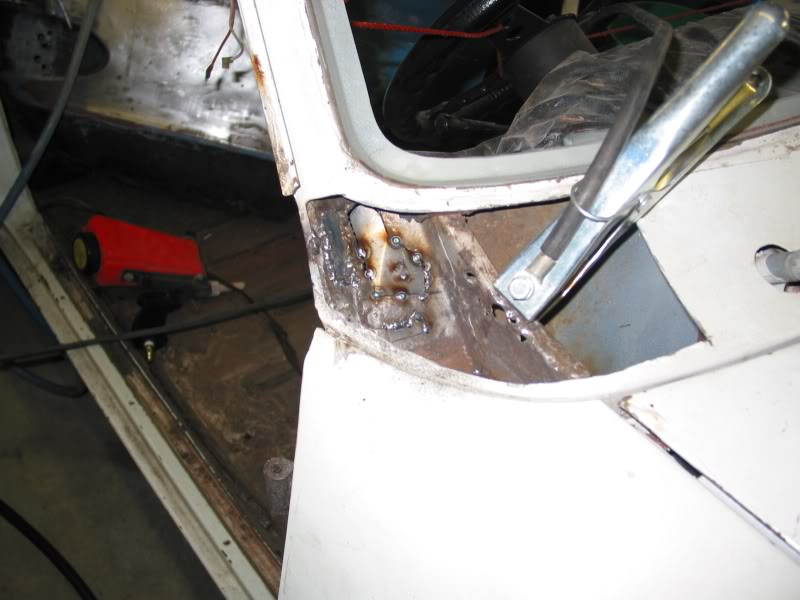
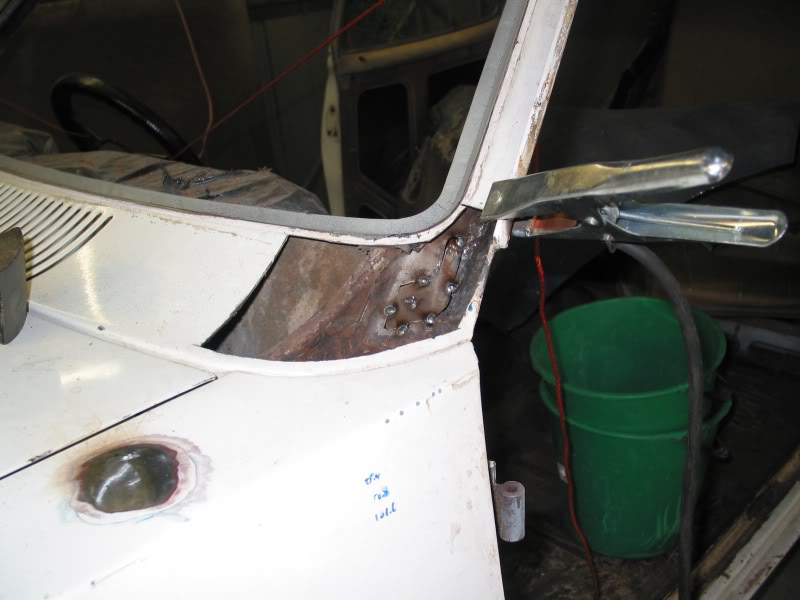
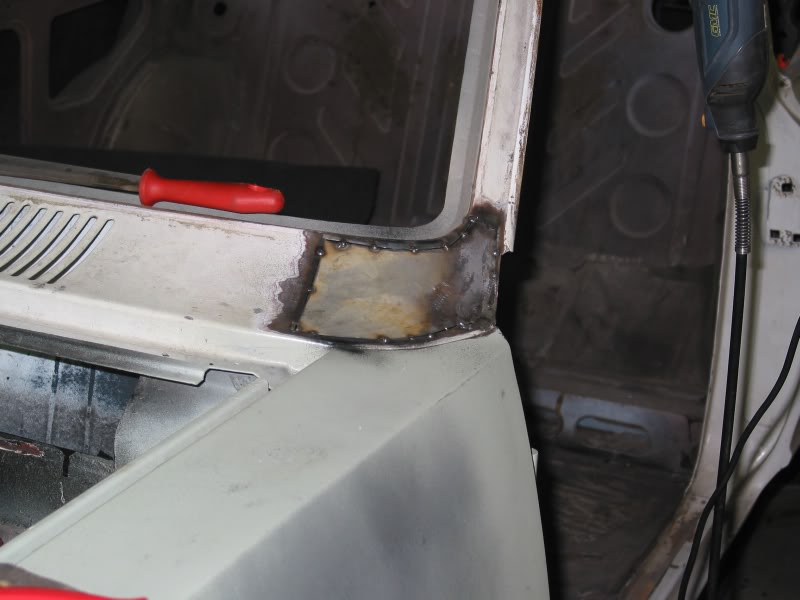
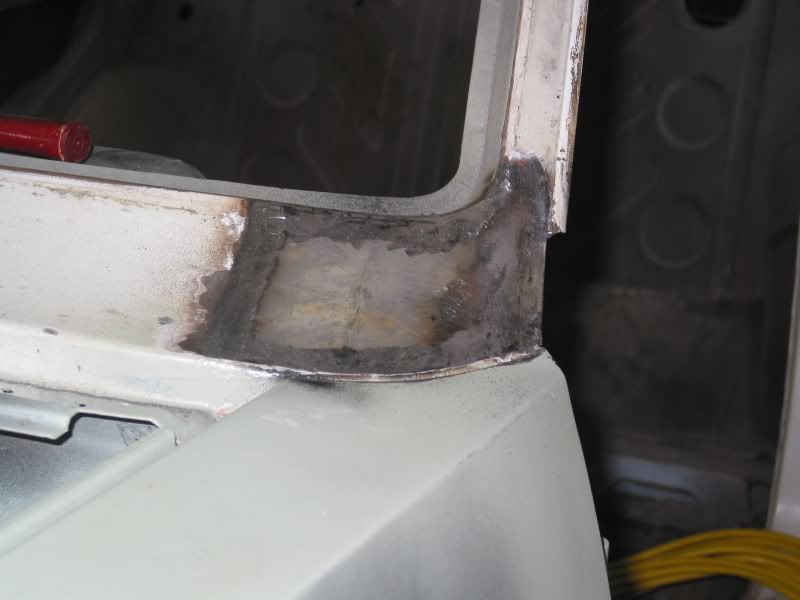
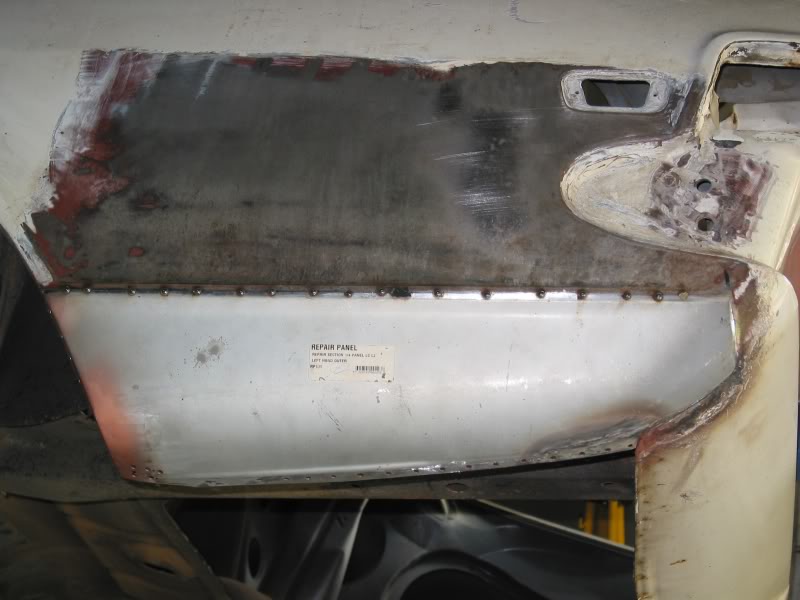
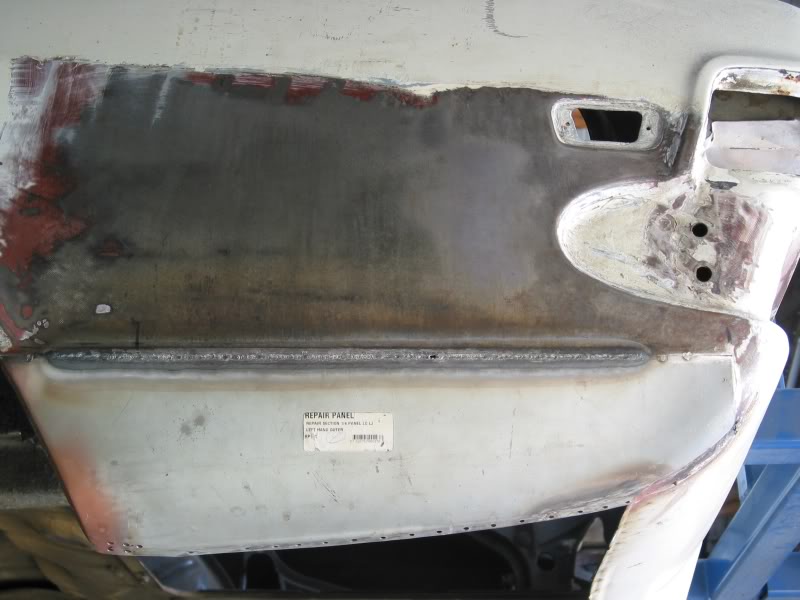
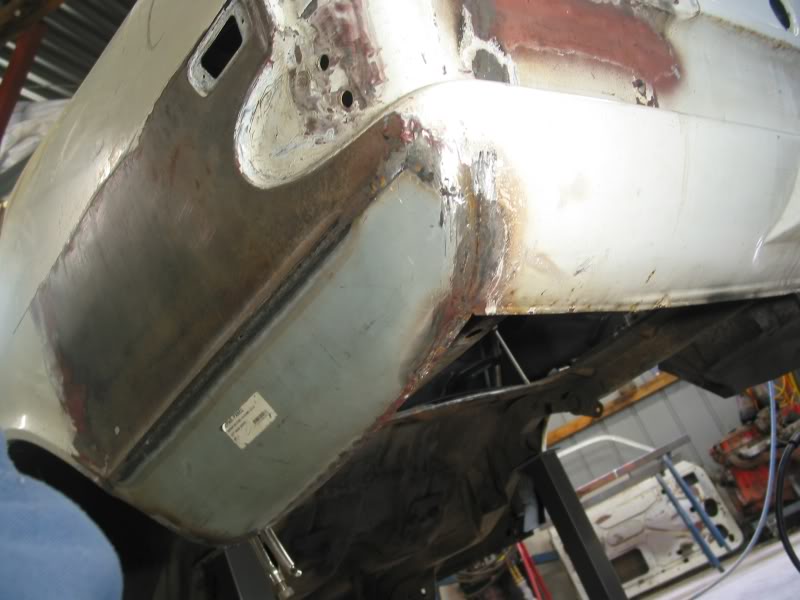
Remember, heat shrinks, so stretch your tacks with a hammer & dolly; the same applies when finish-welding. After 5-10mm (as you get more experienced, you may decide to weld more at a time), set your gun down grind it back close and use your hammer & dolly....Respectfully :Headbang2: . The object is to remove some of the shrinking you've caused by welding, while keeping your panel in shape. Don't stray too far from the weld to begin with. You'll find you can get your shape back if you patiently work the weld area first, and then address any peripheral warpage. Remember, if your panel fits well to begin with, you should be able to make it fit when you're finished, without resorting to drastic measures like a sledge hammer :cry:

again your doing well

#52 lc2dr

lc2dr

    Forum Fan

  • Members
  • PipPipPipPip
  • 320 posts
  • Name:Jeff
  • Location:Melbourne
  • Car:LC 2dr
  • Joined: 06-March 08

Posted 10 March 2012 - 01:29 PM

Wow - I didn't realise it's been so long since I last updated this thread... Time flys.....

Guess I'd better start uploading some photos....

#53 lc2dr

lc2dr

    Forum Fan

  • Members
  • PipPipPipPip
  • 320 posts
  • Name:Jeff
  • Location:Melbourne
  • Car:LC 2dr
  • Joined: 06-March 08

Posted 11 March 2012 - 10:27 AM

After installing the flutes, i started filling badge holes and straightening out the LH guard after removing a bunch of filler...
Posted Image
Posted Image
Posted Image

The shrinkage around the flutes came out pretty good... but will still require a bit of filler later on...
Posted Image
Posted Image

#54 lc2dr

lc2dr

    Forum Fan

  • Members
  • PipPipPipPip
  • 320 posts
  • Name:Jeff
  • Location:Melbourne
  • Car:LC 2dr
  • Joined: 06-March 08

Posted 11 March 2012 - 10:42 AM

After working on hands and knees, I was thinking this is going to be a long & painful process until a friend offered me a rotisserie he'd built for a Celica... This should make life a little easier....
Posted Image

I had to fabricate front & rear mounting arms for the torrie...
Posted Image

Dropped the front & rear ends out, & up, up and away....
Posted Image

The torrie's new view of the garage....
Posted Image

The only real downside has been the lack of wheels to move it around... Perhaps on version #2 if the good lady wife lets me do another project...

#55 lc2dr

lc2dr

    Forum Fan

  • Members
  • PipPipPipPip
  • 320 posts
  • Name:Jeff
  • Location:Melbourne
  • Car:LC 2dr
  • Joined: 06-March 08

Posted 11 March 2012 - 10:51 AM

Once up in the air, the rust in the rear K-frame mounts became obvious...

Posted Image

with the RH side feeling like paper mache where the crush tube should be fixed.. :cry:

Posted Image

Will post some more pics soon....

#56 lc2dr

lc2dr

    Forum Fan

  • Members
  • PipPipPipPip
  • 320 posts
  • Name:Jeff
  • Location:Melbourne
  • Car:LC 2dr
  • Joined: 06-March 08

Posted 14 March 2012 - 08:09 PM

Fixing the LH side was pretty easy.... just cut a hole with a hole saw

Posted Image

Made a piece to fill it...

Posted Image

and welded it up...

Posted Image

Once ground back, it looked pretty good...

Posted Image

Posted Image

#57 lc2dr

lc2dr

    Forum Fan

  • Members
  • PipPipPipPip
  • 320 posts
  • Name:Jeff
  • Location:Melbourne
  • Car:LC 2dr
  • Joined: 06-March 08

Posted 14 March 2012 - 08:24 PM

The Drivers side was a totally different story... not a pretty side.

Posted Image

Posted Image

I had a large washer made by the local steel merchant, and welded it to the 2mm thick patch for the outside of the rail...

Posted Image

Cut off the rusted bit and welded on the new...

Posted Image

Posted Image

After soaking the outer section in a Deox-C bath for a few days... swiss cheese...

Posted Image

Patched the section in two places & made a new crush tube...

Posted Image

and covered it in POR-15...

Posted Image

Finally welded it back together...

Posted Image

Posted Image

Posted Image

Posted Image

I'll be treating the area with cavity wax once the car is painted.

#58 lc2dr

lc2dr

    Forum Fan

  • Members
  • PipPipPipPip
  • 320 posts
  • Name:Jeff
  • Location:Melbourne
  • Car:LC 2dr
  • Joined: 06-March 08

Posted 14 March 2012 - 08:34 PM

The next bit to tackle was the drivers side floor...

It wasn't too bad, but had some holes around the accelerator pedal pivot... so I bought a Rare Spares patch for it.

Posted Image

Posted Image

Posted Image

Posted Image

It will be finished off when the floor is prepped & painted.

More to come, but still uploading them...

Hopefully it's not picture overload????

Cheers,
Jeff

#59 _Liam_

_Liam_
  • Guests

Posted 14 March 2012 - 08:35 PM

Mate they are some nice repairs. Very neat. Good Job.

#60 _mick74lh_

_mick74lh_
  • Guests

Posted 14 March 2012 - 10:08 PM

Mate they are some nice repairs. Very neat. Good Job.


^^^ What he said. Very neat mate. I wasn't actually aware of this project till now.

#61 mr5000

mr5000

    chief break-everything

  • Members
  • PipPipPipPipPipPip
  • 3,449 posts
  • Location:melbourne
  • Car:77 lx 4door
  • Joined: 08-January 06

Posted 15 March 2012 - 07:28 AM

geez jeff it has been ages since youve shown anything on here you did the chassis rail about 12 or more months ago would be getting close to comming off the rotiserie now wouldnt it

#62 lc2dr

lc2dr

    Forum Fan

  • Members
  • PipPipPipPip
  • 320 posts
  • Name:Jeff
  • Location:Melbourne
  • Car:LC 2dr
  • Joined: 06-March 08

Posted 15 March 2012 - 12:03 PM

Mate they are some nice repairs. Very neat. Good Job.

^^^ What he said. Very neat mate. I wasn't actually aware of this project till now.


Thanks guys - much appreciated... Unfortunately I'm a bit anal @ times with the detail which can make things take alittle longer than they should...but I'll get there.

geez jeff it has been ages since youve shown anything on here you did the chassis rail about 12 or more months ago would be getting close to comming off the rotiserie now wouldnt it


Yeah, it was a while ago - just been alittle slack in posting updates. Should catch up in the next few days... :D

#63 _AD_75_

_AD_75_
  • Guests

Posted 15 March 2012 - 03:58 PM

Very tidy work! attention to detail is what separates an average job from a good one.. ;)

#64 lc2dr

lc2dr

    Forum Fan

  • Members
  • PipPipPipPip
  • 320 posts
  • Name:Jeff
  • Location:Melbourne
  • Car:LC 2dr
  • Joined: 06-March 08

Posted 16 March 2012 - 08:14 PM

Howdy again... some more photos of what I've been up to.

Removed the remainder of the paint from the LH guard to start straighten out the wrinkles under to bog...

Posted Image

Posted Image

Posted Image

Getting better...

Posted Image

I wasn't real happy with the bottom secton of the guard after previously removing it, so I decided to do it again, but cutting higher up...

Posted Image

Posted Image

The patch required some altering of the line on the trailing edge, but was otherwise good...

Posted Image

I tried to get the join as even as I could to butt weld it with the Henrob & no filler...

Posted Image

Posted Image

It turned out OK - just required some stretching to get the line back out because of the heat shrinkage....

Posted Image

Also had to shrink above the flute insert to remove a slight bulge, probably due to over stretching around the insert + the previous damage under the filler...

Posted Image

Posted Image

The guard still requires more work above the flutes, but I'll tackle that latter when the final bodywork gets done. So on with some primer...

Posted Image

#65 lc2dr

lc2dr

    Forum Fan

  • Members
  • PipPipPipPip
  • 320 posts
  • Name:Jeff
  • Location:Melbourne
  • Car:LC 2dr
  • Joined: 06-March 08

Posted 16 March 2012 - 08:27 PM

After gaining some experience on the LH guard, the RH side was alot easier as I only had to fill the badge holes...

Posted Image

& clean up around the flute insert...

Posted Image

Posted Image

and then some primer...

Posted Image

A little bit of work is still required later around the flute insert, but nothing major...

#66 _ljharbsy_

_ljharbsy_
  • Guests

Posted 16 March 2012 - 10:04 PM

As the guys have said very neat work and attention to detail is the essence of the work known as art not just another car. Keep up the good work.

Steve

#67 lc2dr

lc2dr

    Forum Fan

  • Members
  • PipPipPipPip
  • 320 posts
  • Name:Jeff
  • Location:Melbourne
  • Car:LC 2dr
  • Joined: 06-March 08

Posted 17 March 2012 - 07:22 PM

Next item on the fix list was the front valance...

It was a little rusty along the outer edges, but also had a large chunk of filler on the drivers side of the number plate...

Posted Image

Looks like a previous owner hit something substantial and it's gone right through to the engine bay... ???

Posted Image

After cutting the spotwelds along the rear join, I marked a line alone the front edge to cut off the bent panel...

Posted Image

Posted Image

After cleaning up the corners of the radiator panel, the holes with filled with the Henrob torch...

Posted Image

Posted Image

Posted Image

Posted Image

Also welded and cleaned up the split in the panel...

Posted Image

Trimmed up the Rares Spares front valance to weld it to what's left of the original...

Posted Image

Cleaned up the cavity...

Posted Image

and covered it with POR-15... ready to weld...

Posted Image

The panel was tacked into place along the front & two sides...

Posted Image

then fusion welded along the front & plug welded along the rear with the MIG...

Posted Image

Finished... :spoton:

Posted Image

#68 lc2dr

lc2dr

    Forum Fan

  • Members
  • PipPipPipPip
  • 320 posts
  • Name:Jeff
  • Location:Melbourne
  • Car:LC 2dr
  • Joined: 06-March 08

Posted 17 March 2012 - 08:03 PM

Next cab of the rank is the front cowl / bottom of the A pillars...

Didn't look so bad from the outside...

Posted Image

but....


Posted Image

Crap on the inside.... :cry:

Posted Image

Posted Image


Posted Image


Posted Image

Added some metal to the cutout section to fill the whole..

Posted Image

Some seam sealer on the top of the inner panel...

Posted Image

and on goes the section.

Posted Image

The repair turned out OK but was a fiddly pain in the a$$...

Posted Image


Pretty much the same on the left hand side....

Posted Image

Posted Image

Posted Image

Posted Image

Posted Image

Posted Image

#69 _Liam_

_Liam_
  • Guests

Posted 17 March 2012 - 08:37 PM

A Pillars are pricks of things aren't they. Good work mate, glad it turned out well for you.

#70 lc2dr

lc2dr

    Forum Fan

  • Members
  • PipPipPipPip
  • 320 posts
  • Name:Jeff
  • Location:Melbourne
  • Car:LC 2dr
  • Joined: 06-March 08

Posted 23 March 2012 - 07:28 PM

A Pillars are pricks of things aren't they. Good work mate, glad it turned out well for you.


Thanks - Yeah, they have been the most fiddly pain in the a$$ bit so far. But we're not done.... :-)

Cheers,
Jeff

#71 lc2dr

lc2dr

    Forum Fan

  • Members
  • PipPipPipPip
  • 320 posts
  • Name:Jeff
  • Location:Melbourne
  • Car:LC 2dr
  • Joined: 06-March 08

Posted 09 May 2012 - 07:05 AM

Hi Folks,

Finally got back to uploading some more photos - hopefully won't bore everybody to tears...

Another spot that I wasn't real happy with my first attempt at a repair. I tried taking the minimalist approach and initially repaired the lower LHR quarter with two small patches. Not a real good idea as the bit I left in had pitting behind it, ending up in a crappy weld job as the thin portion just disappeared when I pointed the MIG at it... :-)

Posted Image

Off comes the bottom...

Posted Image

The Rares section is a good starting point, but required some adjustment of the profile @ the bottom of the wheelarch...

Posted Image

Posted Image

Posted Image

voila...

Posted Image

Cleaned up the inner panel whilst I was there with some POR-15....

Posted Image

Time to put it back...

Posted Image

Posted Image

Posted Image

Posted Image

Posted Image

The repair turned out much better second time around.

#72 lc2dr

lc2dr

    Forum Fan

  • Members
  • PipPipPipPip
  • 320 posts
  • Name:Jeff
  • Location:Melbourne
  • Car:LC 2dr
  • Joined: 06-March 08

Posted 09 May 2012 - 07:21 AM

There was a small hole @ the end of the RH rail which was hiding behind the seam sealer...

Posted Image

I cut this out and made a little patch for it...

Posted Image

Posted Image

One less hole...

Posted Image

#73 lc2dr

lc2dr

    Forum Fan

  • Members
  • PipPipPipPip
  • 320 posts
  • Name:Jeff
  • Location:Melbourne
  • Car:LC 2dr
  • Joined: 06-March 08

Posted 09 May 2012 - 07:41 AM

The next bit to tackle was the inner rear panel of the RH wheel arch. A tad rusty to say the least....

I thought it would be best to do this before I removed the bottom portion of the RHR quarter in order to make sure the replacement secton is in the correct spot.

Posted Image

Posted Image

I cleaned up this section from the rear cut I purchased some time ago...

Posted Image

and removed the offending rusty bits...

Posted Image

Replacement section in place..

Posted Image

and oxy'd up.

Posted Image

#74 _BATHURST-32D_

_BATHURST-32D_
  • Guests

Posted 09 May 2012 - 05:54 PM

hi there jeff [lc2dr] great workmanship your doing there and its coming along nice,,, it will be good to see another lc on the road, just a little bit of advice for you
when replacing the bottem of your guards with after market parts you will need to trim them to look like the original on the drivers side and dont forget the hole for the splat to screw back on, have a close look at them and you will see what i meen, many people dont fix this when they do this same job...
i hope i have helped you some.
keep up the good work.

cheers gong

#75 lc2dr

lc2dr

    Forum Fan

  • Members
  • PipPipPipPip
  • 320 posts
  • Name:Jeff
  • Location:Melbourne
  • Car:LC 2dr
  • Joined: 06-March 08

Posted 09 May 2012 - 08:51 PM

Hey John,

Thanks heaps for you nice comments and encouragement, they're much appreciated. I too can't wait to see another LC on the road as it's been a long journey so far, but I can see the light @ the end of the tunnel.... :)

Wow, I never even noticed... I had to go out to the garage and take a look after reading your post! Thanks for the detail tip - always appreciated. :spoton:

Also, thanks again for your help with the seat pivot bolts, they look awesome on the retrimmed seats (will post a photo soon).

Cheers,
Jeff


0 user(s) are reading this topic

0 members, 0 guests, 0 anonymous users