Jump to content


Photo
* * * * * 1 votes

UCANG is back after 2 years


  • Please log in to reply
259 replies to this topic

#226 Heath

Heath

    I like cars.

  • Administrators
  • PipPipPipPipPipPipPip
  • 18,314 posts
  • Name:Heath
  • Location:Eastern Suburbs, Melbourne
  • Car:Heavily Modified UC Sunbird Hatchback
  • Joined: 07-November 05
Garage View Garage

Posted 01 April 2016 - 07:07 AM

Just to clarify, either the T5 or the W-series Toyota box will fit with basically no tunnel work (moving the shifter is about it I think).


It's only Tremec's TKO and T56, TR6060, T56 Magnum etc. that will require big tunnel work. But even still, altering a tunnel ain't all that huge a deal, you've got a good skillset.


#227 UCANG

UCANG

    Forum Fan

  • Members
  • PipPipPipPip
  • 448 posts
  • Name:Ang
  • Location:Adelaide, South Australia
  • Car:UC Hatch, UC Sedan, VL Turbo, ForFour Brabus, 2010 Fatboy
  • Joined: 28-January 06

Posted 01 April 2016 - 12:15 PM

That's good to know, Heath, cheers.


I'm not after a massive kick ass box, just something that could be mated up to an engine and hold its own moderately. I didn't "really" know my options for a manual.. I could just foresee myself picking up a nice V8 that's chev bolt pattern and then scratching my head wondering what cable driven box I could use.


You're right however, tunnel mods don't scare me, I just didn't want to do it :) Luckily the floor pan will get a good clean, seal and paint when the diff comes out, so work on the floor will happen later on once I pick up some driveline parts (whenever that may be).


Anyway, as good as it is planning, still concentrating on this body work!


#228 UCANG

UCANG

    Forum Fan

  • Members
  • PipPipPipPip
  • 448 posts
  • Name:Ang
  • Location:Adelaide, South Australia
  • Car:UC Hatch, UC Sedan, VL Turbo, ForFour Brabus, 2010 Fatboy
  • Joined: 28-January 06

Posted 02 April 2016 - 02:33 PM

So this week I decided to do some touch ups.

I didnt seam seal the outside of the door folds, so I decided to do that, then paint them again. Mainly because I didn't want rusty stains coming out from within the folds as will probably end up happening later on in life.

IMG_6112_zpsltze6xgo.jpg

IMG_6126_zpsk6pkiqhk.jpg


The passenger door latch area got sanded and reshot. The reason for this is when I shot the outside of the car I decided to sand down the tape line, of course I went too far and it showed a visible line of primer or something - this is single stage 2k anyway, this tends to happen, rather than a clear coat that you can smooth somewhat.

IMG_6115_zpsoet3yl2x.jpg

IMG_6116_zpsrgaxm7vz.jpg

IMG_6123_zpsptxpnjb4.jpg


And the big one. The passenger rear quarter. I had crazy runs that I blocked down, and broke down to bare metal and primer. I wasn't going to leave this but I wasnt wanting to repaint the whole panel. Also I hear single stage is not ideal for blending. But after some research and positive attitude, I gave it a crack, and it turned out awesome. I'm going to have to let this sit for maybe a month or longer before cutting and polishing it. Even though it's hardly noticeble right now. That tells me that the repair was successful. If you can see issues while its wet, you know its not going to fix itself once it dries.

IMG_6113_zpspo20ymah.jpg

IMG_6118_zpscpaufdc1.jpg

IMG_6120_zpsoahj9g40.jpg

IMG_6119_zpslbdy6oxt.jpg

IMG_6117_zpskh78dqg3.jpg


This is how it looks unmasked:

IMG_6121_zpsin1tigta.jpg

IMG_6125_zpsmnqxsrya.jpg

IMG_6124_zpsw77su0gw.jpg


If anything, I hope some people out there can see that A: i'm a pedantic dickhead, and B: you can successfully fix issues that arise. Don't get disheartened when you make an error. We are all human after all - and i'm no pro!


#229 Heath

Heath

    I like cars.

  • Administrators
  • PipPipPipPipPipPipPip
  • 18,314 posts
  • Name:Heath
  • Location:Eastern Suburbs, Melbourne
  • Car:Heavily Modified UC Sunbird Hatchback
  • Joined: 07-November 05
Garage View Garage

Posted 02 April 2016 - 08:15 PM

You'll be really happy that you've revisited these little things :)


#230 _Mox_

_Mox_
  • Guests

Posted 02 April 2016 - 09:06 PM

:clappin: :clappin: :Well done Mate i will be watching for motivation and tips, Cheers


Edited by Mox, 02 April 2016 - 09:07 PM.


#231 _greg2240_

_greg2240_
  • Guests

Posted 08 April 2016 - 11:21 PM

nice blend, a credit to you.


#232 UCANG

UCANG

    Forum Fan

  • Members
  • PipPipPipPip
  • 448 posts
  • Name:Ang
  • Location:Adelaide, South Australia
  • Car:UC Hatch, UC Sedan, VL Turbo, ForFour Brabus, 2010 Fatboy
  • Joined: 28-January 06

Posted 09 April 2016 - 10:09 PM

Pretty happy with how it's looking now.

IMG_6180_zpsb3dlle2p.jpg

IMG_6182_zpsh4uymv9y.jpg

IMG_6183_zpsa6xgl8db.jpg


#233 UCANG

UCANG

    Forum Fan

  • Members
  • PipPipPipPip
  • 448 posts
  • Name:Ang
  • Location:Adelaide, South Australia
  • Car:UC Hatch, UC Sedan, VL Turbo, ForFour Brabus, 2010 Fatboy
  • Joined: 28-January 06

Posted 12 April 2016 - 08:57 PM

I picked up a beefed up T5 from an EB XR6 - world class box - including near new heavy duty clutch - for cheap.


Does anyone know if input shafts are easily unbolted and replaced? This one has a slight crack where the throw out bearing usually sits.


So now looking for a 304 I reckon, and I might even go the EFI route. Would love to find a "freshly rebuilt" motor :)


Cheers


#234 _greenmachine215_

_greenmachine215_
  • Guests

Posted 20 April 2016 - 12:04 AM

nice!

id almost drop $50 and say you've sat on the floor of the drivers side and held the wheel with or without a can in your hand, just imagining the day its driving!


i done that all the time, still do when its broken down lol


#235 UCANG

UCANG

    Forum Fan

  • Members
  • PipPipPipPip
  • 448 posts
  • Name:Ang
  • Location:Adelaide, South Australia
  • Car:UC Hatch, UC Sedan, VL Turbo, ForFour Brabus, 2010 Fatboy
  • Joined: 28-January 06

Posted 01 May 2016 - 09:18 PM

You're not wrong there Marc :)


Small update, pretty much been on a buying frenzy..


This is my T5. I'm ordering the bellhousing, thrust bearing, fork, spigot, pivot ball and anything else I need for the conversion as we speak.

I might go to Xtreme clutches for the pressure plate and ford clutch. I'll save nearly $100 on the pressure plate alone if I don't buy the one CRS offers ($240).

There is a crack on the bearing retainer snout. I know Malwood sells these for about $100 but I don't know where else I can get one? Might have to try the local E series Ford wrecker or fix it somehow - maybe not, I dont know?


IMG_6301_zpsxvitc6j0.jpg

IMG_6302_zpswhp56woz.jpg


VN SS motor. Ive done welsh plugs, cam plug, sump and pickup, engine mounts and bracket, gaskets, nice coat of black paint. Ive Ali Brite'ed the manifold (not shown in this pic), so waiting on some new bolts and will put that on. Ive bought a flywheel, so waiting on new bolts for that too, then might give it a slight cut on the lathe and install that.

Also included was VN wiring loom and computer. The memcal has already been edited to accept an electric thermo fan input - yeah that means nothing to me right now :P

1C6B0E27-8A01-4392-A0AE-3756A908AAD2_zps

IMG_6279_zpsvwauhwjh.jpg


And finally picked up an LSD diff from R31 skyline.

IMG_6303_zps5lpkzblg.jpg


And just want to give a shout out to greenmachine215 (Marc) and A9X UC (Mike) for going above and beyond and offering their experiences should a question arise! You guys don't have to, especially being interstate, but I do appreciate it!


And my mates kingsly and wally308 for allowing there beasts to be visual motivation. Sometimes these cars (as simple as they are) can still be jigsaw puzzles - and it's always good to refer to another car for tips when you get stuck.


Cheers fellas


#236 UCANG

UCANG

    Forum Fan

  • Members
  • PipPipPipPip
  • 448 posts
  • Name:Ang
  • Location:Adelaide, South Australia
  • Car:UC Hatch, UC Sedan, VL Turbo, ForFour Brabus, 2010 Fatboy
  • Joined: 28-January 06

Posted 26 June 2016 - 12:04 AM

Not without its issues that takes time and money o course! Anyway so heres where i'm at.


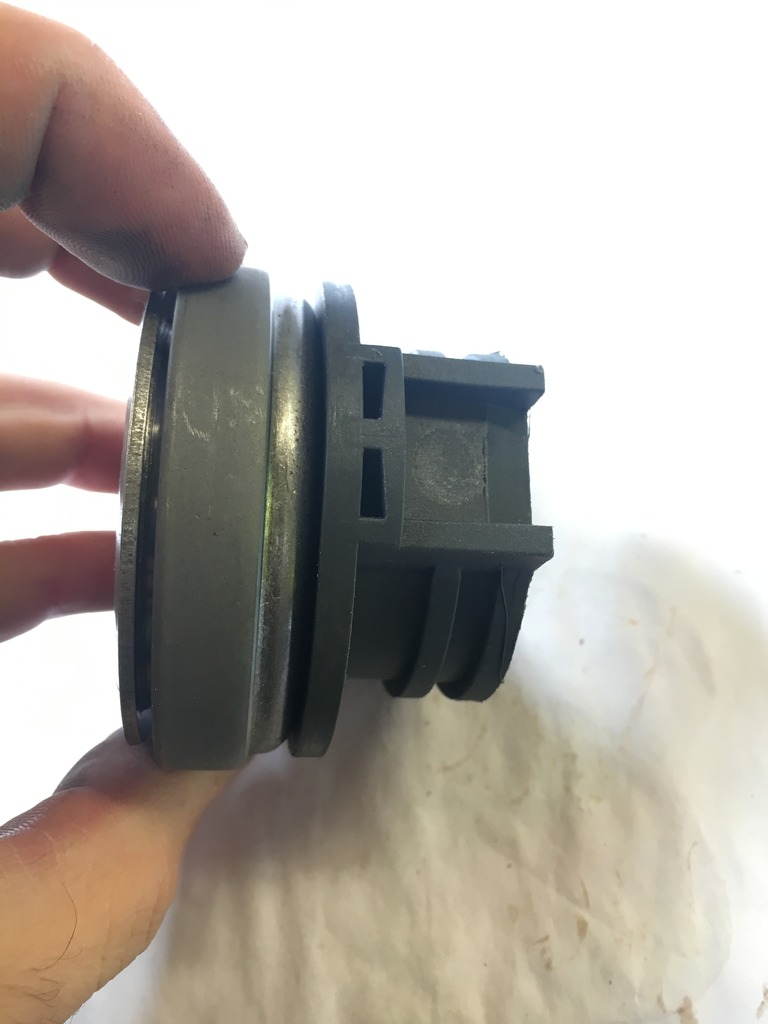
I had issues with clutch fork hitting the back of the bellhousing and still putting a bit too much pressure on the fingers. I contacted CRS and asked for a shorter throwout bearing carrier than what was provided. This fixed my problem. Adjusted it up and bolted to the engine.

IMG_6365_zpsdf7rabxc.jpg


Had issues with starter motors too! I bought a cheapy off ebay, then heard too many horror stories about the casing being cheap and cracking so I bought a Bosch unit. Plus this Bosch had the solenoid on top, whereas the ebay unit had the solenoid on the side - was worried about the extractors fouling.

aaaaaaand, the expensive Bosch unit cracked upon torque!!! Why there is a cavity where the long bolt goes I have no idea - why can't it be solid!!!?!?

IMG_6359_zpsotxssbwu.jpg

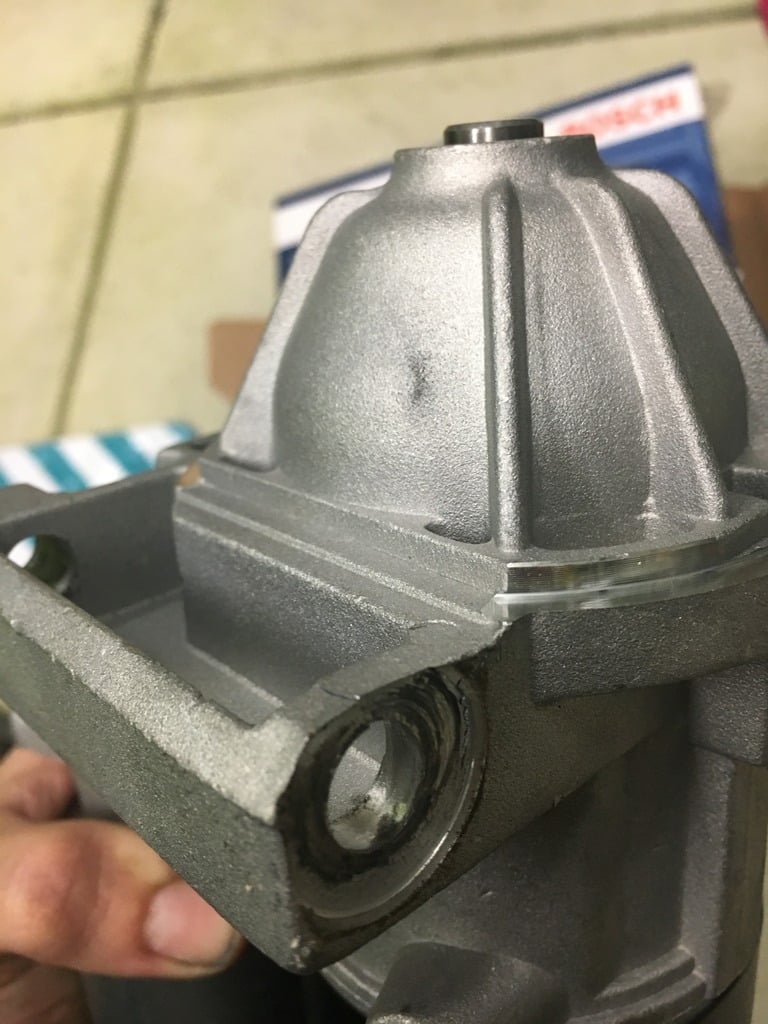
It's casting is identical to the cheap units!!!! So screw it, I put the cheap one on, torqued it up no worries! Plus the extractors clear the solenoid with ease!

IMG_6362_zpswbs6c1gf.jpg


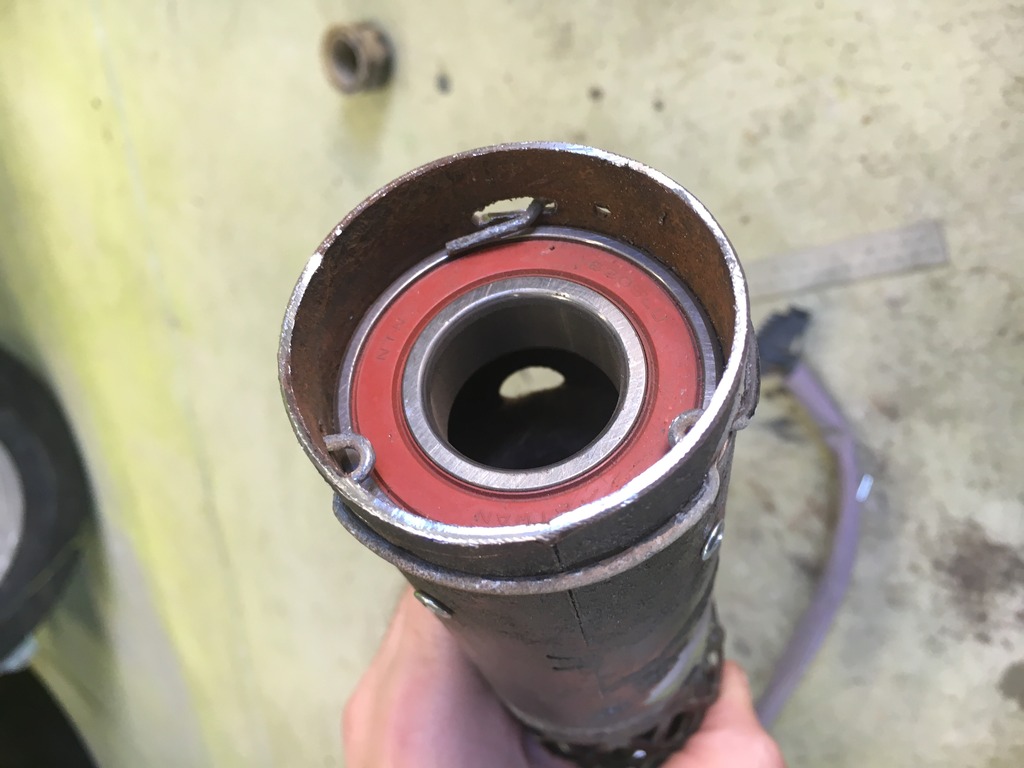
Next was the new bearing for the steering column. My old bearing sheared from the plastic retainer and was flopping about on the knuckle underneath it.

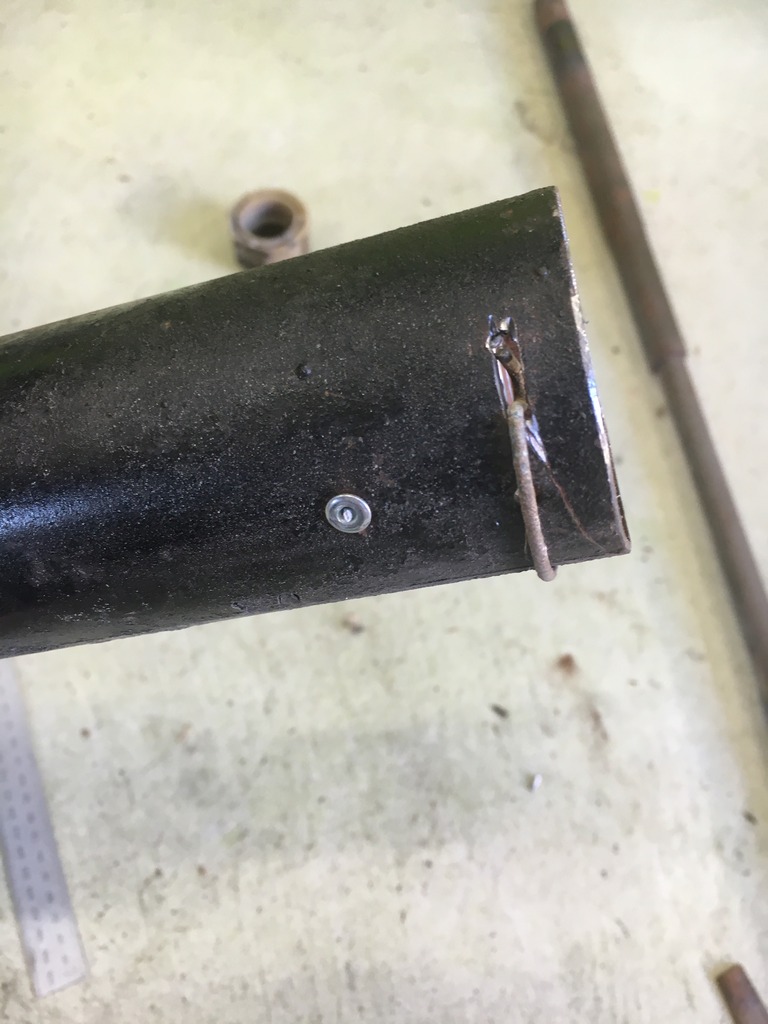
Started with the outer tube.

IMG_6419_zpsl0xtf4yv.jpg

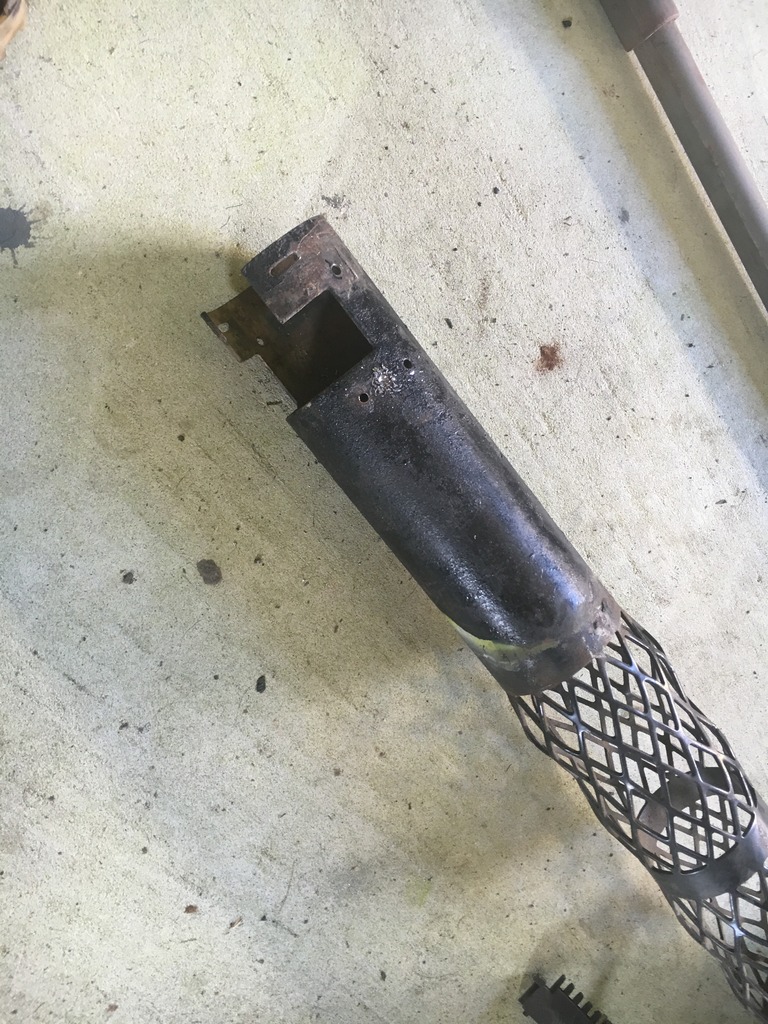
Cut the excess, slid the bearing in, used rivets to stop it going up the tube (even though its a press fit, she aint going anywhere). I also retained the original clip to stop it falling out the bottom - should it ever.

IMG_6421_zpsryu7qqaa.jpg

IMG_6420_zpsepsxsyxo.jpg


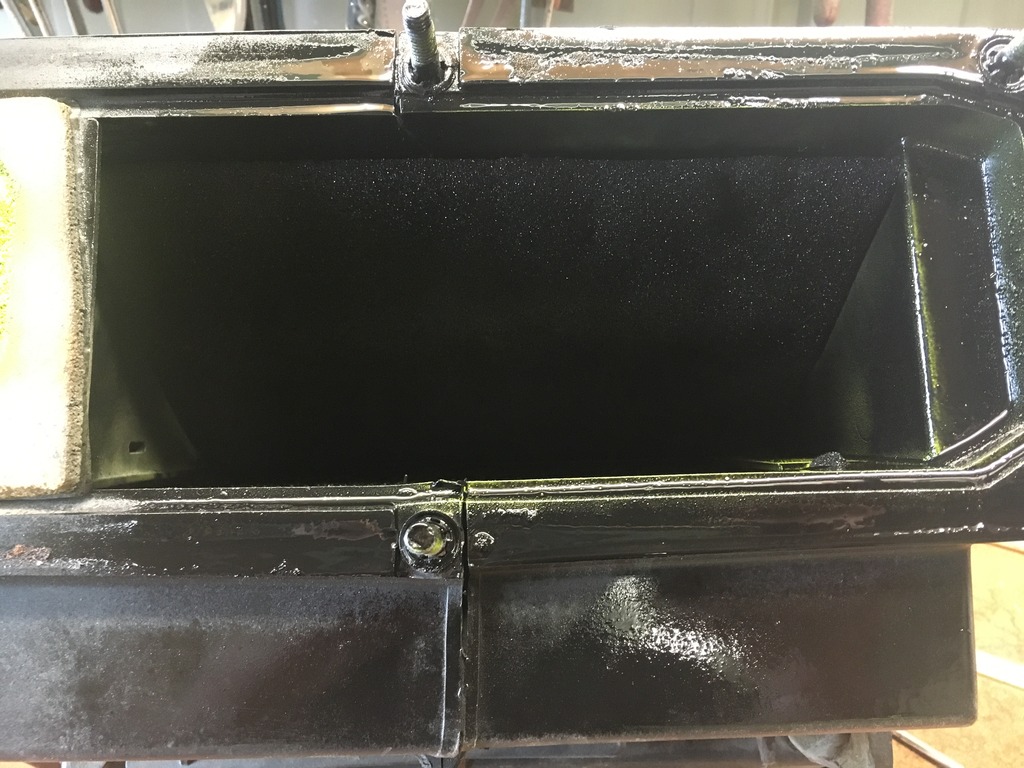
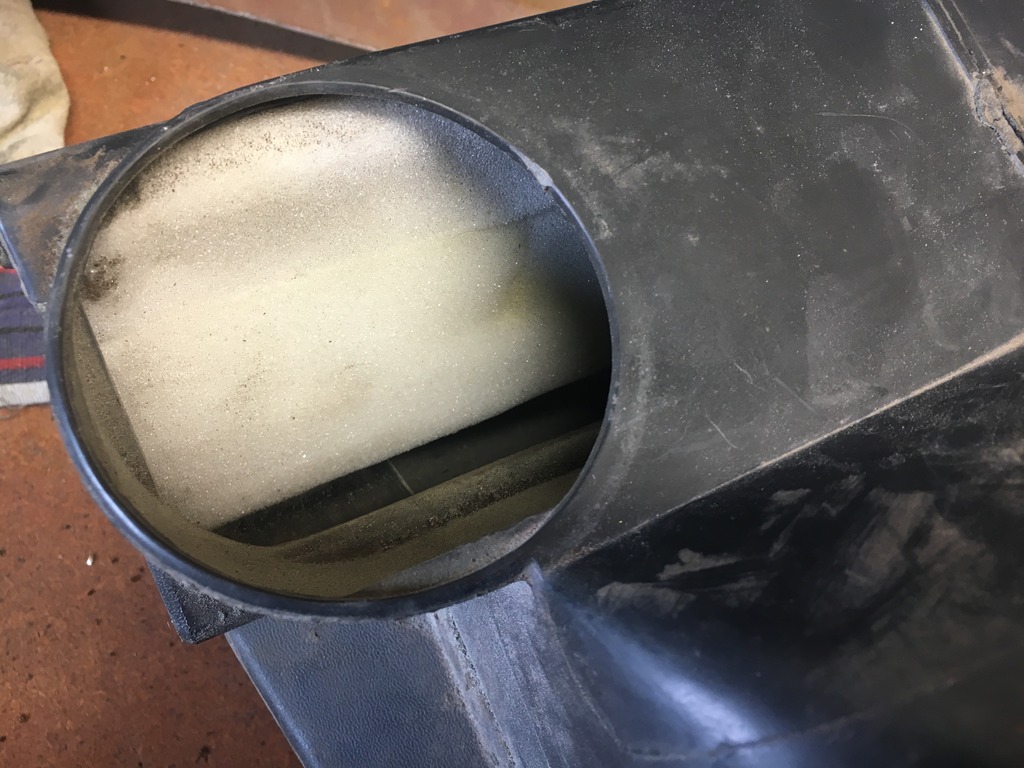
Heater box seen better days

IMG_6512_zpsglzkxjdc.jpg

IMG_6513_zpsitiu1kim.jpg

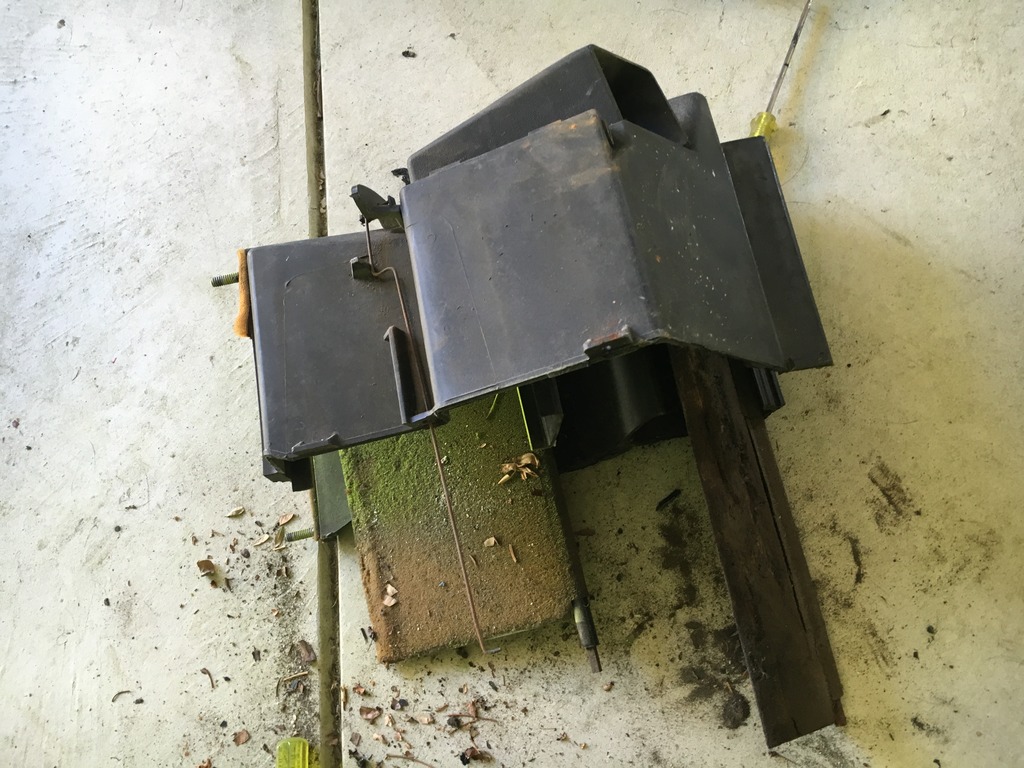
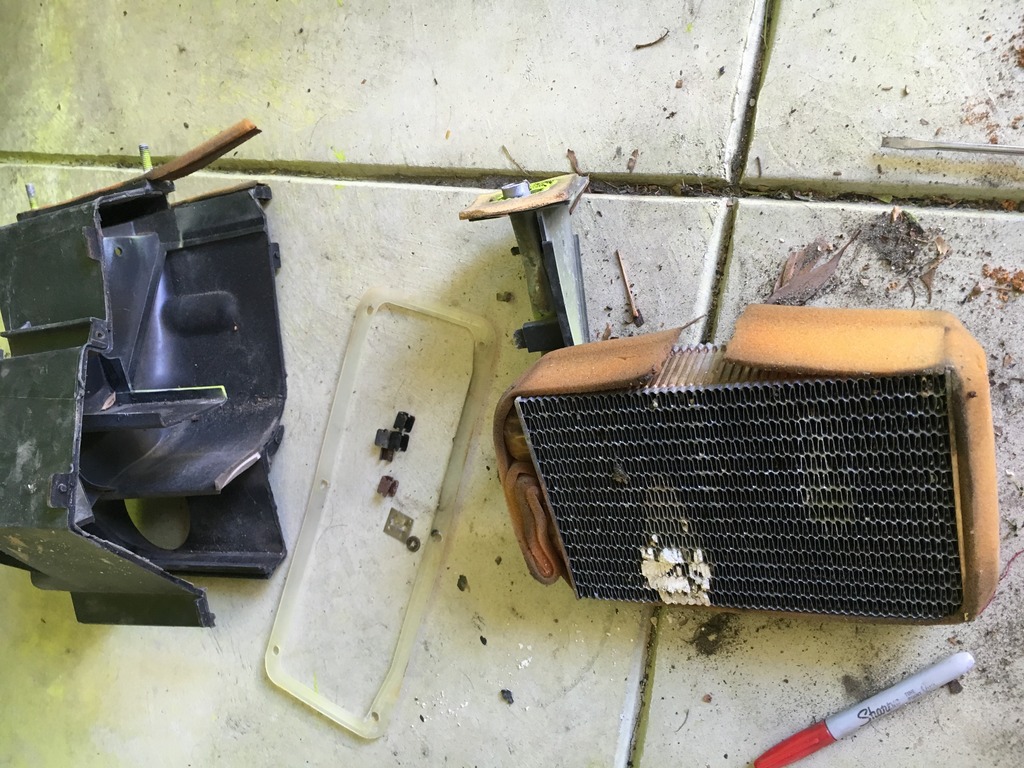
Thankfully I got the core tested and its perfect. Threw it back in with some new foam on the flaps and in it goes.
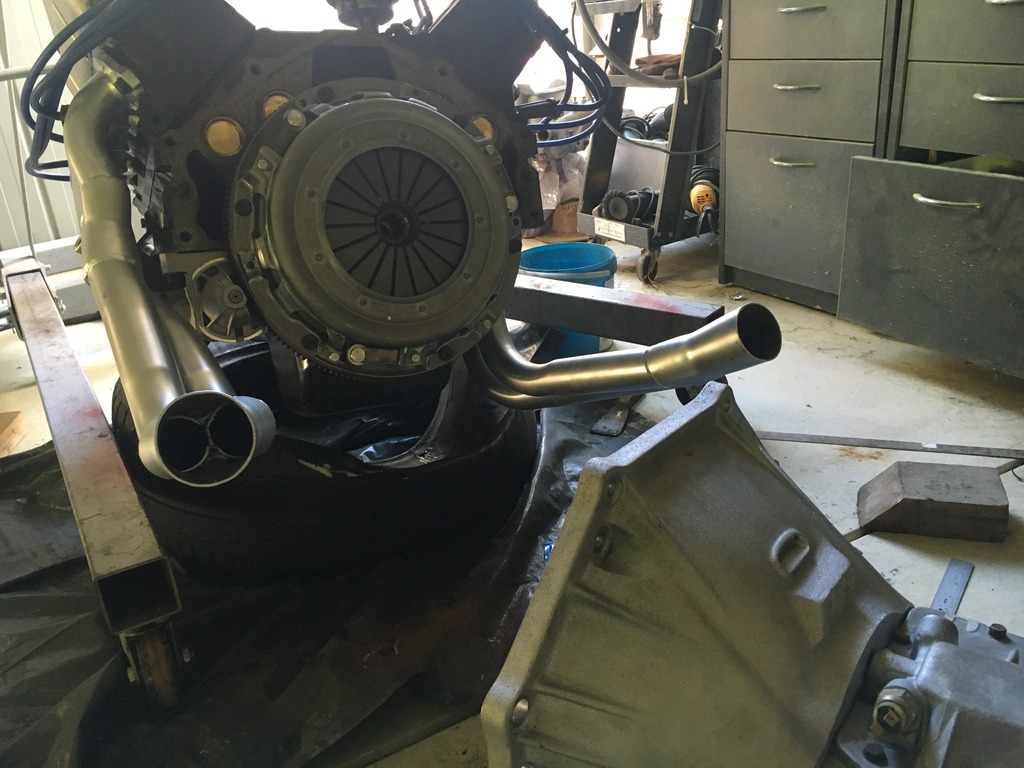
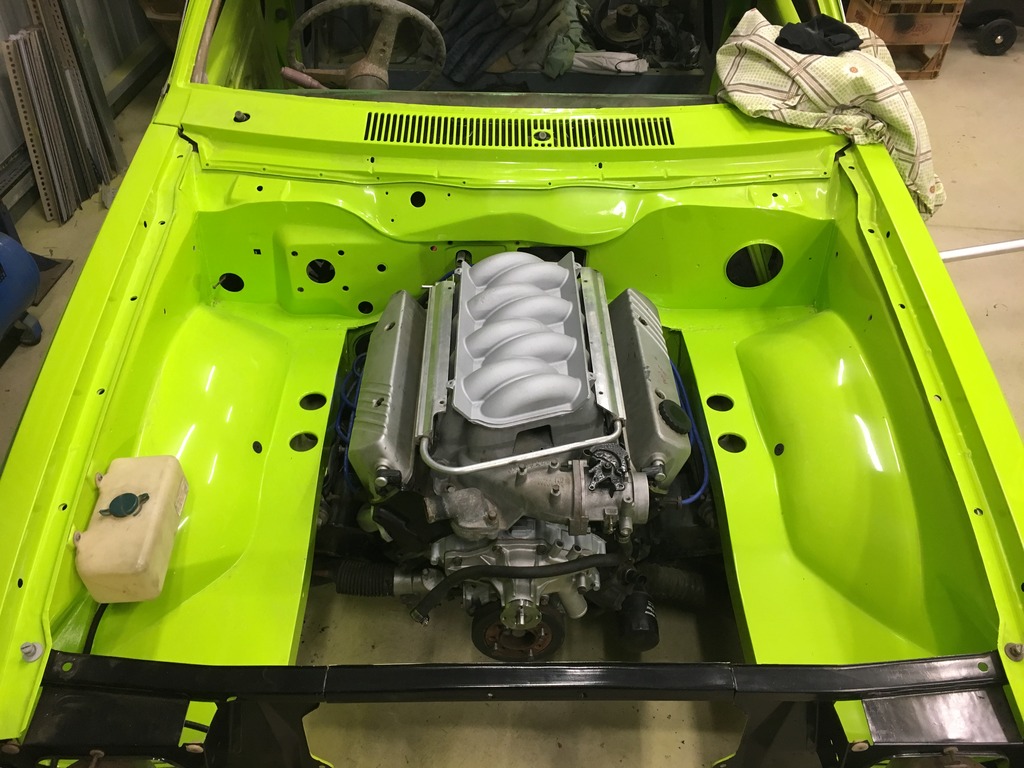
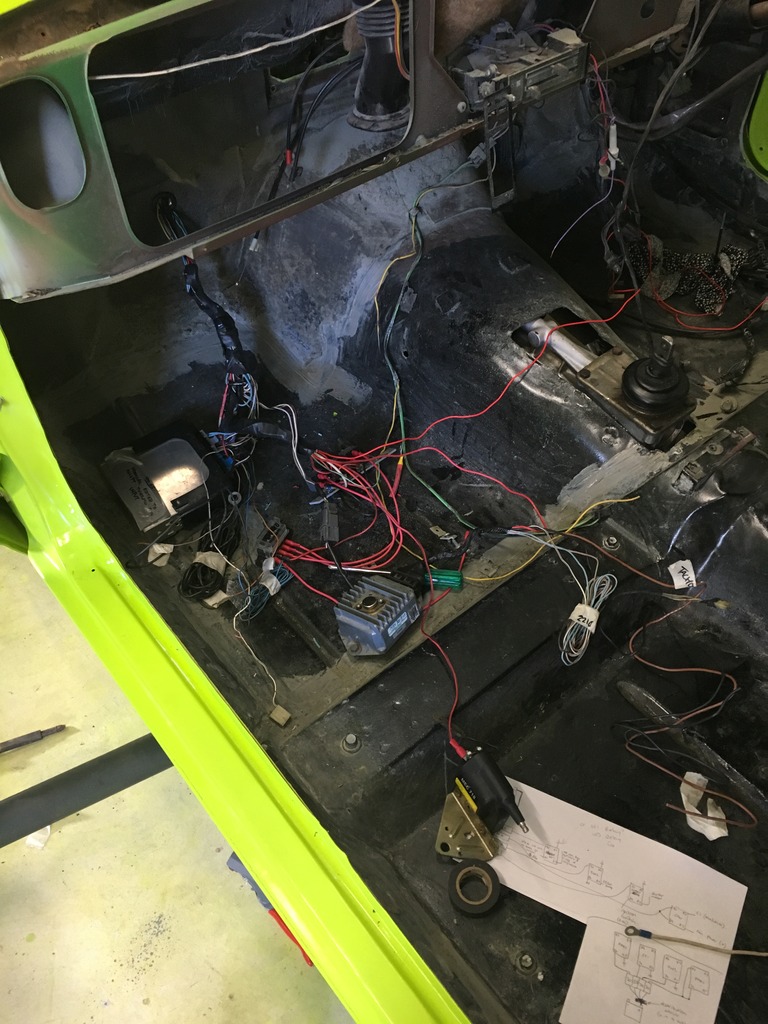
IMG_6530_zpsgt6zg17s.jpg

IMG_6531_zpseiwp6m7m.jpg


Engine in

IMG_6538_zpshkoxwfu7.jpg

IMG_6537_zpsawpwsjlq.jpg


Stripped all the wiring off the VN loom one by one. Turfed the wires I didnt want and repinned the ones I did into the connectors again (I hate spaghetti).

IMG_6363_zpstkyjilmy.jpg

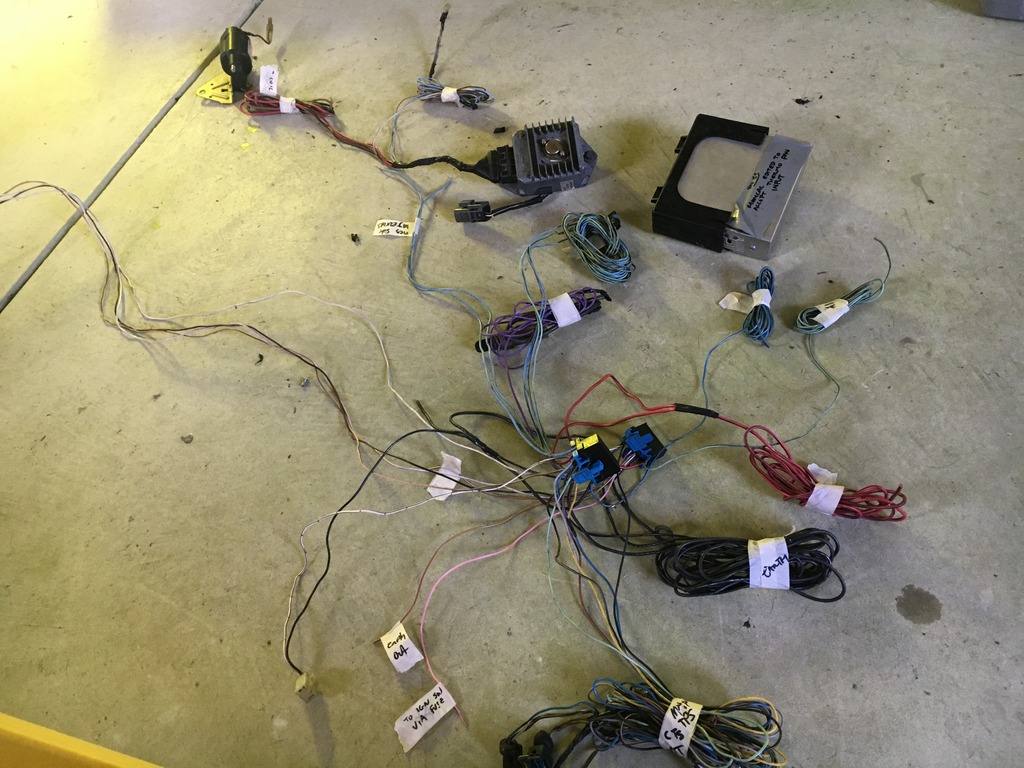
Still a work in progress, but ive separated into 2 sections. Interior and exterior wires - easy as

IMG_6579_zpsrufwowi4.jpg


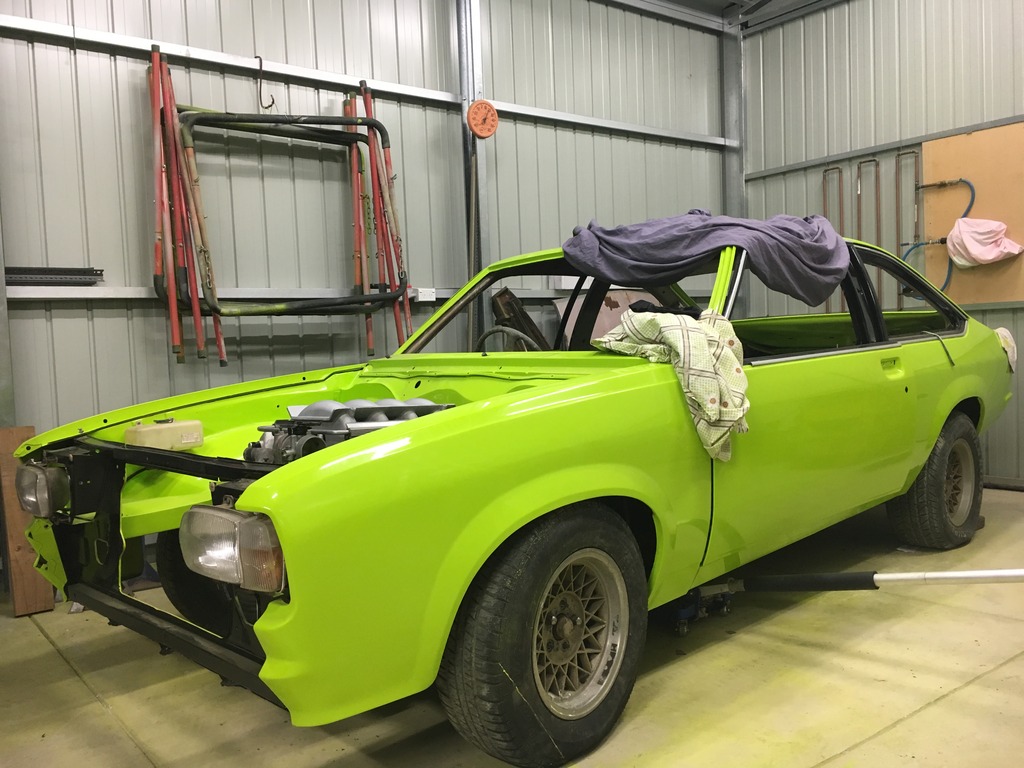
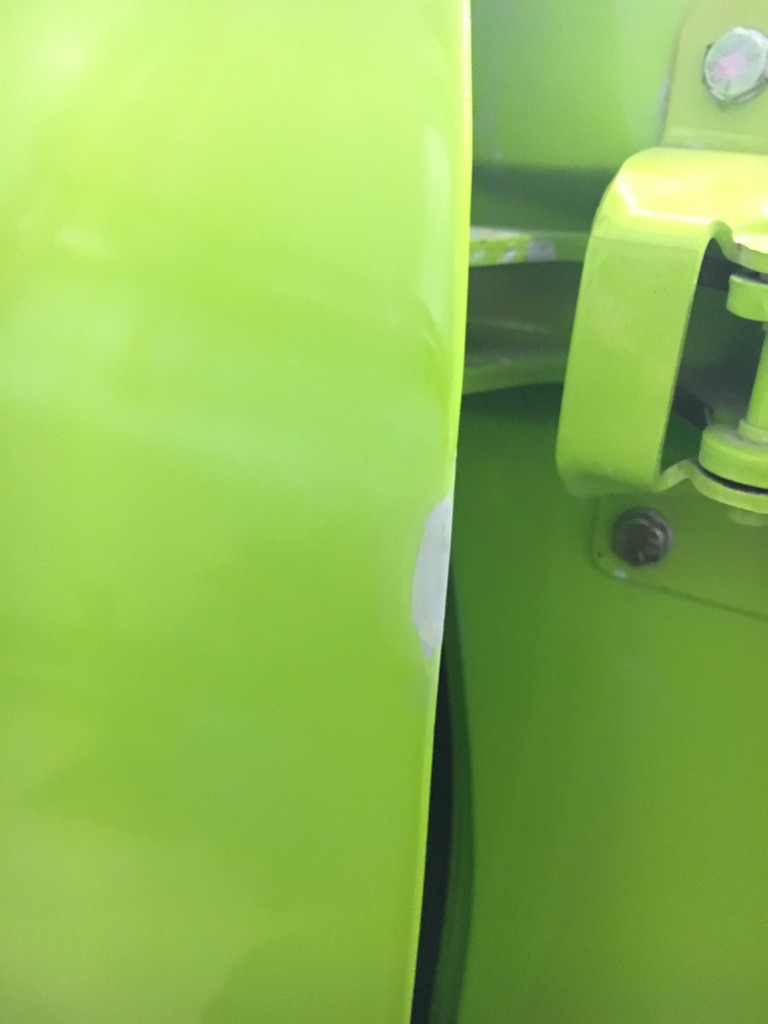
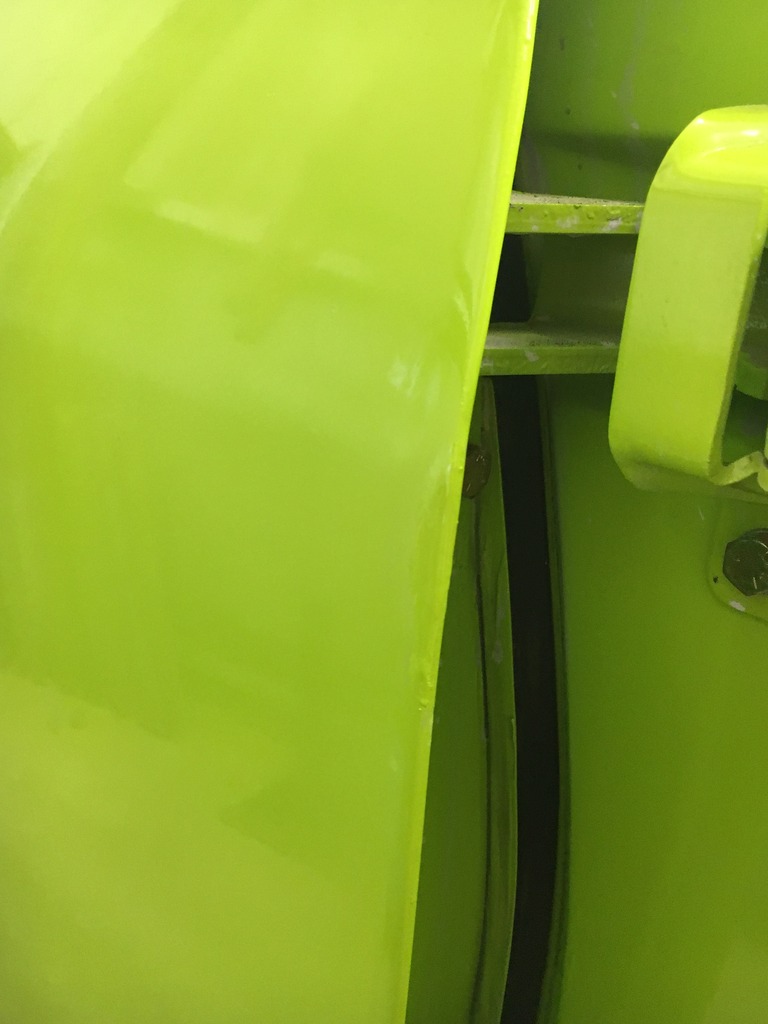
Chipped the edge of the door!! The front guard slid down a little bit and the door caught it when I opened it. So very carefully I feathered the edge of the chip down, used a razor blade to apply some fine filler to bring the level up, brush touched some epoxy, when that dried I carefully blocked it down and brush touched some paint. Once this sets up and I wet sand and polish it, it should be near invisible! Good fun

IMG_6576_zpszirzowdz.jpg

IMG_6578_zpsdnikapmz.jpg


Edited by UCANG, 26 June 2016 - 12:07 AM.


#237 Covert

Covert

    Forum Fixture

  • Members
  • PipPipPipPipPip
  • 1,987 posts
  • Location:In my LH
  • Car:LH
  • Joined: 08-November 13

Posted 26 June 2016 - 01:42 PM

Nice update, been busy, always a spanner in the works at different stages of a build. Looks like you've overcome the issues fairly easily and carried on, well done

#238 UCANG

UCANG

    Forum Fan

  • Members
  • PipPipPipPip
  • 448 posts
  • Name:Ang
  • Location:Adelaide, South Australia
  • Car:UC Hatch, UC Sedan, VL Turbo, ForFour Brabus, 2010 Fatboy
  • Joined: 28-January 06

Posted 19 January 2017 - 03:22 PM

Not a big update and to be honest I haven't really done much as I spend most of my time at the end of 2016 being busy with the other 2 sedans and BMX bikes lol.


I have finally decided colour (or shade) scheme on the engine. I decided against my original plan of polished alloy and green accents.

So I sourced some VT covers, did some painting assembled manifold and rocker covers with new gaskets.


Also started working on my replacement bonnet, as my original one got binned.


IMG_7389_zps9cfrk1tf.jpg

IMG_7750_zpsdx4hgalc.jpg

IMG_7753_zpspvcqwqja.jpg

IMG_7752_zpsc0uabihf.jpg

IMG_7794_zps89dsf2eq.jpg

IMG_7795_zpslwrvghlu.jpg


Edited by UCANG, 19 January 2017 - 03:37 PM.


#239 UCANG

UCANG

    Forum Fan

  • Members
  • PipPipPipPip
  • 448 posts
  • Name:Ang
  • Location:Adelaide, South Australia
  • Car:UC Hatch, UC Sedan, VL Turbo, ForFour Brabus, 2010 Fatboy
  • Joined: 28-January 06

Posted 19 January 2017 - 03:36 PM

I have been a spectator of HTC's All Torana Day since it's inception, but 2016 was a good year for me as I entered a car for the oval. Actually not 1, but 2.


I drove the red 4 speed, 6cyl Sunbird down and the wife took the brown one for me.


The day ended on a very big high as I took out 1st place for Orignal UC! :rockon: and my mate took out first prize for Modified UC with his blue hatch. So it was a clean sweep for the shnitty boys!


IMG_7278_zpsi25wkpyg.jpg

IMG_7266_zpsxbkgg6h2.jpg

IMG_7254_zpstuhuvbiq.jpg

IMG_7252_zps5buvur6n.jpg

IMG_7274_zpsi0zbnagl.jpg

IMG_7273_zpsarrvw2b9.jpg

IMG_7268_zpsogudvp91.jpg


#240 _Lazarus_

_Lazarus_
  • Guests

Posted 19 January 2017 - 07:23 PM

Congratulations on the prize mate.


The black motor looks choice.


#241 _greenmachine215_

_greenmachine215_
  • Guests

Posted 03 February 2017 - 07:45 PM

Cheers for the shout out bro! Always happy to help anyone where I can.
Just going through your latest progress. It's getting there well, how's
The wiring going? Engine looks wicked in black

#242 UCANG

UCANG

    Forum Fan

  • Members
  • PipPipPipPip
  • 448 posts
  • Name:Ang
  • Location:Adelaide, South Australia
  • Car:UC Hatch, UC Sedan, VL Turbo, ForFour Brabus, 2010 Fatboy
  • Joined: 28-January 06

Posted 04 February 2017 - 05:23 PM

My pleasure!

3AC07E7B-CE8A-4DBD-B646-75606926D997_zps

Wiring was pretty easy and therapeutic!
Everything is pretty much in the passenger side foot well.
The MAP sensor is attached to radiator support on the inside under passenger guard, and the coil is attached to the right fuel rail, hidden underneath the cover.

Next job is the bonnet!

#243 UCANG

UCANG

    Forum Fan

  • Members
  • PipPipPipPip
  • 448 posts
  • Name:Ang
  • Location:Adelaide, South Australia
  • Car:UC Hatch, UC Sedan, VL Turbo, ForFour Brabus, 2010 Fatboy
  • Joined: 28-January 06

Posted 04 February 2017 - 07:43 PM

Was bored today (granny flat renovations are in limbo while waiting for "family friend" tradies) so I wanted to practice doing some dash repairs - just to see how it'll turn out. Probably won't use it, but it was a fun job.


This is the crappy dash that came in the hatch. Its in normal aged condition ie: cracked. It also has a shit tonne of welding spatter, grinding dust and paint overspray!

IMG_7870_zpszalpnb6v.jpg

IMG_7872_zpshcu3thiv.jpg


i opened up the cracks, and removed a heap of foam from inside.

IMG_7873_zpsohvlubaa.jpg


I filled the gaps with foam and put some filler over the top and smoothed out. (I should of used a flexible type filler, but this is all I had laying around).

IMG_7875_zpspipktgpg.jpg


After a clean, I then proceeded with a rubberised texture coating over the whole lot. And there we go. Should be able to paint over the top but i'll leave it in black as I run some tests. It's not perfect but better than throwing the dash away. My next step is to leave the dash out in the harsh heat and see what happens! I expect it to crack LOL!


IMG_7886_zpsyccq0aeg.jpg

IMG_7888_zpsvxgyquxz.jpg


Worse case scenario I can mount the instrument cluster, centre dash piece and a glovebox and make a cool man cave wall art!


Edited by UCANG, 04 February 2017 - 07:45 PM.


#244 Bigfella237

Bigfella237

    Socially Distant

  • Members
  • PipPipPipPipPipPipPip
  • 4,374 posts
  • Name:Andrew
  • Location:Far South Coast of NSW
  • Car:(s) not as many as I'd like but more than I've got space for!
  • Joined: 31-October 14

Posted 04 February 2017 - 09:07 PM

The MAP sensor is attached to radiator support on the inside under passenger guard


I thought MAP sensors had to be mounted higher than the port they connect to on the manifold so they can't accumulate fuel and/or oil (via PCV)?


#245 UCANG

UCANG

    Forum Fan

  • Members
  • PipPipPipPip
  • 448 posts
  • Name:Ang
  • Location:Adelaide, South Australia
  • Car:UC Hatch, UC Sedan, VL Turbo, ForFour Brabus, 2010 Fatboy
  • Joined: 28-January 06

Posted 04 February 2017 - 09:43 PM

I thought MAP sensors had to be mounted higher than the port they connect to on the manifold so they can't accumulate fuel and/or oil (via PCV)?


You are probably right, I have no idea to be honest. I just put it somewhere out of sight.


#246 UCANG

UCANG

    Forum Fan

  • Members
  • PipPipPipPip
  • 448 posts
  • Name:Ang
  • Location:Adelaide, South Australia
  • Car:UC Hatch, UC Sedan, VL Turbo, ForFour Brabus, 2010 Fatboy
  • Joined: 28-January 06

Posted 26 March 2017 - 06:42 PM

This weekends job:


Finally got myself a hatch false floor cut to reinstall into my car.


As you can see, the section that goes around the passenger side inner wheel tub was already gone from the donor UC hatch. But that's okay, as long as I had the right side, I was going to get the left side made up. Initially I was going to get a sheety to make one for me, but first I decided to do it myself.


This is the cut from Victoria

IMG_8154_zps5zkckirg.jpg


There was still the remaining strip spot welded to the channel (Initially, I cut the back section out with a grinder, right up the top), so I drilled out the spotties and removed the metal from underneath - which also doubled in giving me the holes for new plug welds.

IMG_8163_zpsewjafa9f.jpg


And all welded in. Just needs the plugs around the tubs ground down, and a coating of paint, ready to be trimmed later on!


p.s. Notice the section around the left wheel tub? Made it myself!

Untitled_zpsogqututi.png


Edited by UCANG, 27 October 2017 - 02:14 PM.


#247 UCANG

UCANG

    Forum Fan

  • Members
  • PipPipPipPip
  • 448 posts
  • Name:Ang
  • Location:Adelaide, South Australia
  • Car:UC Hatch, UC Sedan, VL Turbo, ForFour Brabus, 2010 Fatboy
  • Joined: 28-January 06

Posted 27 October 2017 - 03:11 PM

Wow, its been a long time. Ill post some updates here.


Hatch floor replacement shelf has been completed.

IMG_8227_zpscb4zlgq2.jpg

Smoothed out the rail, and primed it. (not pictured). Ready to be painted.

IMG_8384_zpsdl3lekvq.jpg


Fixed some rust on the underside of the bonnet underneath the skin.

IMG_8244_zpszrewprji.jpg

IMG_8245_zpsw0lmovxd.jpg

IMG_8247_zpstt9wbpfg.jpg


After doing some work to the skin of the bonnet (usual hand dent in the front middle)

IMG_8274_zpskkrgw0gu.jpg

IMG_8275_zpshinfniox.jpg


I proceeded to Epoxy primer, blocked back and high fill put on. Painted the underside of the bonnet first.

IMG_8281_zpscppbeor7.jpg

IMG_8279_zpsul4v7qro.jpg

IMG_8280_zps9mugxbdk.jpg

IMG_8320_zpsnbx2lijk.jpg

IMG_8321_zpsnht5pmyq.jpg

IMG_8378_zpsr86gvvrb.jpg


Blocking of the high fill.

P1010004_zpsszn8s0ym.jpg

IMG_9254_zpse63afieh.jpg

IMG_8423_zpsekrefbyi.jpg

Final prime and wet sand

IMG_9275_zpse860isvu.jpg

IMG_9287_zpsc5sbfr0i.jpg

IMG_9303_zpslpksp9v8.jpg


and colour! (rather than doing a blend on the door that I chipped, with durability in mind I reshot the whole door. With 2 coats came out pretty good off the gun.

IMG_9313_zpsnguiiuhu.jpg

IMG_9314_zpsxyn7ovit.jpg

IMG_9316_zps0dxevnok.jpg

IMG_9317_zpssjqfsqm1.jpg


Cheers


#248 Ice

Ice

    Cool

  • Members
  • PipPipPipPipPipPipPip
  • 15,123 posts
  • Name:Gene
  • Location:Galaxy's away from Ipswich
  • Car:77 HZ Sandman Van
  • Joined: 03-January 07

Posted 27 October 2017 - 07:43 PM

Bloody hell you got some depth on that paint ✌️

#249 UCANG

UCANG

    Forum Fan

  • Members
  • PipPipPipPip
  • 448 posts
  • Name:Ang
  • Location:Adelaide, South Australia
  • Car:UC Hatch, UC Sedan, VL Turbo, ForFour Brabus, 2010 Fatboy
  • Joined: 28-January 06

Posted 08 November 2017 - 10:13 PM

Mocked up the front panels and pushed her out in the sun. Since these pics I have already started putting some things together like grille, handles etc.


I have written a very long list of things to do now - i'll chip away at it one by one.

IMG_9416_zpssa1u3cxr.jpg

IMG_9413_zpstgkwmldw.jpg

IMG_9414_zpsihgpqdnb.jpg

IMG_9415_zpsfcghetdu.jpg

IMG_9412_zpsldzyqw3t.jpg

IMG_9407_zpsc5ufohfl.jpg

IMG_9410_zpsjavu18ii.jpg

IMG_9411_zpsmnflgcmo.jpg

IMG_9409_zpspi9mpt0i.jpg

IMG_9408_zpsqduqtcwn.jpg

IMG_9401_zpsxuykvfv2.jpg

IMG_9404_zpsoc7y7qgk.jpg

IMG_9402_zpsderwlqse.jpg

IMG_9405_zpspr3qy8jl.jpg

IMG_9406_zpsfizuq66k.jpg


Issue.. With these new door skins, I didn't test fit the handles (stupidly assumed they were right). Nope. I had to elongate the holes to get the handle low enough so it wouldn't foul on the handle cavity. So now when peeking through the top of the door handle you can see the larger-than-neccessary holes. IM NOT going to fix this, I need to teach myself to live with it and get over it. Otherwise I will shelve this project indefinitely. So de-motivating, I've had enough.

IMG_9433_zpsjxu5rtna.jpg


#250 Redslur

Redslur

    Has been Torana owner

  • Members
  • PipPipPipPipPipPip
  • 3,532 posts
  • Name:Gerry
  • Location:Canberra
  • Car:HQ GTS Replica 350.
  • Joined: 08-November 05

Posted 09 November 2017 - 11:07 AM

Looking great.  If only the old UC's originally got the V8 engine.......


0 user(s) are reading this topic

0 members, 0 guests, 0 anonymous users