
im guessing camera phone or something similar!
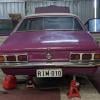
My newer Monaro
Started by
_jabba_
, Apr 09 2006 11:22 PM
529 replies to this topic
#127
 _Yella SLuR_
_Yella SLuR_
-

- Guests
Posted 30 August 2007 - 02:56 PM
Mmmm, bags not riding shotgun!!!
#128
_GTR_069_
_GTR_069_
-
- Guests
Posted 30 August 2007 - 07:25 PM
wow just come across the topic and being a monaro fan , i love it cant wait to see how it comes cant believe you have done it all in the carport, great work, wifes looking at it and going to me when you painting mine, lol, if only I had the time,
Mate keep it up cant wait to see her out of shed for some real good updated pictures
Thanks
GTR
Mate keep it up cant wait to see her out of shed for some real good updated pictures
Thanks
GTR
#129
_jabba_
_jabba_
-
- Guests
Posted 30 August 2007 - 09:10 PM
Night time + Camera phone, sorry :(
Ill borrow a digital camera when i'm welding in the floors so you can actually see whats going on .
.
Ill borrow a digital camera when i'm welding in the floors so you can actually see whats going on
.
#130
_jabba_
_jabba_
-
- Guests
Posted 16 September 2007 - 05:31 PM
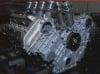
I've moved the engine to my new house, gave it a quick wire brush and paint.


Gear Box just needs a clean

Gear Box just needs a clean
#131
toryman76
-

- Members
-

- 1,082 posts
Forum Fixture
- Location:Melbourne, Vic
- Joined: 16-January 06
Posted 16 September 2007 - 05:34 PM
what paint did you use on the engine? so its as easy as wire brushing it if you want to keep the engine complete is it? looks good mate!
#132
_jabba_
_jabba_
-
- Guests
Posted 16 September 2007 - 05:38 PM
Some better quailty pics of my ugly floors.


#133
RIM-010
 View Garage
-
- Members
-
- 8,079 posts
DON'T PANIC
- Name:Tim
- Location:Cowell, SA
- Car:LJ 2 Door - HQ Premier
- Joined: 01-March 06
View Garage
Posted 17 September 2007 - 12:40 PM
Wow. That looks pretty ratted. Shouldn't be too hard to fix though.
Engine looks good, though
Tim
Engine looks good, though
Tim
#134
_jabba_
_jabba_
-
- Guests
Posted 17 September 2007 - 10:29 PM
I taped up all the holes and turned the engine upside down before wire brushing it, it only took about 45mins to do. I just rubbed it over with some wax and greese remover afterwards then sprayed on the VHT Engine paint (gloss black).what paint did you use on the engine? so its as easy as wire brushing it if you want to keep the engine complete is it? looks good mate!
#135
_L31SS_
_L31SS_
-
- Guests
Posted 19 September 2007 - 04:57 PM
Fred Flinstones Monaro 
Keep the pictures coming through, gotta love HQ Monaros!
Keep the pictures coming through, gotta love HQ Monaros!
#136
_jabba_
_jabba_
-
- Guests
Posted 23 September 2007 - 09:23 PM
Still havent bothered to grab the replacement floor, so i've done some more wire brushing today. I found some pin holes in the boot floor :(, i should be able to mig all but one up. I put down some por15 on the underside, looks really good if i do say so myself .
I've been waiting for my g/f to work out a budget before i go buy more car parts, but I think ill just go buy 'em tomorrow so i can get stuck into something that isnt painting for a while.
Sorry dialuppers


.I've been waiting for my g/f to work out a budget before i go buy more car parts, but I think ill just go buy 'em tomorrow so i can get stuck into something that isnt painting for a while
.Sorry dialuppers
#137
Heath
View Garage
-

- Administrators
-
- 18,403 posts
I like cars.
- Name:Heath
- Location:Eastern Suburbs, Melbourne
- Car:Heavily Modified UC Sunbird Hatchback
- Joined: 07-November 05
View Garage
Posted 23 September 2007 - 10:49 PM
She got a good work out ey?
#138
_jabba_
_jabba_
-
- Guests
Posted 23 September 2007 - 11:36 PM
haha yep, the wire hurt when they let go too  .
.
bwhahhaa, look under the makita... is that a barbie pic, wtf?!? I have nfi where that came from.
.bwhahhaa, look under the makita... is that a barbie pic, wtf?!? I have nfi where that came from.
Edited by jabba, 23 September 2007 - 11:41 PM.
#139
_ultrabluea9x_
_ultrabluea9x_
-
- Guests
Posted 24 September 2007 - 12:28 AM
I LOVE IT more pics .2 door munro,s are tuff looking units
#140
_jabba_
_jabba_
-
- Guests
Posted 29 September 2007 - 11:29 PM
A little more done, not the nicest looking floor but it will do! I've run out of por15 but i will finish wire brushing the hard to reach areas and give them a coating later on .


The paint is still wet in the photos, thats why there are little air bubbles all over it.
.The paint is still wet in the photos, thats why there are little air bubbles all over it.
Edited by jabba, 29 September 2007 - 11:38 PM.
#141
_jabba_
_jabba_
-
- Guests
Posted 01 October 2007 - 05:48 PM
I need some advice, i've been talking to a few mates and they both think that cutting the entire floor out and welding the the replacement one in as one peice would be better than doing a heep of smaller repairs... By biggest worry is will the car be strong enough with the whole floor cut out while were doing the swap, other than that it sounds like a good idea as it will replace all that steel with clean stuff.
Other than that, today i've done some more wire brushing and then went over to my mates place to cut the car off my floor pan .
.


only repair

Other than that, today i've done some more wire brushing and then went over to my mates place to cut the car off my floor pan
.only repair
#142
_jabba_
_jabba_
-
- Guests
Posted 02 October 2007 - 09:26 AM
... When i say will the car be strong enough, i mean will the car be fine to cut the floor out without folding in two, or twisting out of shape etc.
#143
Heath
View Garage
-
- Administrators
-
- 18,403 posts
I like cars.
- Name:Heath
- Location:Eastern Suburbs, Melbourne
- Car:Heavily Modified UC Sunbird Hatchback
- Joined: 07-November 05
View Garage
Posted 02 October 2007 - 06:14 PM
Well how far in would you be cutting it? I think that it depends on that mainly. You're not intending to cut out the sills or anything at the same time?
#144
_jabba_
_jabba_
-
- Guests
Posted 02 October 2007 - 08:37 PM
The entire floor pan from infront of the drain holes and back to where the back seat mount. I wouldnt be cutting any of the sill panels.
Edited by jabba, 02 October 2007 - 08:39 PM.
#145
Bart
-
- Members
-
- 2,559 posts
Shit a brick
- Location:Sydney
- Car:LJ Torana
- Joined: 20-November 05
Posted 02 October 2007 - 11:40 PM
Jabba i think you would have to build a chassis jig and bolt the sills onto it somehow, or if you bolt 4 vices on each corner of the jig and clamp them onto the lip of the sills, this should stop some of the twist or movement.
I think this is honestly Gong's depatment.
I think this is honestly Gong's depatment.
#146
_jabba_
_jabba_
-
- Guests
Posted 04 October 2007 - 09:29 PM
Thanks Bart, if thats the case i might just stick to the smaller repairs as i wouldnt be confident enough to make a jig etc...
Some parts arrived in the mail .
.

Some parts arrived in the mail
.
#147
_jabba_
_jabba_
-
- Guests
Posted 27 October 2007 - 07:48 PM
A few more things done, i had the new bushes and ball joints pressed into the front end. I'm just waiting for some new springs and disc brakes to come so i finish putting the front end together.


I also ordered some engine parts, i bought a new gasket kit and replaced the head gasket's with proper 400 chev ones. I also bought new pushrods, head bolts, high torque starter motor, 65,000v coil in cap distributor and fuel pump. I'm still waiting for the dizzy from ebay to arrive and a few bolt kits to come from rocket before i can finish the motor off.


I also ordered some engine parts, i bought a new gasket kit and replaced the head gasket's with proper 400 chev ones. I also bought new pushrods, head bolts, high torque starter motor, 65,000v coil in cap distributor and fuel pump. I'm still waiting for the dizzy from ebay to arrive and a few bolt kits to come from rocket before i can finish the motor off.
#148
_jabba_
_jabba_
-
- Guests
Posted 03 November 2007 - 06:55 PM
Springs... Just need shocks and disks now.


#149
_jabba_
_jabba_
-
- Guests
Posted 18 November 2007 - 09:21 PM
Not much progress, the distributor finally came after 3 weeks.


#150
_Flamenco_
_Flamenco_
-
- Guests
Posted 18 November 2007 - 09:37 PM
Looks really great Damien, heaps of hours involved there.


0 user(s) are reading this topic
0 members, 0 guests, 0 anonymous users

