
Can't wait to see this one finished.


PROJECT PAPAYA - A VERY FRUITY RESTO THREAD
Started by
notna
, Jul 27 2010 11:14 PM
703 replies to this topic
#26

Redslur
-

- Members
-

- 3,536 posts
Has been Torana owner
- Name:Gerry
- Location:Canberra
- Car:HQ GTS Replica 350.
- Joined: 08-November 05
Posted 19 October 2010 - 11:09 AM
#27
notna
-
- Members
-
- 706 posts
Forum Fixture
- Name:Reverse of username
- Location:Sydney
- Car:1976 LX L32 SL/R
- Joined: 21-May 07
Posted 28 October 2010 - 07:06 PM
A small update. Not huge progress, but worthy of a mention.
Still working in the engine bay. The previous owner has cut out rust from where the bonnet hinges mount to the inner guard (why do they rust here anyway?). I had to cut some nice flat metal to weld in here.
For this, I took an old Mini door that I had down the side of my house. This was to be my metal donor.
 001sml.JPG 123.57K
3 downloads
001sml.JPG 123.57K
3 downloads
I marked out templates from the holes in the inner guards, and transfered those to my Mini door, then cut out.
002sml.JPG 70.51K
2 downloads
006sml.JPG 115.35K
9 downloads
Before welding these into the inner guards, I slapped a bit of POR15 over the back of both sides, to prevent the same thing happening years down the track.
013sml.JPG 88.61K
4 downloads
And after tacking the plates in place, I welded them in good 'n propper!
014sml.JPG 93.81K
4 downloads
The welds look horrid unfortunately, because my MIG is out of gas and I'm having to use gasless wire. Once I grind the welds flush I will post a pic of the finished product.
As always, much more to come.........
Still working in the engine bay. The previous owner has cut out rust from where the bonnet hinges mount to the inner guard (why do they rust here anyway?). I had to cut some nice flat metal to weld in here.
For this, I took an old Mini door that I had down the side of my house. This was to be my metal donor.
001sml.JPG 123.57K
3 downloadsI marked out templates from the holes in the inner guards, and transfered those to my Mini door, then cut out.
002sml.JPG 70.51K
2 downloads
006sml.JPG 115.35K
9 downloadsBefore welding these into the inner guards, I slapped a bit of POR15 over the back of both sides, to prevent the same thing happening years down the track.
013sml.JPG 88.61K
4 downloadsAnd after tacking the plates in place, I welded them in good 'n propper!
014sml.JPG 93.81K
4 downloadsThe welds look horrid unfortunately,
because my MIG is out of gas and I'm having to use gasless wire. Once I grind the welds flush I will post a pic of the finished product. As always, much more to come.........
#28
_LH SLR 3300_
_LH SLR 3300_
-

- Guests
Posted 28 October 2010 - 09:52 PM
Looking good . I have a theory why LH-UCs rust here, over time dirt & moisture from road use etc are trapped between the inner skirt & the reinforcing plate & it starts from there. The rust prevention & protection methods in the 70s weren't what they are today. On my SL/R, to prevent this happening again, i smeared sikaflex all around the edges working it into the joins as best i could. I then stone guarded & painted the entire inner skirt.
. I have a theory why LH-UCs rust here, over time dirt & moisture from road use etc are trapped between the inner skirt & the reinforcing plate & it starts from there. The rust prevention & protection methods in the 70s weren't what they are today. On my SL/R, to prevent this happening again, i smeared sikaflex all around the edges working it into the joins as best i could. I then stone guarded & painted the entire inner skirt.
#29
_nial8r_
_nial8r_
-
- Guests
Posted 29 October 2010 - 07:19 AM
yeah its a pain in the ass how they rust out behind the plate, i will be trimming the lip off mine all the way round then will run a weld to seal it up and then brush in some seam sealer followed by the stone gaurd and it should stop any unwanted tin worms getting in there and starting any drama's... cant wait to see the support go back on as i think it will give me some motivation to get mine back on  keep up the good work mate
keep up the good work mate
#30
notna
-
- Members
-
- 706 posts
Forum Fixture
- Name:Reverse of username
- Location:Sydney
- Car:1976 LX L32 SL/R
- Joined: 21-May 07
Posted 29 October 2010 - 08:19 AM
Yea I was going to run a bead of sikaflex around the back to stop anything getting in there.
Lee.... rad support on Sunday I think. I wanna see yours done the following weekend
Lee.... rad support on Sunday I think. I wanna see yours done the following weekend
#31
_nial8r_
_nial8r_
-
- Guests
Posted 29 October 2010 - 12:11 PM
lol i dont think it will happen next weekend mate got the daughters 5th birthday and i think there must be every kids from her pre school coming  although i reckon i could get it all preped on sunday and get it back on monday or tuesday arvo
although i reckon i could get it all preped on sunday and get it back on monday or tuesday arvo
#32
notna
-
- Members
-
- 706 posts
Forum Fixture
- Name:Reverse of username
- Location:Sydney
- Car:1976 LX L32 SL/R
- Joined: 21-May 07
Posted 29 October 2010 - 04:00 PM
I will quote you now if you don't!!
#33
_nial8r_
_nial8r_
-
- Guests
Posted 29 October 2010 - 07:58 PM
 but i think i will get it sorted as i only have to strip it back to bare unpick the lower section and weld the replacment peice on. hey here is a link to youngy_11 project thread. it will take you straight to the page so you can see what i was talking about with triming the tab's of the bonnet hinge supports and running a clean weld around them. i stole the idea from him as well as his tunnel mod too
  anyways here's the link if you wanna have a look see.....
http://www.gmh-toran...oungy_11&st=175
#34
notna
-
- Members
-
- 706 posts
Forum Fixture
- Name:Reverse of username
- Location:Sydney
- Car:1976 LX L32 SL/R
- Joined: 21-May 07
Posted 30 October 2010 - 11:22 AM
Thanks for the link Lee... that's neat work from Ryan! Nice idea too. Will have a think about that.
Little more progress this morning. Ran out of gasless MIG wire (thank god!), so no more progress until I get my MIG gas bottle refilled (that's my father-in-law's job, it's his MIG afterall... hehehe)
, then I can weld the nice way.
Before....
008sml.JPG 90.28K
23 downloads
After....
020a.JPG 84.85K
18 downloads
Might give it a lick of filler to smooth it off. This afternoon maybe
Little more progress this morning. Ran out of gasless MIG wire (thank god!), so no more progress until I get my MIG gas bottle refilled (that's my father-in-law's job, it's his MIG afterall... hehehe)
, then I can weld the nice way.
Before....
008sml.JPG 90.28K
23 downloadsAfter....
020a.JPG 84.85K
18 downloadsMight give it a lick of filler to smooth it off. This afternoon maybe
#35
_nial8r_
_nial8r_
-
- Guests
Posted 30 October 2010 - 12:38 PM
looks a hell of a lot better now mate and the good thing is you managed to not have cut out the holes for the hinges, well done
#36
notna
-
- Members
-
- 706 posts
Forum Fixture
- Name:Reverse of username
- Location:Sydney
- Car:1976 LX L32 SL/R
- Joined: 21-May 07
Posted 08 November 2010 - 05:33 PM
A day off work today, and well spent in the garage.
Finally got my MIG gas bottle refilled and planned on doing some welding today, but I got sidetracked. I'm a prefectionist at heart, and if something bugs me, I just can't live with it until I make it right.....
First up, the completion of the rust repairs behind the bonnet hinges.
001a.JPG 72.37K
3 downloads
003a.JPG 77.32K
3 downloads
I'm very pleased with this repair, given that the previous owner hacked out the rust and left it unfinished, and didn't state that in the ad for the car.
Next up today I wanted to finish repairs to the panel that contains the chassis number. The previous owner had attacked it and removed the charcoal canister bracket, plus it was very bent from a previous front ender. I welded up and ground flush where the previous owner had hacked holes in it.
004a.JPG 100.46K
2 downloads
Then I took a step back and thought long and hard about what I wanted when the car was finished. Yep, I'm a perfectionist and that panel is FAR from perfect. It's rough and the previous owner had shaved the chassis rail and stupidly touched the chassis number. That's been bugging me from the day I bought the car. Out it comes!
010a.JPG 115.08K
2 downloads
Now I am left with a front end that looks like this!
008a.JPG 126.86K
0 downloads
....however, it gives me nice access now to both chassis rails, to ensure they are perfectly straight. I love perfect! =)
Then as the day wore on, I thought about my rad support and welding in the lower rust repair section. I wanted it to be super clean before welding, so I wire wheeled the lot.
Before.....
014a.JPG 182.71K
0 downloads
And after some serious wire wheeling (next time I paint strip!)....
015a.JPG 178.28K
1 downloads
...and that was it for today. My neck is stuffed from an injury a couple of weeks ago playing indoor cricket, so I had to go to the docs and get x-rays. Damn injuries getting in the way of FUN!
As always...... more to come!
Finally got my MIG gas bottle refilled and planned on doing some welding today, but I got sidetracked. I'm a prefectionist at heart, and if something bugs me, I just can't live with it until I make it right.....
First up, the completion of the rust repairs behind the bonnet hinges.
001a.JPG 72.37K
3 downloads
003a.JPG 77.32K
3 downloadsI'm very pleased with this repair, given that the previous owner hacked out the rust and left it unfinished, and didn't state that in the ad for the car.
Next up today I wanted to finish repairs to the panel that contains the chassis number. The previous owner had attacked it and removed the charcoal canister bracket, plus it was very bent from a previous front ender. I welded up and ground flush where the previous owner had hacked holes in it.
004a.JPG 100.46K
2 downloadsThen I took a step back and thought long and hard about what I wanted when the car was finished. Yep, I'm a perfectionist and that panel is FAR from perfect. It's rough and the previous owner had shaved the chassis rail and stupidly touched the chassis number. That's been bugging me from the day I bought the car. Out it comes!
010a.JPG 115.08K
2 downloadsNow I am left with a front end that looks like this!
008a.JPG 126.86K
0 downloads....however, it gives me nice access now to both chassis rails, to ensure they are perfectly straight. I love perfect! =)
Then as the day wore on, I thought about my rad support and welding in the lower rust repair section. I wanted it to be super clean before welding, so I wire wheeled the lot.
Before.....
014a.JPG 182.71K
0 downloadsAnd after some serious wire wheeling (next time I paint strip!)....
015a.JPG 178.28K
1 downloads...and that was it for today. My neck is stuffed from an injury a couple of weeks ago playing indoor cricket, so I had to go to the docs and get x-rays. Damn injuries getting in the way of FUN!
As always...... more to come!
#37
_LH SLR 3300_
_LH SLR 3300_
-
- Guests
Posted 08 November 2010 - 05:58 PM
Nothing wrong with being a perfectionist  . Looks like you have some serious work ahead of you, good on you for having the passion & determination to keep at it when alot of people would walk away from it
  . Are you going to restore the shaved chassis rails back to original or leave them?
. Looks like you have some serious work ahead of you, good on you for having the passion & determination to keep at it when alot of people would walk away from it . Are you going to restore the shaved chassis rails back to original or leave them?
#38
notna
-
- Members
-
- 706 posts
Forum Fixture
- Name:Reverse of username
- Location:Sydney
- Car:1976 LX L32 SL/R
- Joined: 21-May 07
Posted 08 November 2010 - 10:17 PM
Yea.... not a fan of the shaved chassis rails. Looks great, don't get me wrong, but this resto is to be an ORIGINAL resto, so they can't stay like that. Not sure yet how I will right that wrong.
#39
notna
-
- Members
-
- 706 posts
Forum Fixture
- Name:Reverse of username
- Location:Sydney
- Car:1976 LX L32 SL/R
- Joined: 21-May 07
Posted 09 November 2010 - 08:23 PM
Couldn't help myself. Snuck in a little more work today.
Finished cleaning up the rad support.
002a.JPG 116.34K
1 downloads
Trial fitted it on the car, with bonnet catch and front apron bolten on, and marked out the correct position for the lower rust repair section.
008a.JPG 121.94K
1 downloads
Clamped it and welded it flat on the garage floor.
017a.JPG 126.16K
2 downloads
024a.JPG 124.64K
2 downloads
The clamped it back onto the car and test fitted panels.
025a.JPG 126.21K
1 downloads
027a.JPG 133.88K
2 downloads
Because I didn't cut out the rusted section, I was a little unsure of how the replacement piece should fit. Using the bonnet catch and front apron helped a lot, but like with any reproduction replacement section, it required a little manipulation to sit correctly.
I'm now going to clean up the entire rad support panel, dress the welds, and hit it with some etch primer. I will then get back to my chassis rails, battery tray, etc, and finish off my engine bay nicely, before reattaching the rad support.
Finished cleaning up the rad support.
002a.JPG 116.34K
1 downloadsTrial fitted it on the car, with bonnet catch and front apron bolten on, and marked out the correct position for the lower rust repair section.
008a.JPG 121.94K
1 downloadsClamped it and welded it flat on the garage floor.
017a.JPG 126.16K
2 downloads
024a.JPG 124.64K
2 downloadsThe clamped it back onto the car and test fitted panels.
025a.JPG 126.21K
1 downloads
027a.JPG 133.88K
2 downloadsBecause I didn't cut out the rusted section, I was a little unsure of how the replacement piece should fit. Using the bonnet catch and front apron helped a lot, but like with any reproduction replacement section, it required a little manipulation to sit correctly.
I'm now going to clean up the entire rad support panel, dress the welds, and hit it with some etch primer. I will then get back to my chassis rails, battery tray, etc, and finish off my engine bay nicely, before reattaching the rad support.
#40
_nial8r_
_nial8r_
-
- Guests
Posted 10 November 2010 - 06:10 AM
looking good Anton, makes life that little bit easyer when the support is off hey, you doing some great work keep it up and the pic's coming too
#41
notna
-
- Members
-
- 706 posts
Forum Fixture
- Name:Reverse of username
- Location:Sydney
- Car:1976 LX L32 SL/R
- Joined: 21-May 07
Posted 02 December 2010 - 10:23 PM
A mini update to keep the progress pictured.
I scored a UC roller that was freakishly rust free, and have taken someof its best bits for my SL/R resto.
My plenum chamber is somewhat holy.... as shown:
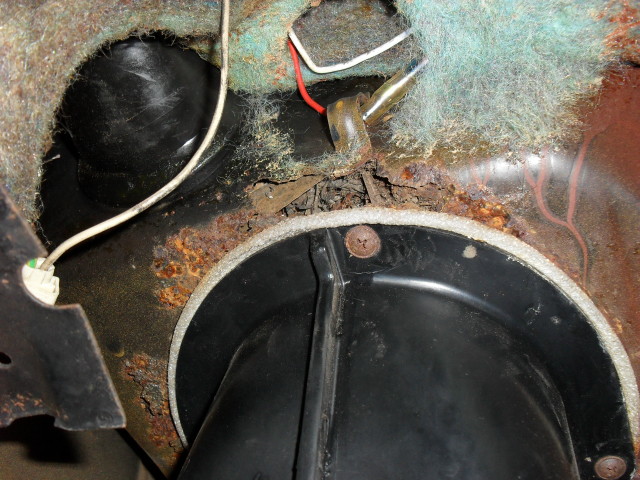
So I butchered the MINT plenum from the UC.... Nice huh?
005a.JPG 118.97K
5 downloads
I will do that repair soon.
My donor UC also had 4 MINT doors in original 1978 paint too. All 4 doors on the 'ol SL/R were absolutely rooted! They even had cardboard stuffed in them to reinforce the bog all the way along the bottom of each. Those went ot SIMS scrap metal with the UC shell, and my skillfull son helped with removing the old and attaching the new.
034a.JPG 99.92K
3 downloads
So now my once complete Papaya SL/R starts to look worse, before it eventually gets better. This is often a period where restos get abandoned, because people lose sight of the completed picture and get turned off by how crap they look mid-resto. I have a long way to go, but no quitting!!
More to come......
I scored a UC roller that was freakishly rust free, and have taken someof its best bits for my SL/R resto.
My plenum chamber is somewhat holy.... as shown:
So I butchered the MINT plenum from the UC....
Nice huh?
005a.JPG 118.97K
5 downloadsI will do that repair soon.
My donor UC also had 4 MINT doors in original 1978 paint too. All 4 doors on the 'ol SL/R were absolutely rooted! They even had cardboard stuffed in them to reinforce the bog all the way along the bottom of each. Those went ot SIMS scrap metal with the UC shell, and my skillfull son helped with removing the old and attaching the new.
034a.JPG 99.92K
3 downloadsSo now my once complete Papaya SL/R starts to look worse, before it eventually gets better. This is often a period where restos get abandoned, because people lose sight of the completed picture and get turned off by how crap they look mid-resto. I have a long way to go, but no quitting!!
More to come......
#42
_suxgas_
_suxgas_
-
- Guests
Posted 02 December 2010 - 10:41 PM
Nice job there cant wait to see it finished,,
#43
notna
-
- Members
-
- 706 posts
Forum Fixture
- Name:Reverse of username
- Location:Sydney
- Car:1976 LX L32 SL/R
- Joined: 21-May 07
Posted 15 January 2011 - 07:57 PM
Had a month off to please the family and do some dad things over Xmas...... got stuck back into the big piece of fruit today.
Time to finally repair these bloody awfull forward chassis rail sections. My donor UC donated it's mint ones, as well as the other 2 bits you see here. Chassis rail lips? Not sure what to call them really. The previous owner of my SL/R wanted the shaved chassis rail look, and did a half assed job of it. Now don't get me wrong here.... on certain restos and street machine builds, its a TOP look to have clean chassis rails, but for me and this big ripe Papaya SL/R, it's gotta be 100% original, so I will be replacing the chassis rail lips that have been removed. More on that later.
The new rails and bits...
filename_02.jpg 206.31K
5 downloads
I was worried about trimming off the bent rail section and then not trimming the new piece to the same length. The best way I could see to ensure both cuts were equal was to bolt the new rail under the bent rail, using the bumper bar bracket holes. You can clearly see the bent rail Vs straight one here.
filename_05.jpg 215.07K
6 downloads
Time to mark and cut. Using a big mofo grinder helped with cutting it in one go and making sure it was straight.
filename_10.jpg 193.65K
2 downloads
filename_11.jpg 212.22K
2 downloads
Oh crap..... what have I done!! I never imagined going this far when I set off to buy this car site unseen last year o.O
filename_15.jpg 198.13K
5 downloads
Clamped the replacement rail section in place and checked all my measurements that I took before chopping off the old.
filename_19.jpg 201.99K
5 downloads
Welded it up nicely, and did exactly the same on the other side, ensuring the welds were penetrating well enough, although this part of the chassis rail is only good for hanging forward panels off, and doesn't effect the integrity of the car.
Nice weld huh?
filename_27.jpg 206.02K
4 downloads
And finally, the front of my SL/R with both rails returned, nice and straight.
filename_43.jpg 200.36K
3 downloads
By this stage I was spent.... it was a damn humid day in Sydney and i had already sweated a truckload.
Next time...... welding on the chassis rail lips, returnign them to factory original......
filename_36.jpg 177.41K
3 downloads
Time to finally repair these bloody awfull forward chassis rail sections. My donor UC donated it's mint ones, as well as the other 2 bits you see here. Chassis rail lips? Not sure what to call them really. The previous owner of my SL/R wanted the shaved chassis rail look, and did a half assed job of it. Now don't get me wrong here.... on certain restos and street machine builds, its a TOP look to have clean chassis rails, but for me and this big ripe Papaya SL/R, it's gotta be 100% original, so I will be replacing the chassis rail lips that have been removed. More on that later.
The new rails and bits...
filename_02.jpg 206.31K
5 downloadsI was worried about trimming off the bent rail section and then not trimming the new piece to the same length. The best way I could see to ensure both cuts were equal was to bolt the new rail under the bent rail, using the bumper bar bracket holes. You can clearly see the bent rail Vs straight one here.
filename_05.jpg 215.07K
6 downloadsTime to mark and cut. Using a big mofo grinder helped with cutting it in one go and making sure it was straight.
filename_10.jpg 193.65K
2 downloads
filename_11.jpg 212.22K
2 downloadsOh crap..... what have I done!! I never imagined going this far when I set off to buy this car site unseen last year o.O
filename_15.jpg 198.13K
5 downloadsClamped the replacement rail section in place and checked all my measurements that I took before chopping off the old.
filename_19.jpg 201.99K
5 downloadsWelded it up nicely, and did exactly the same on the other side, ensuring the welds were penetrating well enough, although this part of the chassis rail is only good for hanging forward panels off, and doesn't effect the integrity of the car.
Nice weld huh?
filename_27.jpg 206.02K
4 downloadsAnd finally, the front of my SL/R with both rails returned, nice and straight.
filename_43.jpg 200.36K
3 downloadsBy this stage I was spent.... it was a damn humid day in Sydney and i had already sweated a truckload.
Next time...... welding on the chassis rail lips, returnign them to factory original......
filename_36.jpg 177.41K
3 downloads
Attached Files
-
filename_01.jpg 208.96K
3 downloads
#44
notna
-
- Members
-
- 706 posts
Forum Fixture
- Name:Reverse of username
- Location:Sydney
- Car:1976 LX L32 SL/R
- Joined: 21-May 07
Posted 15 January 2011 - 08:15 PM
Last pic there is supposed to be at the top.... lol... thats the front cut which I took the rails from.... can't edit it to make it right but yuou get the drift.... 
#45
_nial8r_
_nial8r_
-
- Guests
Posted 16 January 2011 - 07:41 AM
lol the xmas + dad thing hey !! was in the same boat mate 
you have done a great job on the rails, have you done the trial fit up with the gaurds and support to see if they are nice and square ? not that im doubting you and your work
you have done a great job on the rails, have you done the trial fit up with the gaurds and support to see if they are nice and square ? not that im doubting you and your work
#46
_LH SLR 3300_
_LH SLR 3300_
-
- Guests
Posted 16 January 2011 - 08:10 AM
Nice work Anton .Because of where the join is on the chassis rails, i recommend you weld a couple of reinforcing plates inside the rails, along each side. I was taught when doing sectional rail repairs like this, it gives them more strength by "staggering" the weld at a 45 degree angle. But then i recently did a sectional rail replacement on a 2004 Astra in which i couldn't use this method, so the internal gusset that holds the tow hook mount became the reinforcing member. I can mock up a demo & post pics if you like.
.Because of where the join is on the chassis rails, i recommend you weld a couple of reinforcing plates inside the rails, along each side. I was taught when doing sectional rail repairs like this, it gives them more strength by "staggering" the weld at a 45 degree angle. But then i recently did a sectional rail replacement on a 2004 Astra in which i couldn't use this method, so the internal gusset that holds the tow hook mount became the reinforcing member. I can mock up a demo & post pics if you like.
#47
_2wild4u_
_2wild4u_
-
- Guests
Posted 16 January 2011 - 06:07 PM
nice, looks like this will be one to watch
#48
notna
-
- Members
-
- 706 posts
Forum Fixture
- Name:Reverse of username
- Location:Sydney
- Car:1976 LX L32 SL/R
- Joined: 21-May 07
Posted 16 January 2011 - 10:47 PM
Lee.... you made me paraniod to the point where I had to remeasure today, even though I measured and then meadured again before cutting and after welding!! All good in that regard 
Matt, I was actually going to PM you for advice before I took on this repair, so I would love your input now and if you want to mock something for a demo, it would be appreciated!
Matt, I was actually going to PM you for advice before I took on this repair, so I would love your input now and if you want to mock something for a demo, it would be appreciated!
#49
Mort
 View Garage
-

- Members
-
- 2,760 posts
Lotsa Posts!
- Name:Mort
- Location:Moranbah, QLD.
- Car:74 LH SL/R 4.2, 75 LH 4 door 186
- Joined: 16-December 07
View Garage
Posted 16 January 2011 - 11:00 PM
Anton, don't mean to be a jobes comforter but when you say you have measured and remeasured, is that your own car or have you measured another car to make sure they are both the same length, the reason i ask is that in the 2nd and 4th pic your old rails still don't look fully straight, then again it could just be the angle of the photo but it's something to think about if you haven't already done so.
#50
_nial8r_
_nial8r_
-
- Guests
Posted 17 January 2011 - 06:46 AM
sry to make you paraniod mate just thought it would be better to be safe the sorry after all the hard work. i think i would be taking Matt's advice about the rail reinforcing plates as you dont want them to sag. just my 2 cents worth
just thought it would be better to be safe the sorry after all the hard work. i think i would be taking Matt's advice about the rail reinforcing plates as you dont want them to sag. just my 2 cents worth


1 user(s) are reading this topic
0 members, 1 guests, 0 anonymous users

