Jump to content


- - - - -

LC S Coupe Rebuild


  • Please log in to reply
674 replies to this topic

#51 S pack

S pack

    Scrivet Counter

  • Members
  • PipPipPipPipPipPipPip
  • 15,541 posts
  • Name:Dave
  • Location:Luggage Point
  • Car:73 LJ
  • Joined: 25-January 10

Posted 05 July 2012 - 12:15 PM

Ok well i've got a crap load of new stuff and stuff done so will get pictures up (broke 2 iphones so no camera). In the meantime, and before i do the manual conversion, what speedo gear will i need for a 3.36 from im guessing a 2.78 and where can i purchase it? cheers!


24 tooth Yellow. Rare Spares have them and you'll also find them on ebay for sure.

#52 _threeblindmice_

_threeblindmice_
  • Guests

Posted 05 July 2012 - 04:35 PM

I think it has a 3.08 to 1 , diff in it Jacob .

#53 _judgelj_

_judgelj_
  • Guests

Posted 05 July 2012 - 05:15 PM

3.36 LSD now, though i think the factory diff would have been a 2.78 IIRC. Are the speedo gears the same for auto/manual?

#54 S pack

S pack

    Scrivet Counter

  • Members
  • PipPipPipPipPipPipPip
  • 15,541 posts
  • Name:Dave
  • Location:Luggage Point
  • Car:73 LJ
  • Joined: 25-January 10

Posted 05 July 2012 - 05:43 PM

3.36 LSD now, though i think the factory diff would have been a 2.78 IIRC. Are the speedo gears the same for auto/manual?


Trimatic - yes, same gear.

#55 _judgelj_

_judgelj_
  • Guests

Posted 06 July 2012 - 01:17 PM

Ok well happy birthday to me! Picked up these babies on the weekend for future body work. Same gun and orbital Toyota production plant uses.

Posted Image
Posted Image

These bad boys are for my newly found interest in polishing! Will start on my wipers which were painted black but quite nice underneath. Will try my hand and polishing them, though i only think they will need a white buff. Will also polish my gutter molds and door molds.

Posted Image

Flywheel machined.

Posted Image

Spigot bearing. The idiots gave me RSB520 initially and when i asked him if it was right i got brushed off immediately. I went home and researched it only to find i was right. go figure.

Posted Image

started stripping back with some turps and my nails, didnt want to scratch up the nicely polished surface underneath.

Posted Image

Same deal with the next two, will strip back more with a wire wheel and paint gloss black before going in, just waiting on my pedal rubbers.

Posted Image

Posted Image

And these are my new kick panels and parcel shelf, just have to cut out the holes!

Posted Image

Also got my headlining, 1/4 window rubbers and door rubbers, will post pictures later cheers.

#56 debkar

debkar

    Forum Fixture

  • Members
  • PipPipPipPipPip
  • 911 posts
  • Location:Townsville QLD
  • Car:1971 LC 2 Door
  • Joined: 03-January 09

Posted 06 July 2012 - 07:47 PM

Hi Jacob

Some good stuff there, looks like your flywheel cleaned up OK,

Like the gun as well,

Yep, RSB520 from memory is 6 cyl VL

Regards Simon

Edited by debkar, 06 July 2012 - 08:01 PM.


#57 _judgelj_

_judgelj_
  • Guests

Posted 08 July 2012 - 12:37 PM

Yeah makes sense, he would have ordered the wrong Holden 6. And the flywheel still has some putting around the inner part, he could have taken a little more off but its ok because the contact point is still very flat. Gun is ok, but maybe a bit small for body work i'm not sure what do people reckon? I know the pot is small, interchangeable i know but then again the fun itself is a bit smaller than the 400 and therefore a bit too light to hang a heavy pot off.

Went to the trouble of spraying some of my manual bits yesterday. Hit them with 1k primer and finished off with a 2k gloss black. They came out pretty good, some pin holes and i can't explain them but pretty happy overall. If i had sprayed some hi fill and sanded smooth they would have turned out a bit better but that is just chasing perfection and they are fine the way they are. I was going to chrome the gear stick however he couldn't do it unless i had taken it all apart and i wasn't too confident so i left it.

Posted Image
Posted Image

#58 debkar

debkar

    Forum Fixture

  • Members
  • PipPipPipPipPip
  • 911 posts
  • Location:Townsville QLD
  • Car:1971 LC 2 Door
  • Joined: 03-January 09

Posted 08 July 2012 - 01:51 PM

Hi Jacob

Looks good, nice finish. What size pot do you have on the gun?

Regards Simon

#59 _judgelj_

_judgelj_
  • Guests

Posted 08 July 2012 - 04:20 PM

Hi Simon

Its a 200ml pot, 1.3mm tip

cheers

#60 debkar

debkar

    Forum Fixture

  • Members
  • PipPipPipPipPip
  • 911 posts
  • Location:Townsville QLD
  • Car:1971 LC 2 Door
  • Joined: 03-January 09

Posted 08 July 2012 - 05:23 PM

Thanks mate,

#61 _Bomber Watson_

_Bomber Watson_
  • Guests

Posted 08 July 2012 - 05:35 PM

Toyota as CNC spraying machines with chopper dicks, not spray guns.

The WB 300 is a touchup gun, but a nice one.

Cheers.

#62 _judgelj_

_judgelj_
  • Guests

Posted 08 July 2012 - 10:25 PM

DJ they use the 300 to touch up and spray cars that come out of paint with defects . and yes it is a nice gun

#63 _LONA-CK_

_LONA-CK_
  • Guests

Posted 09 July 2012 - 07:01 AM

roebuck, is the right answer, this is a good read, i have also noticed that you are changing gearboxes from auto to 4 speed, your flywheel looks like it has been used and balanced before to suit another motor so it will cause dramas with your motor, it will shutter and fill like a pig to drive if its not made to suit your donk,,,

good luck with it mate
cheers gong [now lona-ck]

#64 _judgelj_

_judgelj_
  • Guests

Posted 09 July 2012 - 11:55 AM

Cheers mate, i've sent you a PM anyway. plus it's your favorite colour isnt it!?!

Manual was supposed to go in friday and i was freaking out because i wasn't ready, lost my spot on the hoist so had to postpone but gave me some more time. What bolts will i need for the 4 speed, does anyone know? Is it better to bolt the 4 speed on the box before hand or can i do it from inside the car?

#65 S pack

S pack

    Scrivet Counter

  • Members
  • PipPipPipPipPipPipPip
  • 15,541 posts
  • Name:Dave
  • Location:Luggage Point
  • Car:73 LJ
  • Joined: 25-January 10

Posted 09 July 2012 - 09:58 PM

Cheers mate, i've sent you a PM anyway. plus it's your favorite colour isnt it!?!

Manual was supposed to go in friday and i was freaking out because i wasn't ready, lost my spot on the hoist so had to postpone but gave me some more time. What bolts will i need for the 4 speed, does anyone know? Is it better to bolt the 4 speed on the box before hand or can i do it from inside the car?


Can't put the box in with the shifter pre fitted. Bolt it on after the box is installed.
Will have a look and get back to you on the shifter mounting bolts.

Cheers
Dave.

#66 _judgelj_

_judgelj_
  • Guests

Posted 09 July 2012 - 10:32 PM

Thanks Dave, and thank you for the other measurements i went and got what i needed appreciate it even though it was all in vain. Ill bolt it in after the box goes in, appreciate your help.

#67 _judgelj_

_judgelj_
  • Guests

Posted 29 July 2012 - 05:53 PM

Well, what a very eventful two weeks straight of monday to sunday work 9 -7 or so. Enough to put anyone off touching a car ever again. Some people get to have a few days rest when the work gets hard but because my car was stuck at my uncles work shop i had no choice but to work on it every day until it was finished so i could get it out of there, plus the car sitting in the rain really did a number on my stress levels, hoping it wouldn't have developed too much rust.

Why did a manual conversion take two weeks you say? Sit back and relax as this may take a while!

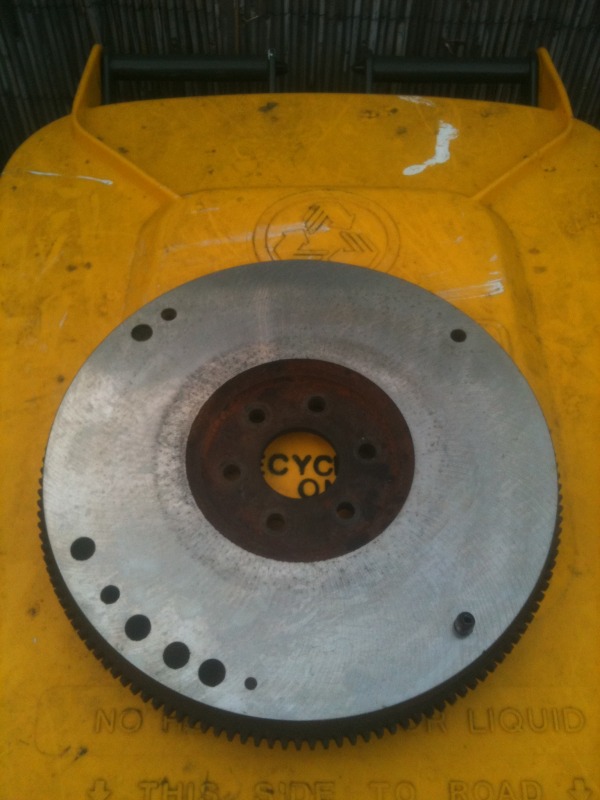
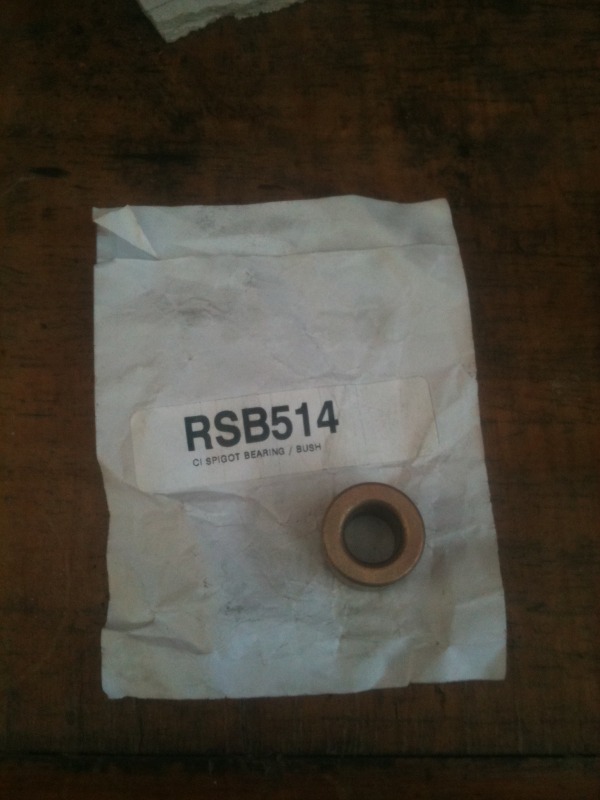
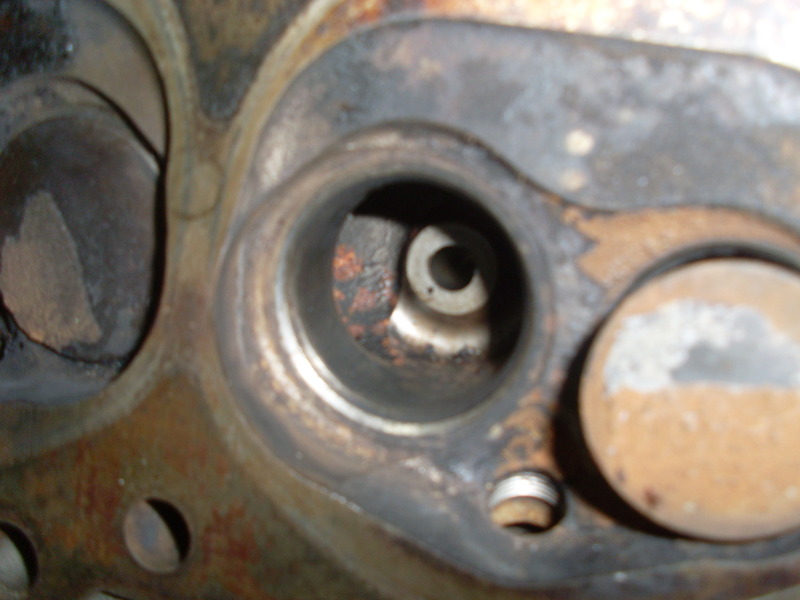
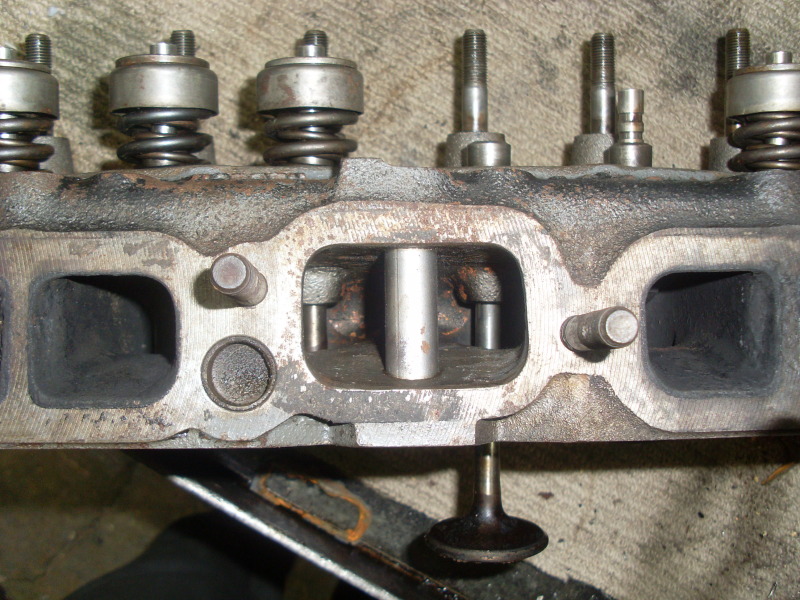
So i began disconnecting everything inside and out in order to remove the transmission, and with the exception of a stubborn converter it came out without any real hassles. The next step was to tap in the spigot bush which had been soaked in oil for a couple of days, no issues there. Bolted on the flywheel and lined the clutch up by eye, slipped in the gearbox and bolted it all up. After i fitted my shifter and attached all the linkages i noticed that it was pretty close to the trans tunnel. Had to use the gearbox mount from the trimatic (are they the same) as the other had perished. Upon bolting up the cross member i noticed the 3/4 gear selector rod was fouling on the trans tunnel, turned out i had what seemed to be LH/LX linkages.
Posted Image

Upon researching i found out that the 4 speed 202's ran spacers between the cross member and chassis rails so i cut some out using 10mm steel and drilled them out with the drill press.

Posted Image
I achieved little with the spacers and decided to leave it and start on my pedals. I was hoping for a day job, two days max as the car needed to be gone Monday. Oh boy was i in for it!!

Rolled her away from the hoist and parked her around the back.
Posted Image
Posted Image

Posted Image

Posted Image

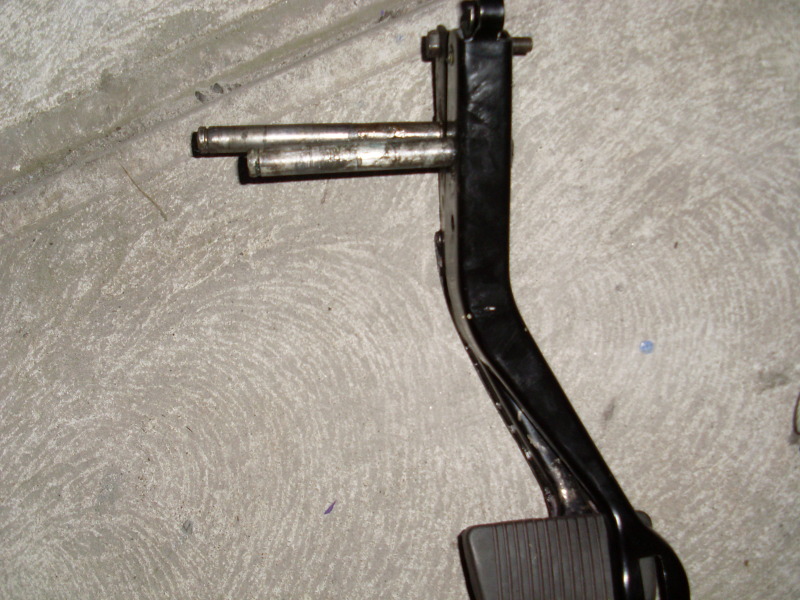
Pulled the front seat out as to not brake my back and proceeded to remove what i thought was the auto brake pedal. Had a bit of trouble getting the bloody booster rod off as someone had welded what i presumed was too thick a bolt (what did holden use originally?).Posted Image

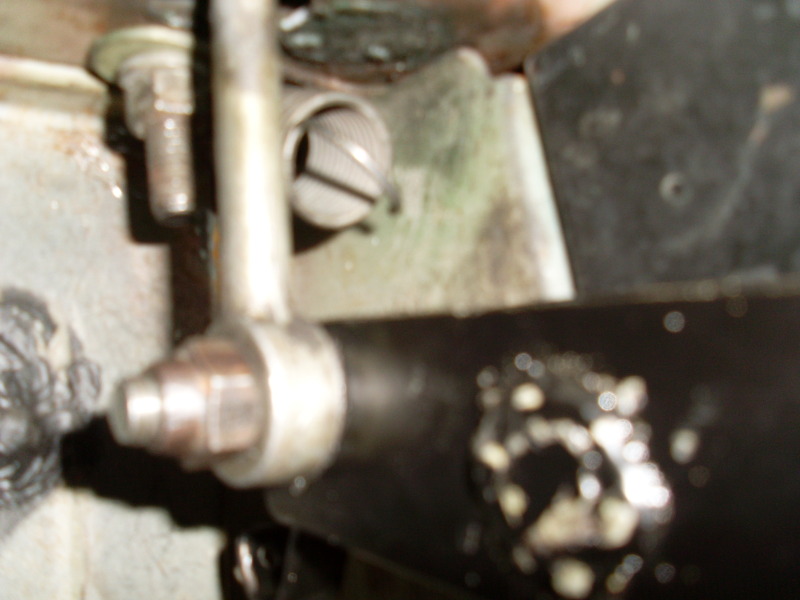
Could not for the life of my get it off so unbolted the booster and the said rod from inside the engine bay.

Posted Image

Pedal came out quite easily, with the addition of a home made sleeve.

Posted Image

Posted Image

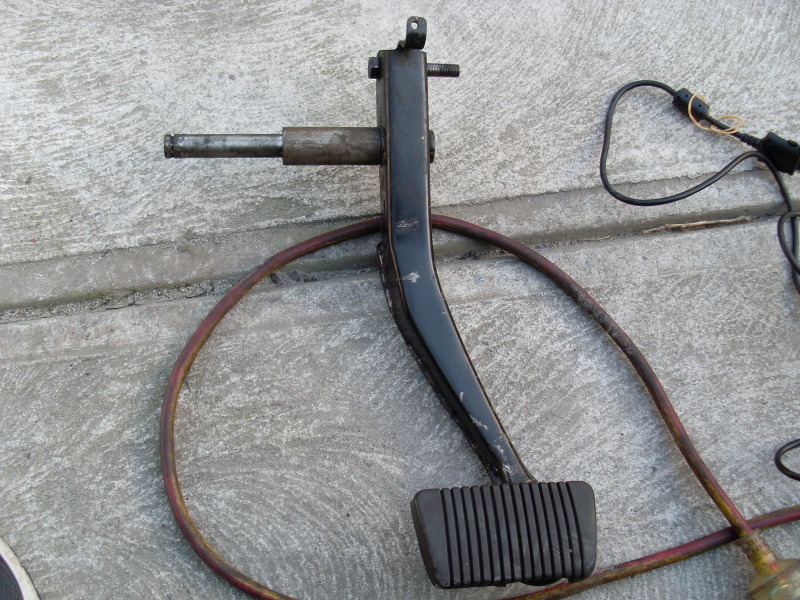
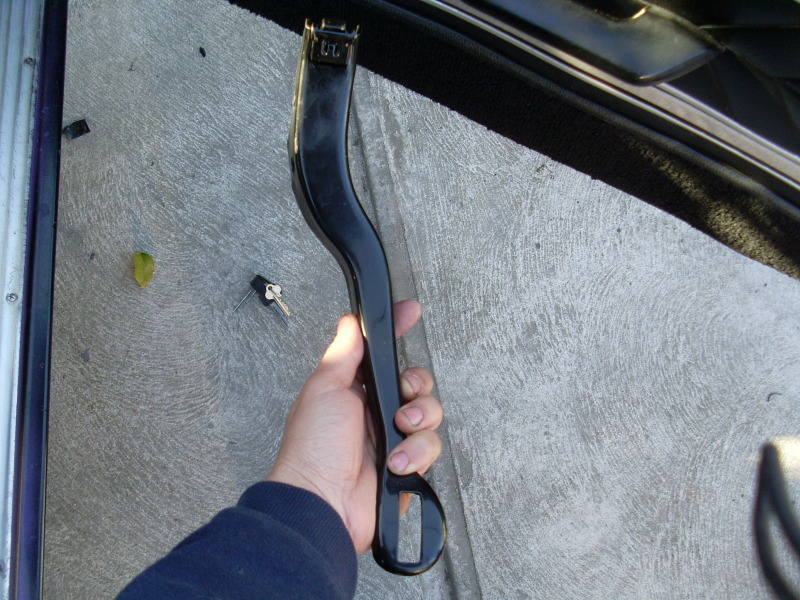
It was obviously modified and much to my surprise originally a manual brake pedal. Not quite sure why there was a plate welded on the back but didn't worry me as it was going.

Posted Image

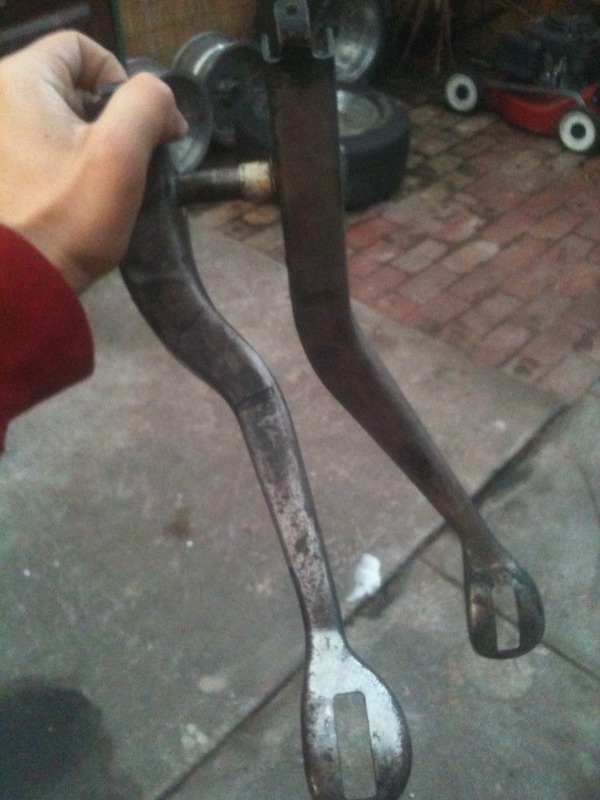
First thing i noticed was the difference in pivot rod lengths, and at that stage i didnt know why. I proceeded to try and bolt it all up only to find that the pivot rod was too short on one of the pedals. It appeared that the one i pulled out had been extended so i tried to use that one instead and this happened.

Posted Image


Posted Image


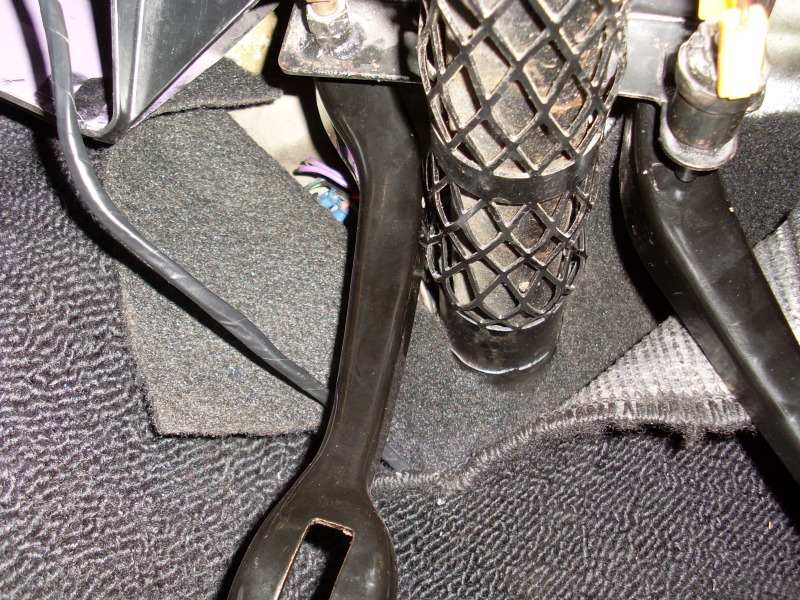
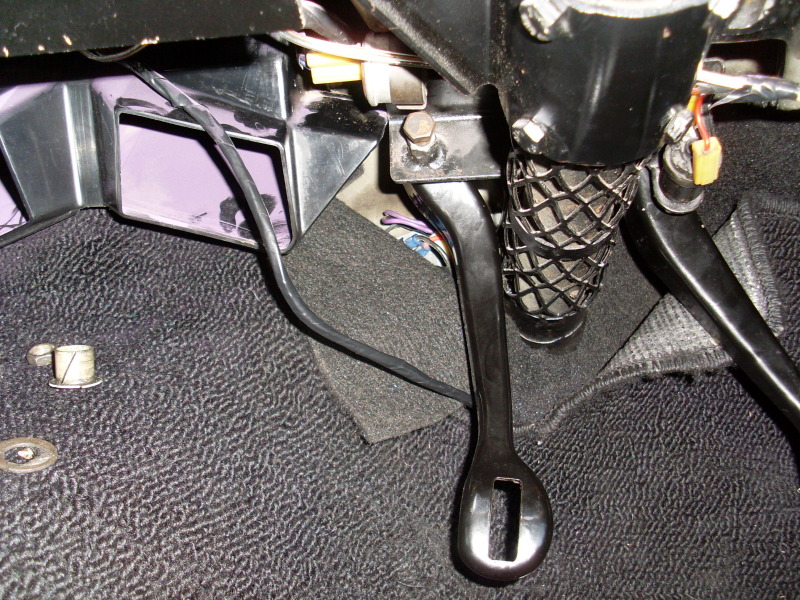
The clutch pedal was fouling on the steering column and i could not figure out why. This was pretty stressful as i not knowing why played on my mind, i wasnt sure if i was doing something wrong or it was the car. It got really late that sunday so i packed my things and went home. After a bit of research it was brought to my attention that the setup was all wrong and the clutch pedal should sit on the right side of the column, along side the brake, not on the opposite end. Turns out this was a result of the steering column being moved over 4" when it had a V8.

Posted Image
Come monday i was pretty bummed and ready to throw in the towel and fit the auto up again. I was out of ideas but with some kind words and encouragement i was ready to give it a go. I was under the impression it couldnt be done but thankfully i was told otherwise so i thought i would give it a go. I did some investigating and found that the 308 was coupled with a supra 5 speed so it was obviously manual once before and could very well be done with the 4 speed. This also explained the modification to the existing brake pedal as the rod would have been lengthened to run a clutch pedal further out from where they were from factory (factory rod is shorter). The sleeve was used to take up all the play from side to side and keep the brake pedal in one spot with the retaining clip on the other end.

Without hesitation i pulled out the grinder and got to work.
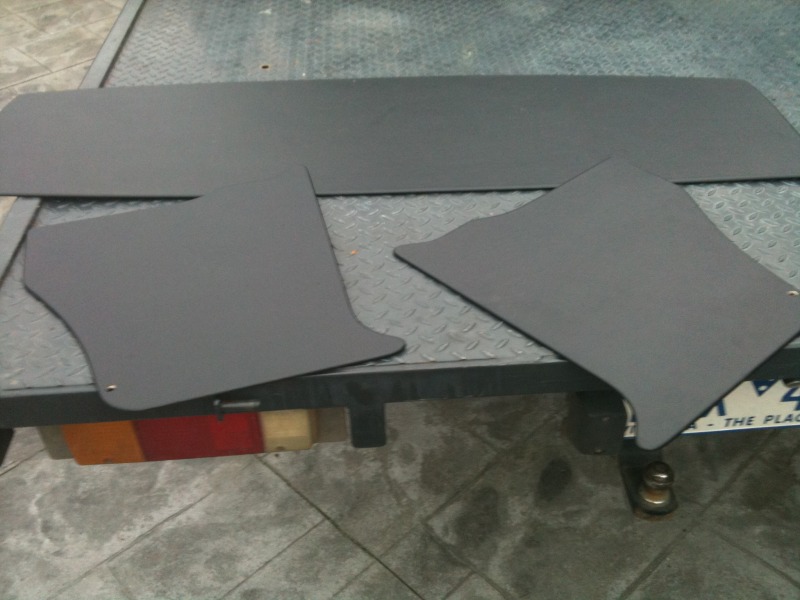
Before shots:
Posted Image

Posted Image

Made up a template of how the clutch pedal should be shaped in order to clear the column. At this stage i was unsure if it would work at all but went ahead with it anyhow.


Posted Image
Couldnt bring myself to cut it up but it was for a good cause.

Posted Image
Posted Image
Posted Image

Decided to use the original brake pedal as i could be bother removing the longer pin. Ground the sides flush and cut off the rectangular plate.

Posted Image


Posted Image

Posted Image

Dummy'ing up the new pedal.


Posted Image
Posted Image
Posted Image
Posted Image

Took day after day of bending, shaping, mocking up untill i finally got it right. The amount of times i was ready to weld and decided to change it completely, it got a bit frustrating.

Posted Image

Cut up the necessary pieces out of 3mm steel and got my uncle to weld it all up for me. He also re welded the brake pedal as it split the welds grinding it down.

Posted Image
Posted Image
Posted Image
Posted Image
Posted Image
Posted Image
Posted Image

Before i cut it up i traced the original shape and cut some slits to bend it close to the original shape. I wanted to maintain the same travel so payed close attention to the length as well, didn't want it being short in comparison to the brake pedal.

Spent the next day or so grinding and unfortunately being as impatient as i was went to fast and gouged the crap out of the metal. It didnt help that i was using a solid disc so switched to a flap disc and the results were impressive. Much better but still needed some work. Would have liked to 2pak them again but was in a bit of a rush so i spray puttied them in the hope i would level out the surface.

Posted Image

Hit them with the rattle can and although i wasn't happy it would have to do.

Posted Image

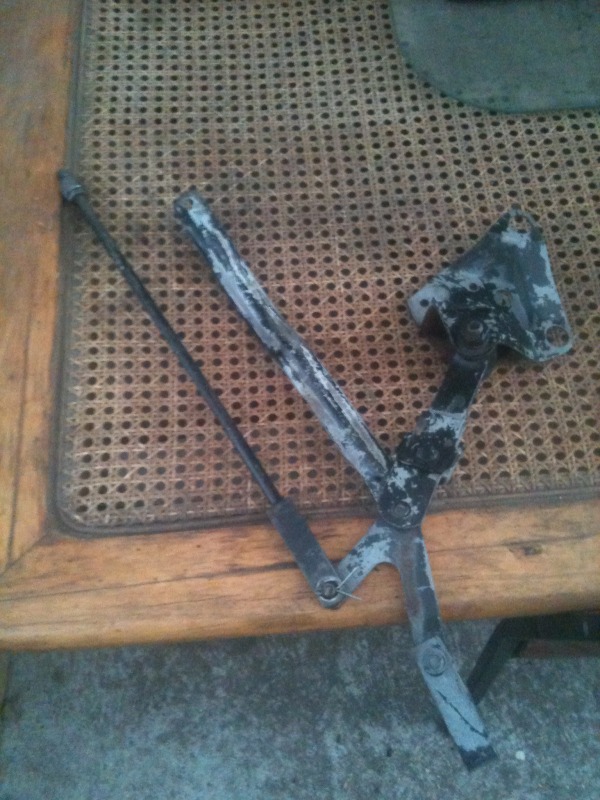
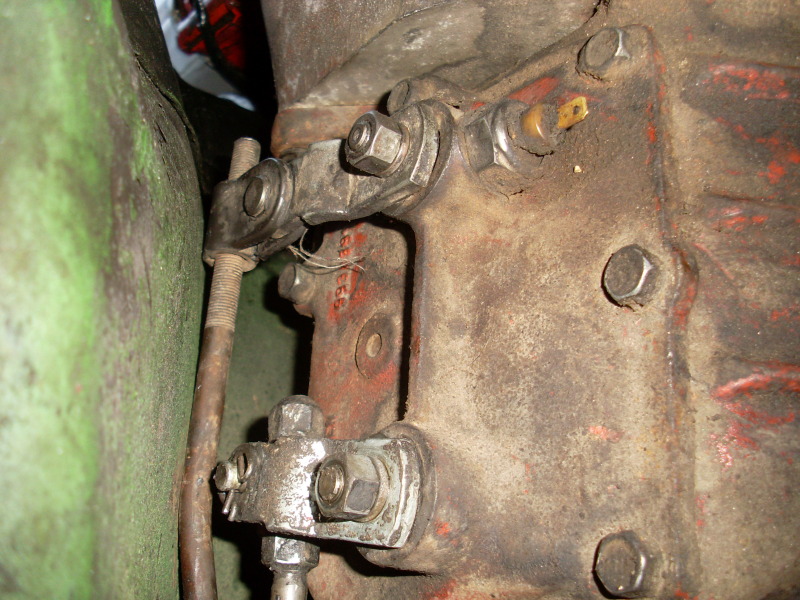
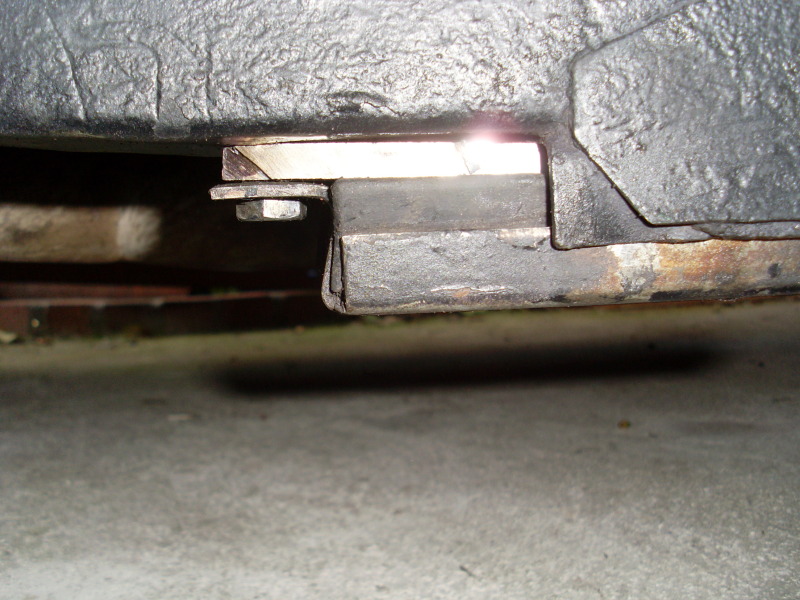
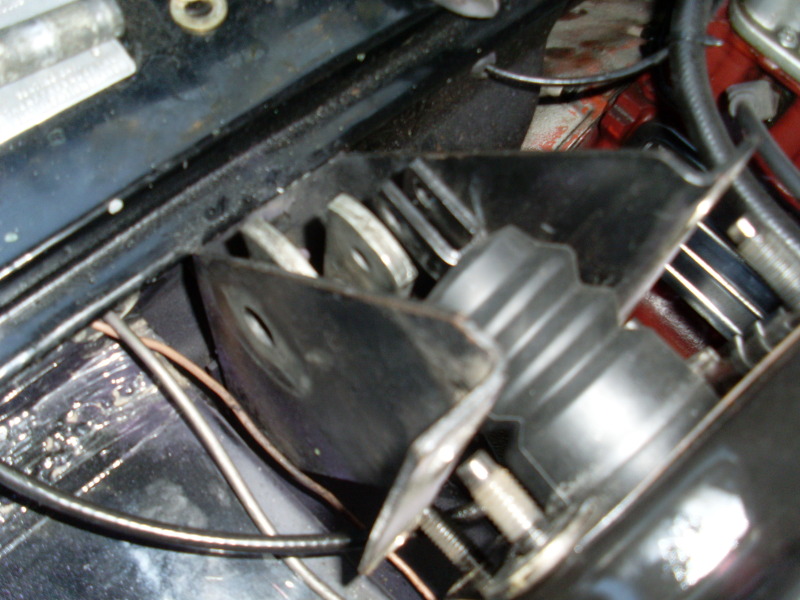
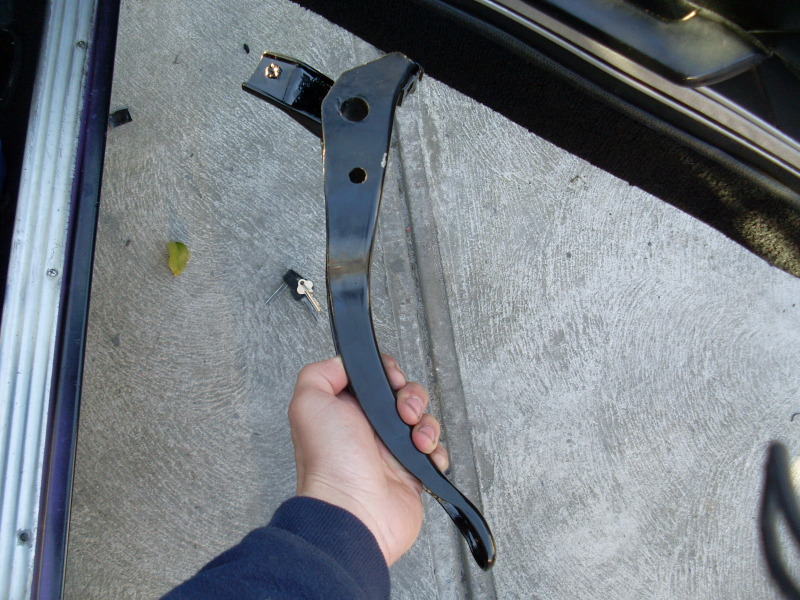
Next step was to sort out the rat trap. I bolted it to the chassis rail but noticed there was no where to bolt the relay support brace. Turns out of had a LH/LX bell housing bracket and it needed to be modified accordingly.

Posted Image

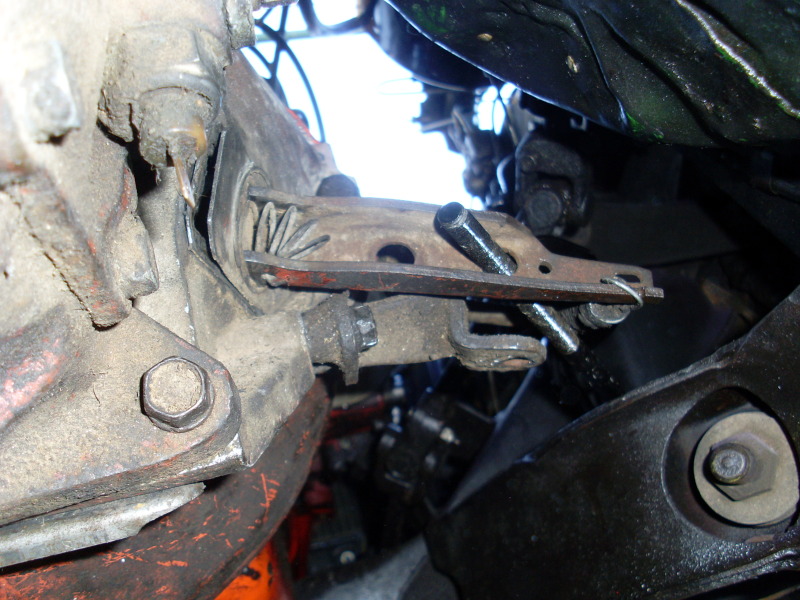
As you can see its a horizontal mounting tab and needed to be vertical so i cut out some angle steel and had it welded. Gotta love these welds, if anything was to brake it would be the bell housing i reckon.


Posted Image
Posted Image

Edited by judgelj, 29 July 2012 - 06:06 PM.


#68 _judgelj_

_judgelj_
  • Guests

Posted 29 July 2012 - 06:06 PM

All bolted up
Posted Image

Neutral safety switch bypassed.

Posted Image

Next step was to sort out the over center spring assembly. At this point i was really clueless and had no real idea of what needed to be done. Took a lot of measuring and trialing to finally work out what needed be done. a 1/2" rod with a 3/8" step down. End product was insanely cool, a bit over kill but it wasnt untill afterwards that i actually saw a picture of the holden factory item. What you see was once a Ford head bolt, machined by my uncle in his lathe to resemble what it is now. As you can see the heax head was deleted and cleaned up, Nut welded on and tapered. Two step downs to 3/8" with matching thread in 3/8 UNF.
Posted Image


Posted Image

Added another hex washer nut which was turned down never to be the same again.
Posted Image

Posted Image

Was a major job to get it right and with a lot of trial and error worked in the end. Seeing as though the pedals would not have gone in when i wanted them to i took the time to paint them properly. Rubbed them back with 800 wet and sprayed straight over with 2k black. Paint reacted slightly with the acrylic putty but still looked great.


Posted Image
Posted Image


Posted Image

Posted Image

Finished product.

Posted Image

Cut up the sleave to space the clutch pedal out just before the ratainer clip.
Posted Image

Tapered the inner nut on the pin to sit nicely on the rounded surface.

Posted Image

Tried to get the spring in and it went the first time however forgot the bushes so it had to come out again. Spent a lot of time stuffing around with bushes that didnt fit (thanks rares), i put it all together and attempted to replace the spring and BAM, it snapped. Started to machine a new one out of alloy on the lathe but turned out it would take a while so i used some rapid fix to repair the plastic temporarily until i can get a new one machined (currently looking to buy or borrow one to copy).

How they look once fitted.
Posted Image


Posted Image

One thing i noticed about this car was that everything was modified, even the entire throttle assembly. Would someone be able to tell me if the booster bracket has been moved over?
Posted Image

Well anyway everything seemed to be done including the clutch cable anchor i made to pivot off the clutch pedal. Had to pop out the factory pivot point as after years of use it had nearly worn off. I used a long bolt as the anchor would not line up with the cable.
Posted Image

So tried to fire it up and after discovering it had a kill switch couldnt figure out what was preventing it from firing. After further investigation it seemed that the engine was jammed and to cut a long story short the flywheel bolts were 120 thou too long. So out came the box and did a few things to it while it was out.

Too long
Posted Image
Posted Image

Bent the bracket to sit further away from the tunnel.
Posted Image
Reverse light switch loom
Posted Image
Made up a new rod adjuster bracket as the old plastic POS broke.
Posted Image
Posted Image
Posted Image

Plenty of clearence

Posted Image

Modified crossmember for the supra box? The start of the tunnel had been modified to clear the bigger bell housing.

Posted Image

Shorter bolts

Posted Image
What is this switch for?
Posted Image
Posted Image

Posted Image

Took her for a road test and she went well. So much more fun to drive, pulls so much harder. Shifter is sloppy but havent driven a four speed before so im guessing they are all like that?

The only problem that was left bard the pedal rubbers not fitting on because of the extra bracing on the back of the pedals was that the clutch cable fouls on the extra steering knuckle when you turn. To combat this i was thinkin of backing off the tension and using an anchored pulley to keep the cable away from the steering by allowing it to operate with a slight bend.

Posted Image

#69 debkar

debkar

    Forum Fixture

  • Members
  • PipPipPipPipPip
  • 911 posts
  • Location:Townsville QLD
  • Car:1971 LC 2 Door
  • Joined: 03-January 09

Posted 29 July 2012 - 06:39 PM

Great work Jacob, switch on box senses when box is in top gear as far as I am aware, tells vacuum module when car is in top on later cars Known as transmission control switch, allows vac
advance in top gear only

Regards Simon

Edited by debkar, 29 July 2012 - 06:53 PM.


#70 S pack

S pack

    Scrivet Counter

  • Members
  • PipPipPipPipPipPipPip
  • 15,541 posts
  • Name:Dave
  • Location:Luggage Point
  • Car:73 LJ
  • Joined: 25-January 10

Posted 29 July 2012 - 08:26 PM

Great work Jacob, switch on box senses when box is in top gear as far as I am aware, tells vacuum module when car is in top on later cars Known as transmission control switch, allows vac
advance in top gear only

Regards Simon


Jacob, don't worry about that switch on the gearbox, it's not applicable to your car.

#71 _judgelj_

_judgelj_
  • Guests

Posted 29 July 2012 - 11:21 PM

i thought as much, and thanks, took a bit of work but im glad it's over.

cheers

#72 _judgelj_

_judgelj_
  • Guests

Posted 30 July 2012 - 08:54 PM

I was thinking to perhaps hang a pulley off the rat trap chassis rail mount, allowing the cable to run with a kink in it. Does this seem like it will work? Either way it needs to come away from the steering column.

Cheers

#73 _judgelj_

_judgelj_
  • Guests

Posted 11 August 2012 - 03:33 PM

Ok so i have taken my head into the shop to have the valcve springs replaced as they were only holding 55 pound. Asked him to check it out for me and it turns out the guides are worn as well as the valve stems. He reckons to re do the guides, second hand valves and increase the throat size for free it will cost me 500 all up including springs to get the head to brand new. Before i take it anywhere else which i didnt really want to do, how reasonable does this sound? Seems like i could find something reco'd of the same spec for similal pricing?

Cheers

#74 _Agent 34_

_Agent 34_
  • Guests

Posted 08 September 2012 - 07:30 PM

Jacob,

your in Victoria, why don't you take it to head stud services, they seem to be a guru on 6 heads down that way . not sure if 500 is a lot for what your getting done , but just get a second opinion on this.


depends on what you want to do with the car will depend on the head you use to do this. Keep it simple and build the monster engine later.

#75 _judgelj_

_judgelj_
  • Guests

Posted 16 September 2012 - 10:02 PM

Yeah good advice Grant, i think the priority is the body and interior first; the things most obvious when you look at the car. But as for the head i had them both tested (161 and 186). Both have the same CC chamber size (one cc difference) which would be due to the recess machined into the small kidney shaped combustion chambers on the 161 head. For this reason i am not going to pay $500 to have it re done when the one i have currently is a better head both performance and condition wise. My only thought was to up compression but since they are both the same chamber size i can only get 8.5:1 which is nothing really. I have come to terms with this and instead of going all out ripping the block apart and decking it etc i think that $1000 would be better spent on a throw together bang for buck Bomber Watson style turbo setup. Something that is nice to look at, different and operational. Doesn't have to make heaps of power.

In other news grille and headlight surrounds have been sent away to be returned back to their former glory... and then some. They will be stripped, straightened and mirror finished. At the same time i had to top of the guides machined down and teflon seals installed. A little bit of meat was taken off the head to get it straight and i will pop it on as soon as i can find some head stud sealant.

Have become addicted to polishing metal now and finished off my wiper blades
Posted Image
Posted Image
Posted Image

Posted Image

Guides on 186 head
Posted Image

Guides on 161 head
Posted Image

Ports on 161
Posted Image

Ports on 186
Posted Image

Posted Image

186 Valves
Posted Image

Look no grille!!
Posted Image


0 user(s) are reading this topic

0 members, 0 guests, 0 anonymous users