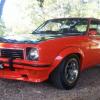
Unfortunately no pics Laurie but my daughter translated it for me. The Asian writing is Japanese kanji and it literally translates to 'left hand front door pillar'.
GMH did export RH drive vehicles to Japan, albeit in small numbers. The RPO was XU4 - Japanese special vehicle equipment.
The story with the pillar is it's been sent to asian country to see if it can be copied and manufactured but after 4 years of flying around the world it's come back with a "can't do."
Nice work Marty, always enjoy seeing your updates.
My tip for welding the cowl panel on is to fit the wiper mechs. This is to make sure the panel that sits against the heater is in the correct position and the wiper mech fits afterwards.
I used a HB cowl panel on mine, not realising the differences, and neglected to fit the wiper mechs when I welded it on.
Fast forward to me fitting the wipers and wondering why -
1) The passenger side wiper mech wouldnt fit without some massaging and grinding of the hole it sticks through.
2) The drivers side wiper mech hole was actually about 60mm too far to the center of the car so I had to redreill the mounting holes.
3) When I fitted the heater box, I needed two gaskets to make it seal against that panel. (I still havent tested to see if it's water proof.)
Luckily it looks good and isn't easy to pick without a keen eye.
What may seem obvious to some is not so for others!
Paul
Thanks Paul, Always good to learn from other peoples mistakes. I'm pretty sure I would of put the wiper mech's in before lining up the cowl.
I've sanded back the etch to remove the runs caused by Rust Seal. Then re-applied another coat of etch. Made up a big brew and etched some parts I had sand blasted and rust blasted.
 IMG_9279.jpg 139.55K
8 downloads
IMG_9279.jpg 139.55K
8 downloads
IMG_9294.jpg 172.69K
8 downloads
IMG_9267.jpg 369.92K
10 downloads
IMG_9297.jpg 164.89K
9 downloads
IMG_9298.jpg 116.81K
11 downloads
Marty


 View Garage