Jump to content


- - - - -

Brewster's LX SS


  • Please log in to reply
214 replies to this topic

#51 RIM-010

RIM-010

    DON'T PANIC

  • Members
  • PipPipPipPipPipPipPip
  • 8,079 posts
  • Name:Tim
  • Location:Cowell, SA
  • Car:LJ 2 Door - HQ Premier
  • Joined: 01-March 06
Garage View Garage

Posted 04 July 2007 - 03:29 PM

Diff is easy. Go a Borg Warner (as seen in VL's)

See these threads for more details...

http://www.gmh-toran...4036&hl=skyline
http://www.gmh-toran...9959&hl=skyline
http://www.gmh-toran...0629&hl=skyline

Good idea, going all Holden.

Tim

Edited by RIM-010, 04 July 2007 - 03:33 PM.


#52 _Brewster_

_Brewster_
  • Guests

Posted 05 July 2007 - 12:24 AM

Thanks Tim for the links, you're doing all the work for me!
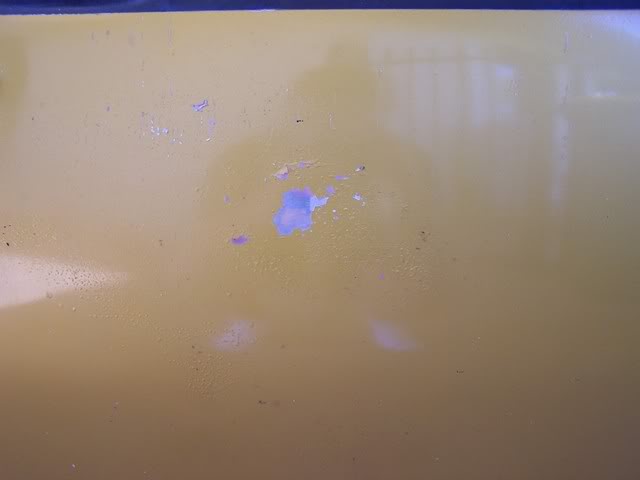
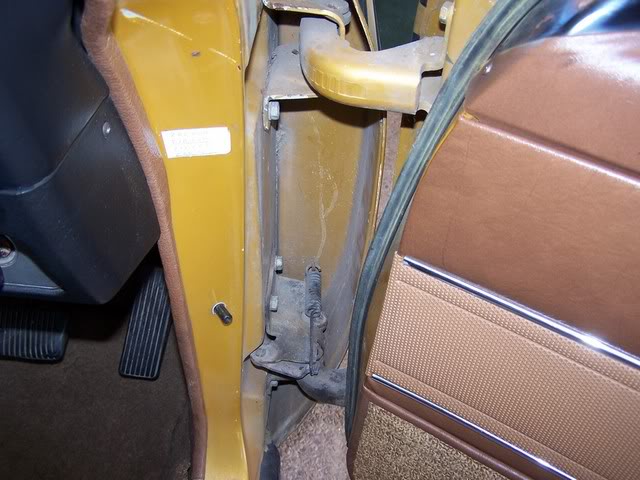
I had my suspicions, but I cofirmed the driver door had been in some sort of accident. It doesn't look that bad, the tiny little patch of primer that you can see is bog, about 20 cent size, ran over it with a magnet. It aslo explains why the paint is all blistery on that side. But the darker bottom door hinge was a worry. Everything else seemed to be in order.

Posted Image

Posted Image

#53 RIM-010

RIM-010

    DON'T PANIC

  • Members
  • PipPipPipPipPipPipPip
  • 8,079 posts
  • Name:Tim
  • Location:Cowell, SA
  • Car:LJ 2 Door - HQ Premier
  • Joined: 01-March 06
Garage View Garage

Posted 05 July 2007 - 12:26 AM

I've been here for a little while now, and read ALOT of threads. Always glad to help people out.

Tim

#54 _Brewster_

_Brewster_
  • Guests

Posted 28 September 2007 - 06:29 PM

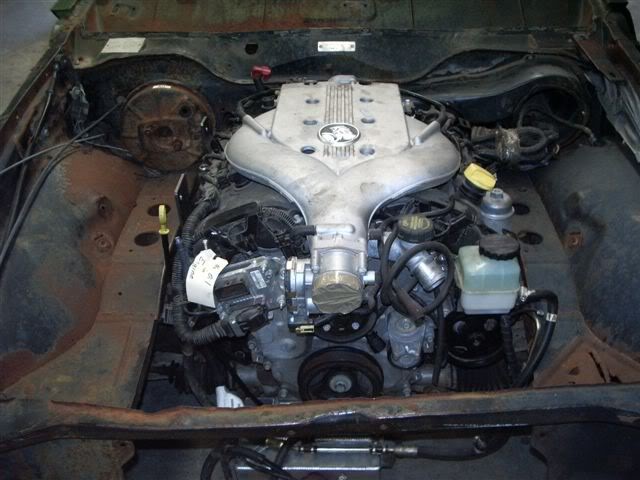
Ok, time for an update, but a very important one, the Alloytec engine conversion kit for the engine transplant has been completed. Scott (Workshop Supervisor) and the hard working dedicated boys at Castlemaine Rod Shop after months of hard work and patience have come through with the goods!

Engine mounts on to standard cross member,

Modified Engine sump to suit, and

Transmission cross member for the 4L60E

At this stage, Scott has provided me with the world premier exclusive photo of what an Alloytec engine looks like in a Torana engine bay!

Please note, the donor car belongs to Castle Auto Electrics and they are currently developing the custom headers for it, and the wiring to start.

Top job boys! :spoton:

Posted Image

#55 _Brewster_

_Brewster_
  • Guests

Posted 28 September 2007 - 06:33 PM

If anyone else is interested in the conversion, could they please direct all their enquiries to Scott, at [email protected]
But I'll be happy to answer as many questions as I can, but please bare in mind, I haven't done anything to this project thus far, so i can only go off what Scott has told me. Cheers.

#56 _Brewster_

_Brewster_
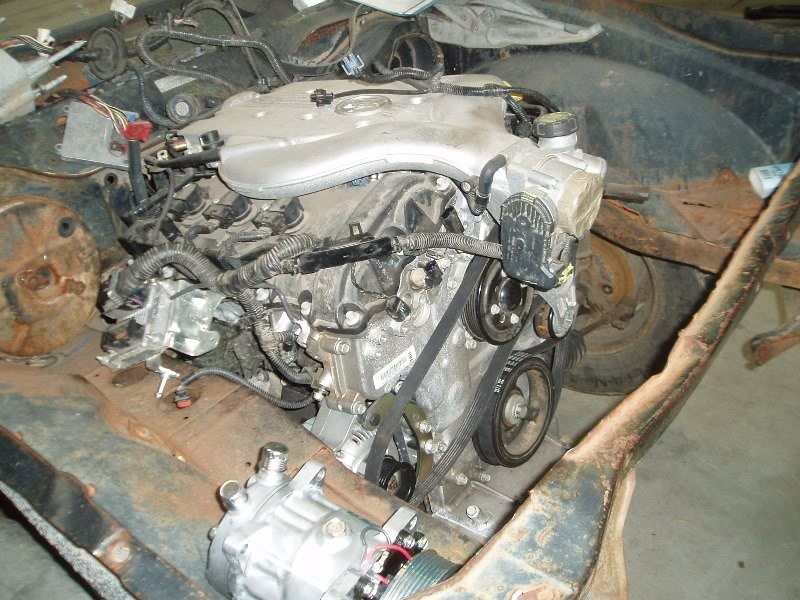
  • Guests

Posted 28 September 2007 - 06:46 PM

The outstanding issues with the engine itself are as follows,

1. the alternator and bracket mounting is too low and hits the chassis rail.

2. Got to sort out an idler pulley for the power steering pump, although I have been advised that I could just recirculate the pump back to resevoir.

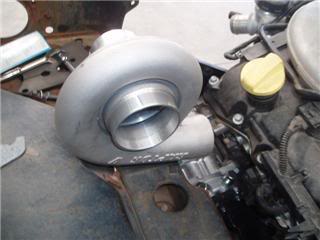
3. Air conditioner has been removed due to it being mounted low and hitting the chassis rail.

4. Mounting the electronic throttle inside the car

5. Wiring the loom so the car starts and runs and to a suitable dash. I was going to use the original dash, as Con at CAE said they could do it, for the geniune look, but I was thinking of sending the second hand instrument cluster I have away to Dakota Digital and getting them to make up a custom dash for me.
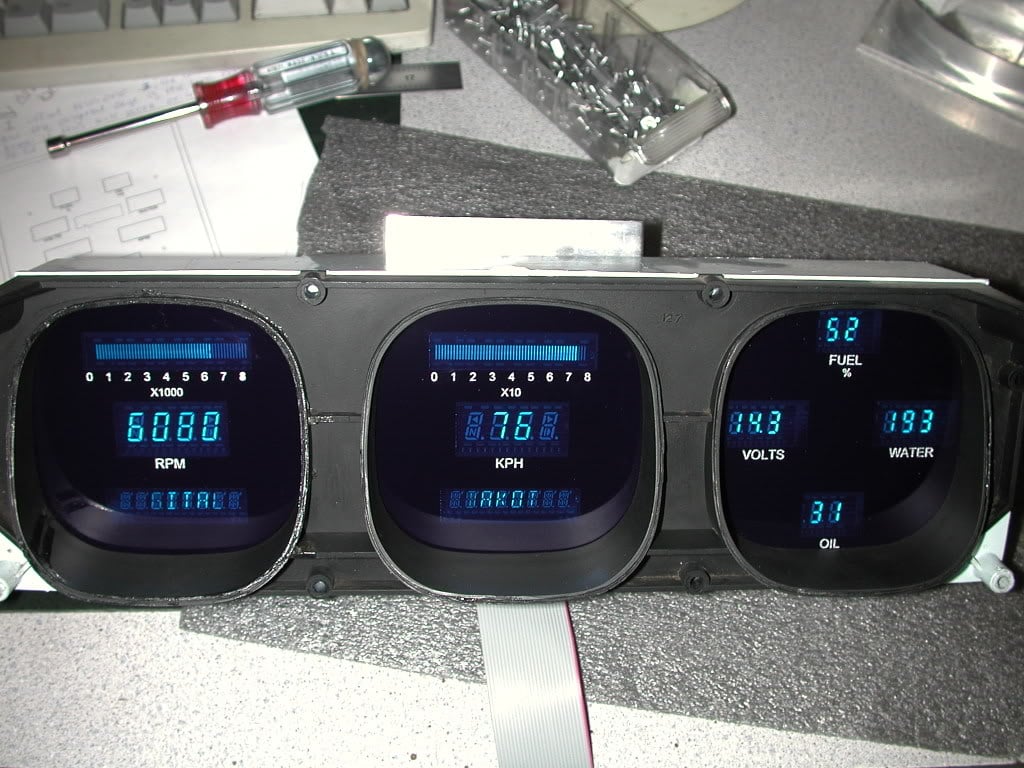
It might suit the electronics better. Not sure about that one.

6. I think its gonna be a tight squeeze for a new radiator.

I've asked CAE to sort out the issue in regards to the alternator, being Auto Elecs, they have a better extensive knowledge about the range of alternators available.
I've also asked to do an assessment of an dummy idler pulley in place of the power steering pump, or alternatively, fitting an air conditioner compressor in its place, although highly unlikely due to the mounting of the oil cartridge housing being so close.
The electronic throttle seems to be a straight forward fit, but I don't want to rip my original carpet!

Thats about it for the moment, I'm sure I'll think of some other issues later! :D

#57 _Brewster_

_Brewster_
  • Guests

Posted 28 September 2007 - 09:37 PM

Incidentally, I need to mention that I'll be leaving Darwin at the end of the year and moving to Bris Vegas! Yeah baby!

So any info on who's the best business's around the area would be greatly appreciated.

Electro plating

Paint and panel

powder coating

Zinc coating

drop tank fabrication

9 inch diff conversions

Interior trimming

Window tinting

Transmisson upgrades

custom tail shafts

And, a reliable Automotive Engineer to get all this approved!

Cheers guys

#58 _Leakey_

_Leakey_
  • Guests

Posted 29 September 2007 - 08:43 AM

Brewster, fantastic car mate! Had a yella one just like it. LX5008 now owns it
and is completely restoring it. When complete, he will keep it for a month
and sell it back to me for $50! (Luckily I implanted a subliminal message in his brain just before the sale..LOL.)

Will you be keeping the original motor and aircon set up?
Doesnt look like there is a lot of room around the ecotek!
If you are selling it off, I would certainly give it a home for you!

Great pic record of your build too.

Cheers, Leakey

#59 RIM-010

RIM-010

    DON'T PANIC

  • Members
  • PipPipPipPipPipPipPip
  • 8,079 posts
  • Name:Tim
  • Location:Cowell, SA
  • Car:LJ 2 Door - HQ Premier
  • Joined: 01-March 06
Garage View Garage

Posted 29 September 2007 - 09:00 AM

It's an Alloytec, Leakey...

Andrew, whats this speak of a 9"? Can't wait to see more updates.

Tim

#60 _Brewster_

_Brewster_
  • Guests

Posted 29 September 2007 - 09:54 AM

Cheers Leakey, yes, I am going to keep the original engine and air con set up, but I'll keep you in mind if the time comes to off load it. My original idea was to modify the car for a daily driver but also be able to revert back to the stock standard car.
The same model car sold on Shannon's auctions for $30K, just imagine how much they're going to be worth 20 years down the track!

#61 _Brewster_

_Brewster_
  • Guests

Posted 29 September 2007 - 09:57 AM

Hi Tim, yes its bad talk about a 9", however, in another thread I've been informed that you can have a 9" built, but not necessarily a F@#D 9", so that might be a good thing. Especially if the mod plate just says, 9" Diff instead of that filthy four letter word!
I was getting a bit concerned with the issues related to welding the upper control arm mounts on the cast housing of the commodore one, but people seem to have done it.
Its way down the track, I still have lots to do before I get to that yet!

#62 _Brewster_

_Brewster_
  • Guests

Posted 30 September 2007 - 09:34 AM

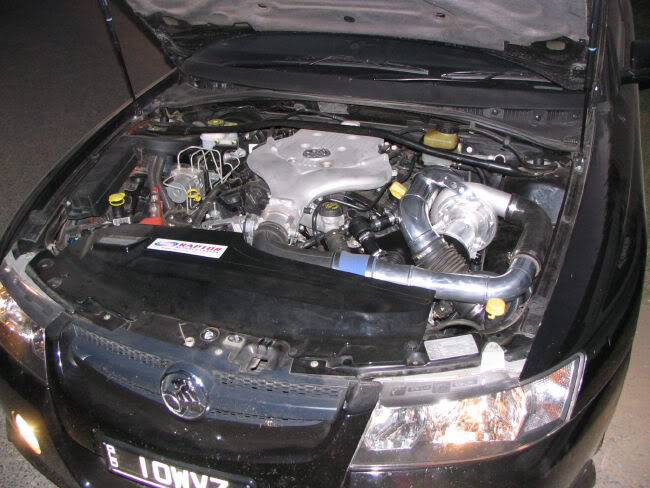
I want to have forced induction on this engine, and companies are slowly but surly churning out the performance bolt on goodies for this Alloytec.
Check it out, the very new Raptor supercharger kit for the Alloytec by Raptor Superchagers. I've gotten some keen intrest from Tim at Raptor about my project and I'll be sending him some pics so that he can determine if the kit will fit into the Torana or not. From his initial assessment, all looks good. Its a simple bolt on kit that takes 15 to 20 minutes to install. Power gain is from 175kw to 295kw, 220rwkw
I just hope it all fits under the hood! :D

Posted Image

#63 _Brewster_

_Brewster_
  • Guests

Posted 05 October 2007 - 09:29 PM

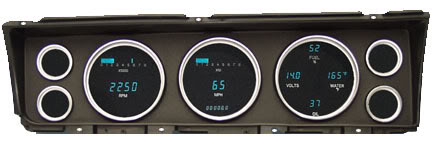
A little something to mention here, I not long ago purchased a LH/LX instrument cluster off ebay, not sure which one it was, it had the clock on the left, speedo in the middle and fuel guage up the top on the third with 6 warning lights at the bottom, an SL or Sunbird dash perhaps? Anyway, it was only 20 bucks, so I removed the gauges, cleaned it up, ( should have taken a pic so everyone knows what I'm talking about ) and today, its on its way via air mail to Dakota Digital. Hopefully they will be able to custom fit a digital dash in there, and it should look sweet.
I've asked them to fit the instrument system below, as its very similar to the one I have already got. Has anyone else done this before?
I know the cost is gonna be huge, but with the dollar being so high, now is the time to lessen the damage!
I remember reading in a thread in the elec section someone else fitting a 5 gauge system, but it was just the square panel, it looked cool, don't get me wrong, but hopefully this way will look even better. Stay tuned for when I get this baby back! If it doesn't get lost in the post that is, TOUCH WOOD!

Posted Image

#64 Heath

Heath

    I like cars.

  • Administrators
  • PipPipPipPipPipPipPip
  • 18,394 posts
  • Name:Heath
  • Location:Eastern Suburbs, Melbourne
  • Car:Heavily Modified UC Sunbird Hatchback
  • Joined: 07-November 05
Garage View Garage

Posted 06 October 2007 - 11:06 AM

Yeah you described an SL dash. That will be a very unique mod - I look forward to seeing it complete.

#65 TerrA LX

TerrA LX

    Fulcrum Fixture

  • Members
  • PipPipPipPipPipPipPip
  • 14,241 posts
  • Location:Sid 'n' knee
  • Joined: 31-May 06

Posted 06 October 2007 - 02:56 PM

^^ Yeah that will look trick.
Call me old school but i still prefer a tacho with an arm that raises in an arc tho.

#66 _Bomber Watson_

_Bomber Watson_
  • Guests

Posted 06 October 2007 - 04:36 PM

ah dakota digital. yeah i've spoken to these guys a few times. they make some mad stuff.

#67 _Brewster_

_Brewster_
  • Guests

Posted 01 December 2007 - 10:54 AM

Ok, its time for an update, the guys at Castle Auto in Castlemaine were kind enough to take some photo's of the progression of the motor thus far.

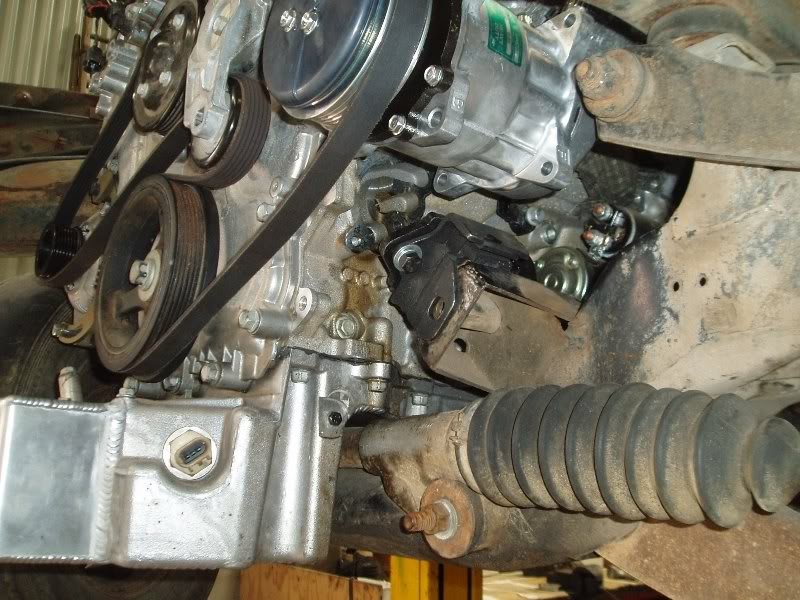
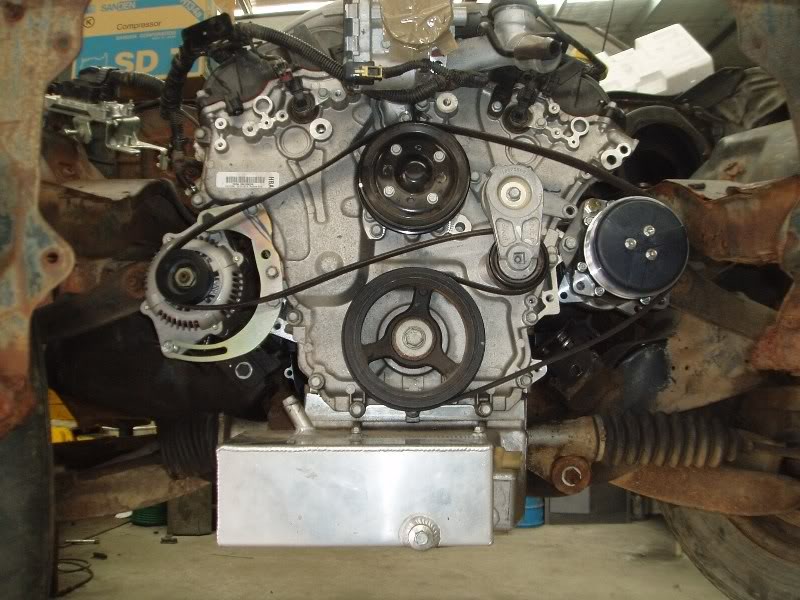
Here is a shot of what the sump mod looks like, as you can see, its a very, very tight fit. The front of the sump as been extended and the tube you can see on top of the extension is for the dip stick. The sump saddles the cross member.
The engine mounts also fit the standard mount on the cross member, nice work from the boys at the Rod Shop.

Castle Auto have solved my issue for Air Con, as you can see, they have mounted a smaller universal compressor, in place where the Power Steering pump used to be. The oil filter cartridge housing will now be relocated and mounted as a remote set up.


Posted Image

Edited by Brewster, 01 December 2007 - 11:01 AM.


#68 _Brewster_

_Brewster_
  • Guests

Posted 01 December 2007 - 10:57 AM

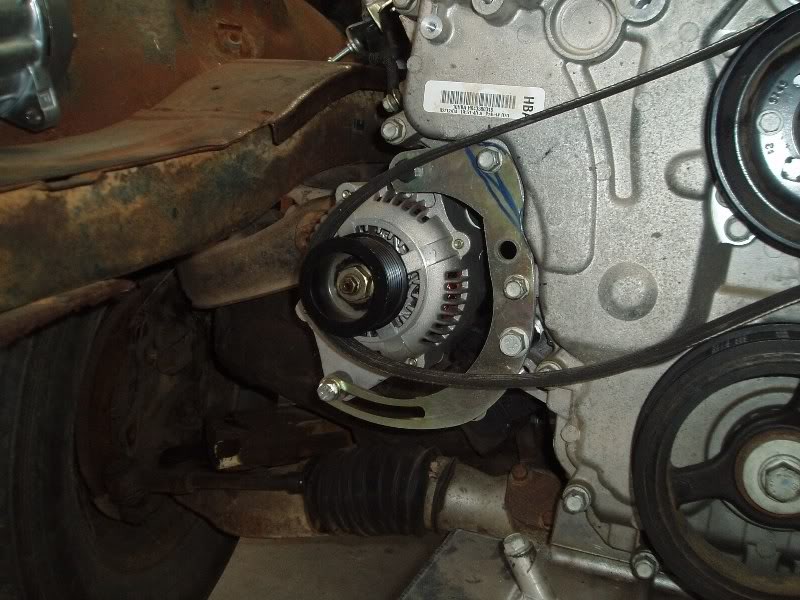
Castle Auto have solved the issue with the alternator, they have used a smaller 85amp alternator and modified bracket.

Posted Image

#69 _Brewster_

_Brewster_
  • Guests

Posted 01 December 2007 - 11:03 AM

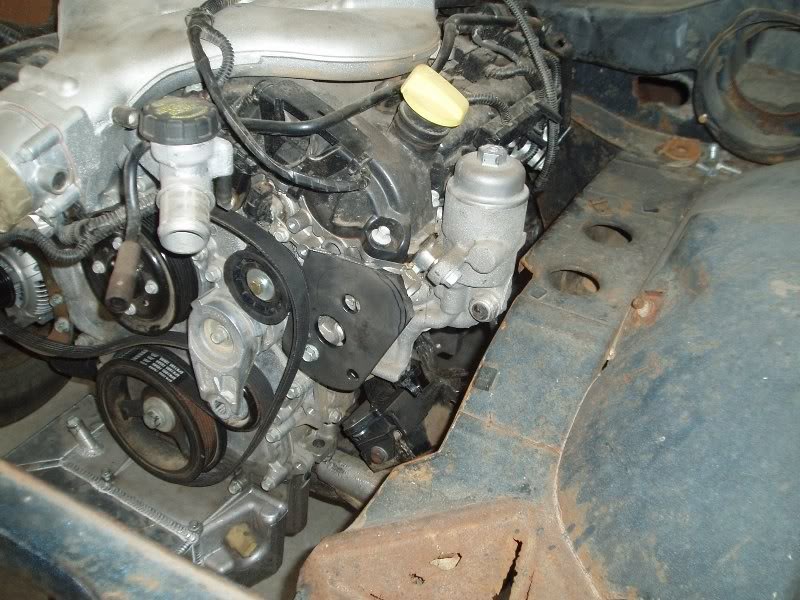
Here is a pic before the A/C compressor was mounted, you can see the bracket plate for it, and the oil cartridge housing behind it that will be moved.

Posted Image

#70 _Brewster_

_Brewster_
  • Guests

Posted 01 December 2007 - 11:05 AM

Here is a side on view of the engine prior to the A/C compressor being mounted, but you can see the modified alternator.

Posted Image

#71 _Brewster_

_Brewster_
  • Guests

Posted 01 December 2007 - 11:09 AM

And finally a front view of the set up thus far. Con and his excellent craftsmen at Caslte Auto have done an excellent job.

Posted Image

#72 _Brewster_

_Brewster_
  • Guests

Posted 04 December 2007 - 01:12 PM

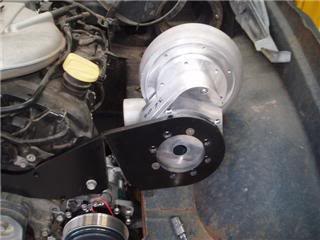
Ok, this part progressed faster than I had initially planned, but Tim at Raptor Super Chargers was kind enough to send a dummy super charger and bracket down to see if it could be fitted inconjunction with the A/C compressor. And I'm pleased to say, Con and his boys at Castle Automotive Enterprises have come up with a viable solution. :D

This first pic shows the original bracket having to be cut so the super charger can be mounted.

Posted Image

#73 _Brewster_

_Brewster_
  • Guests

Posted 04 December 2007 - 01:15 PM

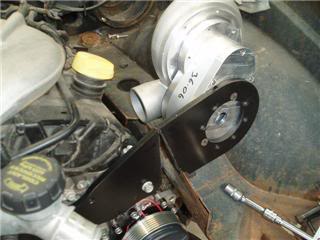
This picture shows another angle of the mounting, note that there might be a bit of a problem running a pipe from the outlet of the super charger to the throttle body, but I've been assured it will work this way.

Posted Image

#74 _Brewster_

_Brewster_
  • Guests

Posted 04 December 2007 - 01:19 PM

This picture shows how close the super charger is to the wheel well, but there is sufficient clearance there. I've also been assured that this should fit under the bonnet. This is still in its early stages and obviously once the pulley has been fitted, pipes run from and to the supercharger and air box and the belt has to be re routed probably with an extra tensioner or two, not to mention a custom made length of belt. All should be sweet!

Posted Image

#75 _Brewster_

_Brewster_
  • Guests

Posted 19 December 2007 - 05:26 PM

Here is a pic of my completed Custom Dakota Digital Dash, that will be on its way from the States shortly to CAE to get wired into the wiring harness! How exciting! I think it looks awesome and I'm really happy with the work.
A short note, even though they have had the dash for a few months now, work doesn't start until, you either pay up front, and they gurantee work will be completed in under 4 weeks. In this case, I paid upfront and it has only taken them a week and half to do, or if you pay the minimum 50% deposit, it might take longer than 4 weeks.
Please don't ask how much it cost, it was a wee bit more than i thought. :cry:

Don't mind the quality of the front part of the instrument cluster, if you've been reading my project notes, I bought this second hand one off ebay for 20 bucks, and sent it to them.

Posted Image


0 user(s) are reading this topic

0 members, 0 guests, 0 anonymous users