
Hey Green Machine... Can i buy this one off you for $500? LOL
Mate that looks UNREAL! One day i will buy myself all the right tools and give it a shot!

Polishing aluminium
Started by
V-SLR5000-P
, Sep 19 2007 01:20 PM
247 replies to this topic
#101

MRLXSS
-

- Members
-

- 12,420 posts
The Render Garage
- Name:Matt
- Location:Upwey, Melbourne
- Car:355 LX Hatchback, DeLorean DMC-12, LX SS Hatch, VY Cross8 Crewman
- Joined: 09-November 05
Posted 28 March 2008 - 01:44 PM
#102
_greenmachine215_
_greenmachine215_
-

- Guests
Posted 28 March 2008 - 07:33 PM
Herne, thanks alot for the comment, Roughyly took me about 3 weeks a few hours a night after work, all up id say around 20hours
MRLXSS: 500 is a good DEPOSIT,
i Dont have anything special, just a bench grinder with buffs, sand papers,and dremels
thanks fellas
MRLXSS: 500 is a good DEPOSIT,
i Dont have anything special, just a bench grinder with buffs, sand papers,and dremels
thanks fellas
#104
_Viper_
_Viper_
-
- Guests
Posted 28 March 2008 - 08:33 PM
Wow thats amazing, have also given me the Urge to go polish something now  *looks at VN rocker covers* they shouldnt be too hard, mostly flat
*looks at VN rocker covers* they shouldnt be too hard, mostly flat
Edited by Viper, 28 March 2008 - 08:33 PM.
#105
_j7723_
_j7723_
-
- Guests
Posted 29 March 2008 - 08:24 AM
Top work hope once I finnish hernes car I will be back at my buff have up and coming plans 
#106
_Viper_
_Viper_
-
- Guests
Posted 30 March 2008 - 12:14 PM
Hehe Ok I started off with something extremely Easy, But im very pleased with the results
My Custom remote shifter for the Gem... Heres the finished product:
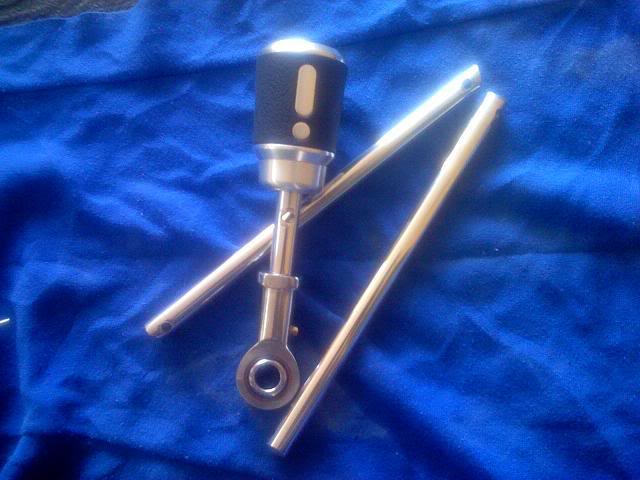
And A couple Of before and after shots:
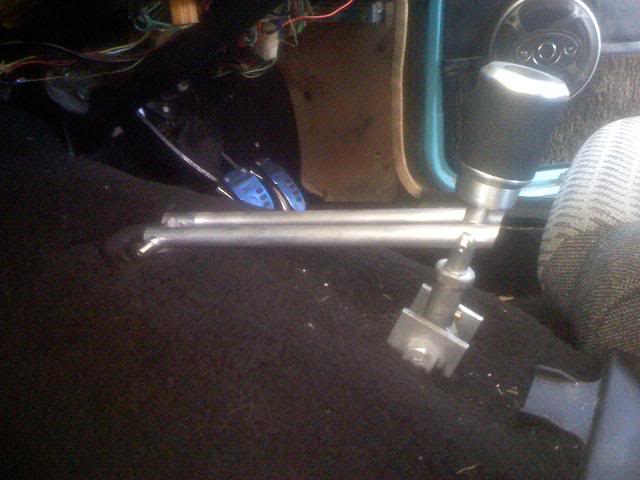

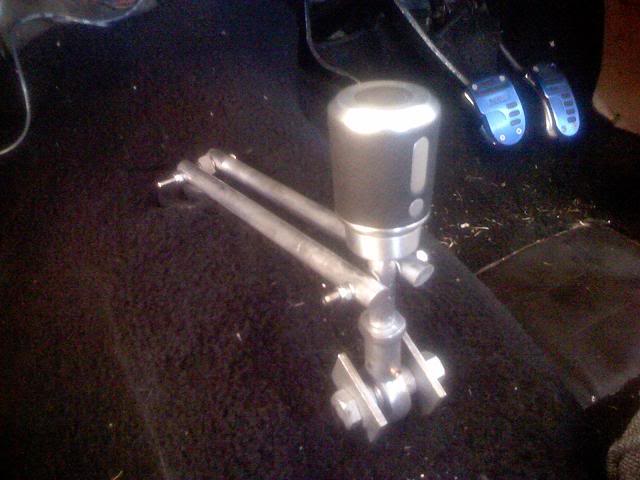
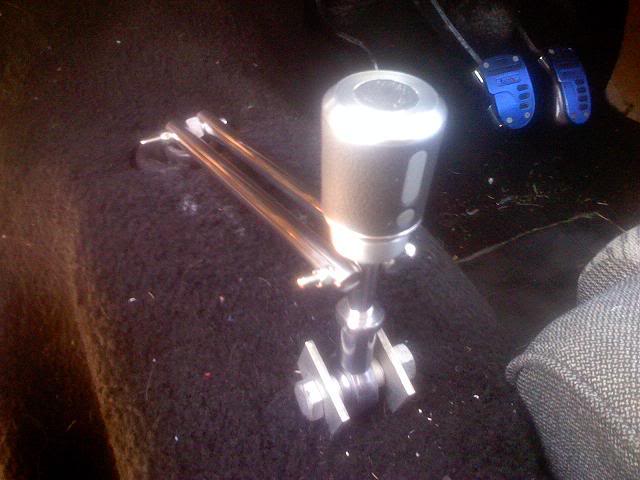
My new alloy intake manifold for the gem should Arrive this week.. Ill give that a shot
My Custom remote shifter for the Gem... Heres the finished product:
And A couple Of before and after shots:
My new alloy intake manifold for the gem should Arrive this week.. Ill give that a shot
#107
_greenmachine215_
_greenmachine215_
-
- Guests
Posted 30 March 2008 - 12:46 PM
Viper, mate that looks pretty neat!
best way to get the nack is to start on simple items, Keep us posted with the progress on the manifold
best way to get the nack is to start on simple items, Keep us posted with the progress on the manifold
#108
orangeLJ
-

- Members
-
- 10,261 posts
Yes, yes I do post alot!
- Joined: 02-May 06
Posted 30 March 2008 - 02:18 PM
hey greenmachine, what car is the polished manifold going on if you dont mind me asking??
Also how much did it set you back from COME?
Also how much did it set you back from COME?
#109
_greenmachine215_
_greenmachine215_
-
- Guests
Posted 30 March 2008 - 02:43 PM
Orange LJ: The manifold is going on my stroker for my LX Hatch, and it set me back $2850, They have recently price dropped to 2500 with snorkel and fuel cross over
#110
_Viper_
_Viper_
-
- Guests
Posted 02 April 2008 - 06:42 PM
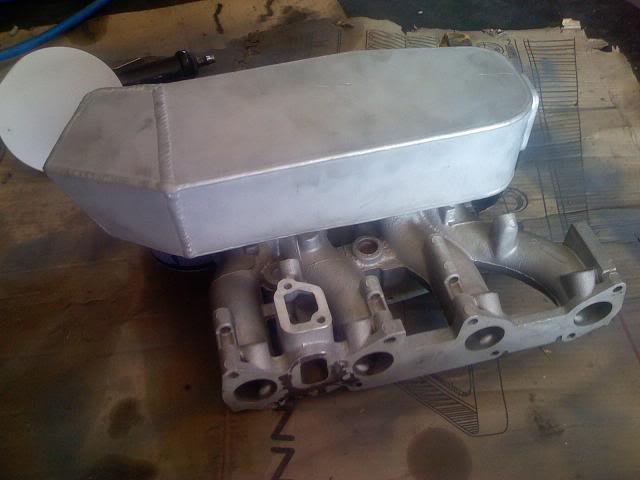
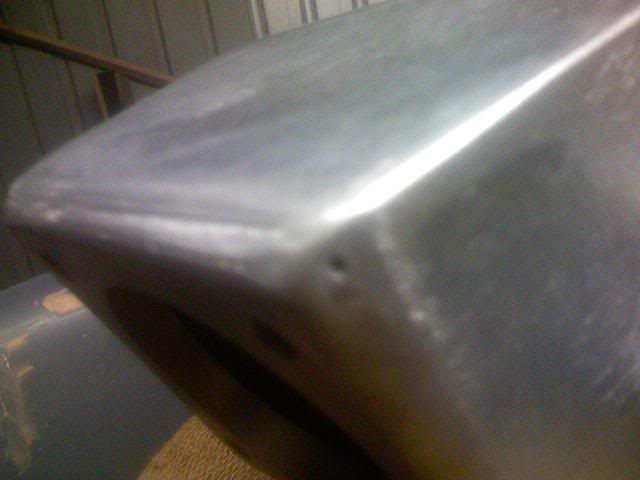
New intake manifold arrived today
I know its not a perfect intake manifold as it has square internal edges which isnt the best performance wise... But lets face it this isnt a top level drag car and the tiny ammount of Horsepower id lose wont be noticed... and Well I got it at a good price
But made a start on polishing it today, most of it is pretty flat so should be pretty quick and easy to do, bar the bottom half eep dreading that bit...
Before:
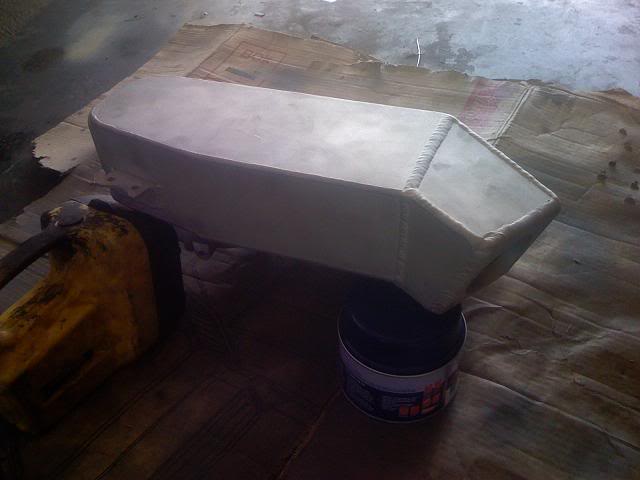
After 1/2 n Hour:

I only had sandpaper and some meguirs metal polish So could only get that hazzy sorta shine out of it...
there is about 3-4 spots on the top that are like chips (casting flaws?) and are about 1/2mm-1mm deep... Am I best to just ignore them? Or should I keep sanding and sanding and sanding till there gone?
I went 240 then 340 on the orbital sander, then 600, 800 dry with just a rubbing block then 1200wet then polish....
What do you guys recommend I do to get a mirror finish? Just get some of those Jasco blocks from bunnings and use the brown then white, then some Purple polish? or do some more sanding first?
Cheers
I know its not a perfect intake manifold as it has square internal edges which isnt the best performance wise... But lets face it this isnt a top level drag car and the tiny ammount of Horsepower id lose wont be noticed... and Well I got it at a good price
But made a start on polishing it today, most of it is pretty flat so should be pretty quick and easy to do, bar the bottom half eep dreading that bit...
Before:
After 1/2 n Hour:
I only had sandpaper and some meguirs metal polish So could only get that hazzy sorta shine out of it...
there is about 3-4 spots on the top that are like chips (casting flaws?) and are about 1/2mm-1mm deep... Am I best to just ignore them? Or should I keep sanding and sanding and sanding till there gone?
I went 240 then 340 on the orbital sander, then 600, 800 dry with just a rubbing block then 1200wet then polish....
What do you guys recommend I do to get a mirror finish? Just get some of those Jasco blocks from bunnings and use the brown then white, then some Purple polish? or do some more sanding first?
Cheers
#111
_j7723_
_j7723_
-
- Guests
Posted 03 April 2008 - 01:21 PM
Viper If I were doing that one I would go to the white with a soft wheel then purpleIthere is about 3-4 spots on the top that are like chips (casting flaws?) and are about 1/2mm-1mm deep... Am I best to just ignore them? Or should I keep sanding and sanding and sanding till there gone?
I went 240 then 340 on the orbital sander, then 600, 800 dry with just a rubbing block then 1200wet then polish....
What do you guys recommend I do to get a mirror finish? Just get some of those Jasco blocks from bunnings and use the brown then white, then some Purple polish? or do some more sanding first?
Cheers
Top job so far
#112
_Viper_
_Viper_
-
- Guests
Posted 03 April 2008 - 09:22 PM
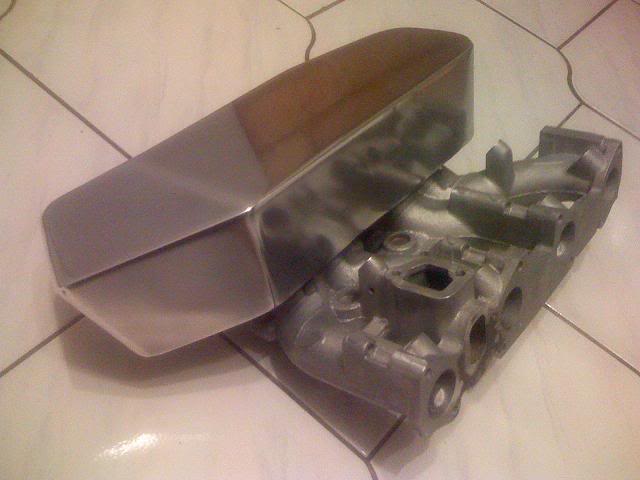
Hey guys, I donno if you guys wanna see the progress I make every time I work on it?? if yas dont jus lemme know and ill wait till ive actually finished 
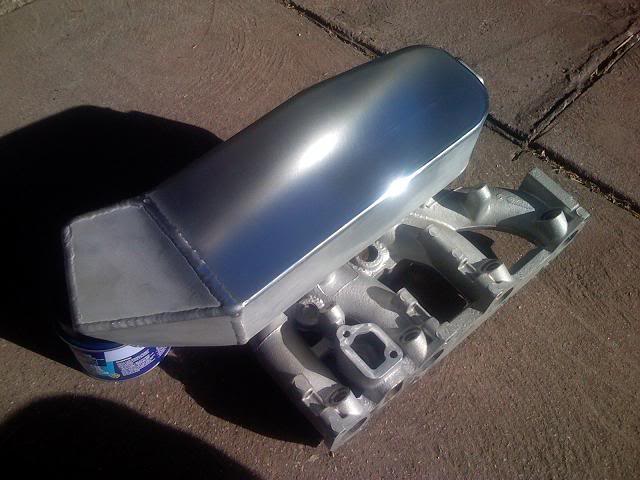
BUT, spent another hour on it tonight, just working on the huge welds this time and got them down level, which has left with with a couple of questions... Pics first
Before:
After:
Ok questions time... anyone got any tips with working on rounded surfaces? and keeping it all even and nicely uh rounded? I found when I was using the little 2" die grinder I had to be really carefull otherwise Id make low points and the rounded edges would be all bumpy, Wasnt so bad when I used the 6" Orbital sander but yea, any tips would be great
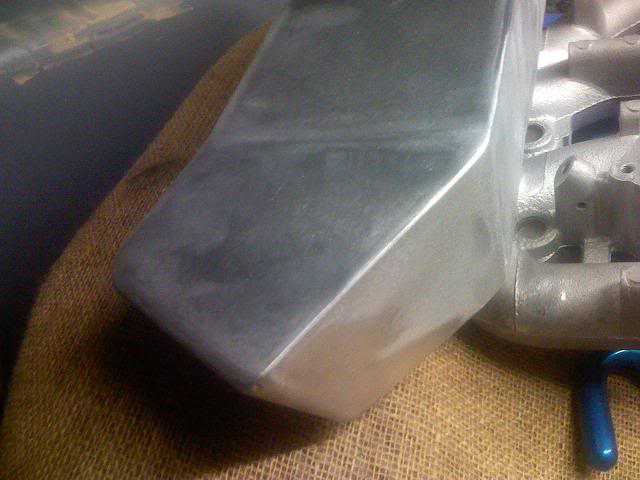
Also found a couple of spots like this:
Not the best pic but you can see its a fairly deep hole in the weld. Now I could possible sand it down but would need to remove alot of material... Would it be best to find someone who can weld alloy to just weld the hole up and I grind it back down flat?
Cheers fellas
1.5 Hours work so far...
BUT, spent another hour on it tonight, just working on the huge welds this time and got them down level, which has left with with a couple of questions... Pics first
Before:
After:
Ok questions time... anyone got any tips with working on rounded surfaces? and keeping it all even and nicely uh rounded?
I found when I was using the little 2" die grinder I had to be really carefull otherwise Id make low points and the rounded edges would be all bumpy, Wasnt so bad when I used the 6" Orbital sander but yea, any tips would be great Also found a couple of spots like this:
Not the best pic but you can see its a fairly deep hole in the weld. Now I could possible sand it down but would need to remove alot of material... Would it be best to find someone who can weld alloy to just weld the hole up and I grind it back down flat?
Cheers fellas
1.5 Hours work so far...
#113
_greenmachine215_
_greenmachine215_
-
- Guests
Posted 03 April 2008 - 10:16 PM
Viper, Its comin along very well,
Tip: Get yourself one of them rubber sanding blocks from bunnings, put your paper in that and do your edges, this way you are sanding in an even pattern. where as by hand or rotary tool you tend to apply different pressure giving that ripple effect if you block sand the whole object i garuntee you will have an excellent ripple free finish.
I Know that imperfections and pours are a bitch, but look at it from a distance and you cant tell, if it was me id just put a touch of bog or something and cover the dot with a silver touch up pen, depends how hard you wanna go i guess,
Like how you smoothed out the tig welds One piece effect is awesome, cant wait to see it done and on the car
Are you doing the rest of the manifold runners?
#114
_Viper_
_Viper_
-
- Guests
Posted 03 April 2008 - 10:24 PM
Yea its just that that dot is right at the very front and very visable and probly stand out like dogs balls :/ So I cant get someone to weld the hole up?
Rubber sanding block best hey? Ive got one of those medium density foam ones...
Yea should look sweet once its all done and cant see any welds
Hah umm still undecided about the lower half... would be ALOT more work... I was going to see if its possible to just get the lower half ceramic coated? or if they can only do a whole object.... Cos as you can see is very tight in there and would pretty much all have to be done with my pinky finger and not looking forward to that haha
#115
_greenmachine215_
_greenmachine215_
-
- Guests
Posted 03 April 2008 - 10:51 PM
Be careful with ceramic coating, If you get oil on it, It will stain into the coat, You cannot polish ceramic coat, The other path would be chroming, But again the finish will be very poor, and to chrome the surface needs to be flat to start with,
It may seem like a shit load of work but if you have time and patience, It is the most rewarding thing when you stand back and look at the final product,
Good luck with it
It may seem like a shit load of work but if you have time and patience, It is the most rewarding thing when you stand back and look at the final product,
Good luck with it
#116
_Viper_
_Viper_
-
- Guests
Posted 03 April 2008 - 11:50 PM
Hehe Ill think about it, how bout the welding up the hole question?
#117
_Viper_
_Viper_
-
- Guests
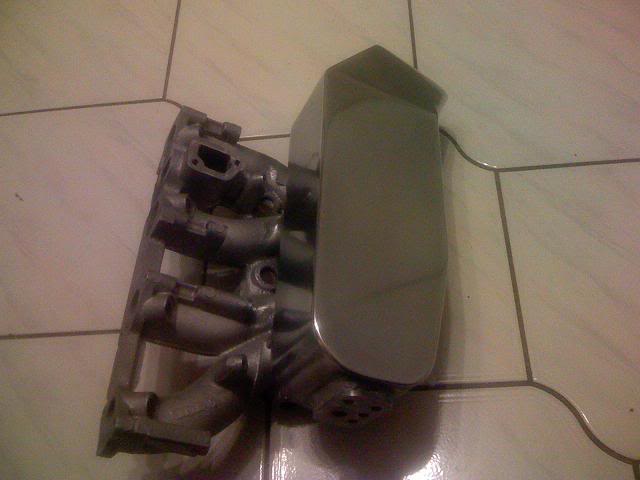
Posted 06 April 2008 - 09:11 PM
Spent some more time on it today, about 7-8 hours so far! Still not sure if im going to do the runners, they do get coverd by the thermostat housing, radiator hose, injectors, fuel rail... and is alot of effort to only cover it up :(
But here's where its at now anyway Still needa go get some purple polish...
When your doin the very final polish ie with purple polish etc... whats the best thing to rub the purple in with? and is it best to rub it in by hand and push as hard and fast as u can.... or as slow and soft.. or fast and soft?
Then whats the best thing to give the final rub down? and yea hard n fast etc...
But here's where its at now anyway
Still needa go get some purple polish...When your doin the very final polish ie with purple polish etc... whats the best thing to rub the purple in with? and is it best to rub it in by hand and push as hard and fast as u can.... or as slow and soft.. or fast and soft?
Then whats the best thing to give the final rub down? and yea hard n fast etc...
#118
_greenmachine215_
_greenmachine215_
-
- Guests
Posted 06 April 2008 - 09:27 PM
Viper, Mate top work so far
I always use flannelette bed sheets (the ones for winter) They are very soft and semi fluffy, no grain in the material,
Always work in a circular, figure 8 pattern be it sanding or polishing, This way you get an even finish and when the light angle hits there arent any Directional lines, With sanding you also get even finish No high/low spots.
thats the ways i do it, But if anyone else has tips that work lets hear it.
cheers
marc
#119
_Bomber Watson_
_Bomber Watson_
-
- Guests
Posted 06 April 2008 - 09:32 PM
I like terry cloths
Just buy a box of babies nappies, the reusable ones. Then when they get dirty throw them in the washing machine.
Cheers.
Just buy a box of babies nappies, the reusable ones. Then when they get dirty throw them in the washing machine.
Cheers.

#121
_Viper_
_Viper_
-
- Guests
Posted 06 April 2008 - 11:52 PM
its still not 100% mirror shiny, well it you put something up close it is, but say I look into it from about half a meter away its a lil hazy...
I jus used some autosol I had, will the purple polish fix this? or should I attack it more with the white compound? or is that the best u can expect...
oh yea and the welds all came up hell shiny, like 100% mirror finish, is this jus cos different alloys shine more or wha?
I jus used some autosol I had, will the purple polish fix this? or should I attack it more with the white compound? or is that the best u can expect...
oh yea and the welds all came up hell shiny, like 100% mirror finish, is this jus cos different alloys shine more or wha?
#122
_Herne_
_Herne_
-
- Guests
Posted 07 April 2008 - 07:24 AM
I would suggest using a very soft buff and more white, the purple is very good but wont removing the haze you have. Once you have finished with the white then use the Purple for a final hand polish. Do not use the Autosol after this process or you will scratch the mirror finish.
Cheers
Herne
Cheers
Herne
#123
_Viper_
_Viper_
-
- Guests
Posted 07 April 2008 - 07:11 PM
Hmm how do you guys get in there and buff the harder to reach places with a bench grinder? :S I dont have a bench grinder but I found smaller buffing wheels that can mount in a drill Or Die grinder that I was gonna use...
Would it be better to use it in the drill due to the lower RPM (thats what I have used so far) or in the die grinder at high rpm?
Would it be better to use it in the drill due to the lower RPM (thats what I have used so far) or in the die grinder at high rpm?
#124
_Herne_
_Herne_
-
- Guests
Posted 07 April 2008 - 07:33 PM
Yes some of us use an electric drill with various buffing wheels. I believe higher speed is necessary to help generate some heat through the item being polished.
For smaller or tricky jobs such as bolt heads etc I use a flexible connection on a Dremel type tool also run at high speed.
Herne
For smaller or tricky jobs such as bolt heads etc I use a flexible connection on a Dremel type tool also run at high speed.
Herne
#125
_Viper_
_Viper_
-
- Guests
Posted 18 April 2008 - 12:05 AM
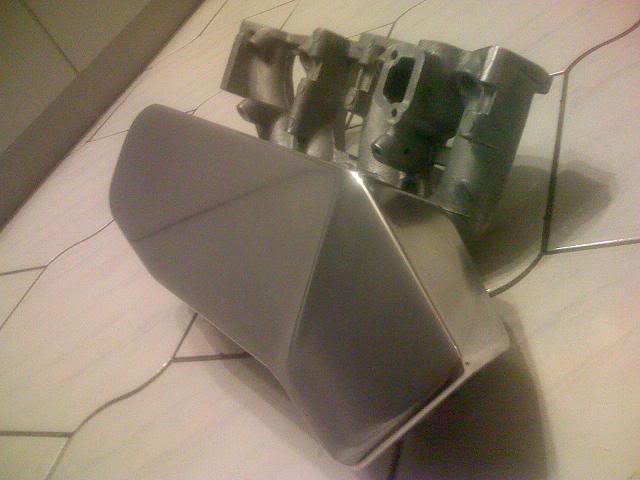
Had a go at my rocker cover I actually first had a go at this awhile ago, But thought Id give it another shot since Ive learnt abit more and its turned out quite good
Here how it was originally:
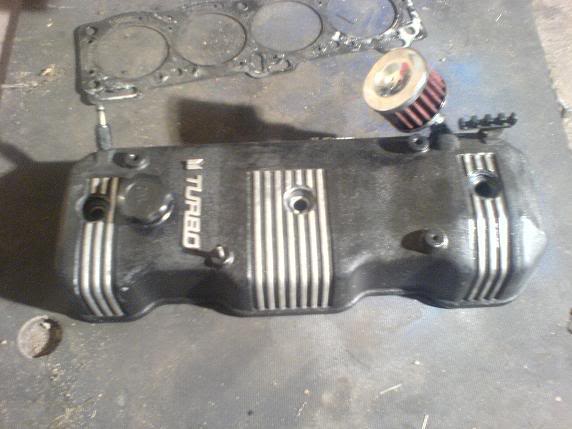
Bout half way:
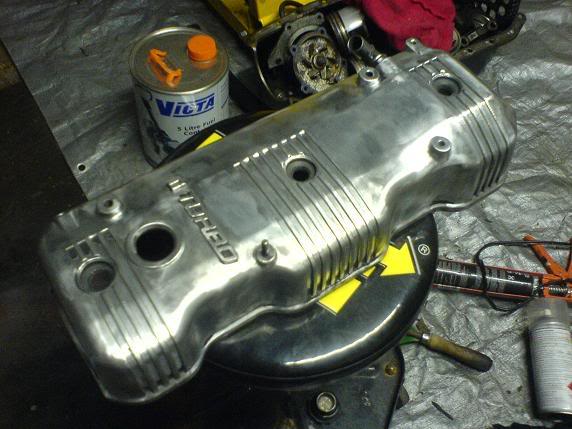
And as it is atm:

I tried to use just the white compound on the soft wheel straight away, but didnt come up with a mirror shine and can see very very slight scratches.... gonna have another go with grey and rougher buff, then the white again... Aiming for the full on mirror finish
Thanks for the tips guys, im getting there..
I actually first had a go at this awhile ago, But thought Id give it another shot since Ive learnt abit more and its turned out quite good Here how it was originally:
Bout half way:
And as it is atm:
I tried to use just the white compound on the soft wheel straight away, but didnt come up with a mirror shine and can see very very slight scratches.... gonna have another go with grey and rougher buff, then the white again... Aiming for the full on mirror finish
Thanks for the tips guys, im getting there..


1 user(s) are reading this topic
0 members, 1 guests, 0 anonymous users

