Jump to content


- - - - -

Liam's LX 4 Door Rebuild.


  • Please log in to reply
211 replies to this topic

#51 _Liam_

_Liam_
  • Guests

Posted 27 May 2011 - 07:05 PM

very positive attitude and thats a good thing :spoton: :spoton: another hatch will live to see the roads again for a long time to come :clap: :clap:


:furious:

Sedan Lee... Everyone has a Hatch.

But thanks mate, it would be much easier to give up and get another car. But I will learn more this way.

#52 _Bomber Watson_

_Bomber Watson_
  • Guests

Posted 27 May 2011 - 07:35 PM

And we all know four doors make the car go way faster.

Cheers.

#53 _Liam_

_Liam_
  • Guests

Posted 27 May 2011 - 07:37 PM

And we all know four doors make the car go way faster.

Cheers.


Well they are lighter anyway so they go faster for sure. :buttrock:

#54 _Liam_

_Liam_
  • Guests

Posted 29 May 2011 - 04:49 PM

Gday fellas just a quick update, tacked in all the templates today in the arches.

Posted Image
Posted Image

Also unpicked the plenum and ripped it off as there was some cracks in the metal, ie rusting. So ripped it off to examine the damage.

Here is a repair I found on the plenum cover itself... Look more rivots! :buttrock:
Posted Image

Plenum sides.
Posted Image
Posted Image

Here were the cracks that made me want to take it off in the first place.
Posted Image

Will finish welding in all the new pieces this week, as well as fixing the top of the A pillar/Plenum corner. So stay tuned.

#55 _nial8r_

_nial8r_
  • Guests

Posted 29 May 2011 - 05:04 PM


very positive attitude and thats a good thing :spoton: :spoton: another hatch will live to see the roads again for a long time to come :clap: :clap:


:furious:

Sedan Lee... Everyone has a Hatch.

But thanks mate, it would be much easier to give up and get another car. But I will learn more this way.


OPPS dont know where i read " hatch " :dontknow: you sure are hooking in now and good to see some welding going on too :buttrock: even though im 99% sure the inner plenium on mine is clean, seeing a few members ripping theres off to find there is a bit to be sorted i think i might unpick mine just to be 110% sure :D keep up the good work mate and keep the pic's coming i need another boost of that stuff called motivation :spoton: :spoton: hey are you trimming your rails or just going smooth ??

#56 _Liam_

_Liam_
  • Guests

Posted 29 May 2011 - 05:09 PM

Thanks Lee, yeah mate will be trimming the rails, just looks alot neater I reckon. Yeah mate, better to be safe than sorry I reckon. Do it once, do it right I say.

When are you updating your awesome rig? I am disappointed that you couldn't salvage that shirt in the sill and wear it... lol

#57 _Liam_

_Liam_
  • Guests

Posted 31 May 2011 - 09:43 PM

Hey guys just a quick update, I was stupid enough to forget to pinch some copper from work. So I didn't get to finish welding up the arches. So I decided to attack the A pillars that were shod.

Here's what I started with.
Posted Image

I had to build up one of the internal panel which is the sides of the plenum.
Posted Image

Then on went the cap that I cut out last week.
Posted Image
Posted Image

Then did the other side. What I started with.
Posted Image
Posted Image

As the other side had to build it up.
Posted Image

Then I tacked the two pieces I built up together to be welded to the cap.
Posted Image

I then welded the bits together and then put the cap on and welded it all up, (Don't judge too harshly, I need to clean it up.)
Posted Image
Posted Image
Posted Image

That's it for today, will be getting some copper tomorrow and then will be finishing off those bastard arches. :Headbang2:

#58 _Kush_

_Kush_
  • Guests

Posted 31 May 2011 - 10:06 PM

Yup! Lookin good.
I can't tell from the pics, but did you try and hammer some roundness onto those patches that are on the wheel arches? You don't want to use too much bog/spray putty. :buttrock:

#59 _Liam_

_Liam_
  • Guests

Posted 31 May 2011 - 10:19 PM

Kush, yeah mate, I shaped it as close as I could, once it is all welded up I will probably still need to dolly a little bit but not much. I tried to Hammer/Dolly it without cutting but it was not working very well at all. I think so far the only part I'm not looking forward to replacing is that top piece on the A pillar which had extra rivots in it. Going to be hard to shape I think... :surrenderwave:

#60 _Kush_

_Kush_
  • Guests

Posted 31 May 2011 - 10:29 PM

Yeah, me too with the A pillar, I keep putting it off.

#61 _Liam_

_Liam_
  • Guests

Posted 31 May 2011 - 10:37 PM

Haha, somehow I think you'll be right mate, once I arrive at that I'll get it done no worries I hope, it just looks hard.

#62 _nial8r_

_nial8r_
  • Guests

Posted 01 June 2011 - 08:44 AM

lol i just updated mine build thread last night :badabing: i was avoiding doing a pretty big repair on the under side of the plenium for ages but when the time come i pretty much breezed through it, trimming the rails is my next fear :DOH: .

the repairs are coming along nice now, just a tip, you should try and get some cavitiy wax or something up on the inside of the repairs so that there not still bare other wise it wont take long for the tin worm to find its way back there :angry:

Kush before i do the chop chop on the rails is there anything i should be looking out for? ^_^

#63 _Kush_

_Kush_
  • Guests

Posted 01 June 2011 - 10:38 AM

lol i just updated mine build thread last night :badabing: i was avoiding doing a pretty big repair on the under side of the plenium for ages but when the time come i pretty much breezed through it, trimming the rails is my next fear :DOH: .

the repairs are coming along nice now, just a tip, you should try and get some cavitiy wax or something up on the inside of the repairs so that there not still bare other wise it wont take long for the tin worm to find its way back there :angry:

Kush before i do the chop chop on the rails is there anything i should be looking out for? ^_^


Nah, there's not much to it. All I found was that if you cut it all off, the top lifts up so you've gotta clamp it back down to weld it. Then once it's welded, grind it back and weld it again as you won't get good enough penetration on the first weld. You want a good solid bead on the inside as reinforcement in the join, as there won't be any weld on the outside because it gets all ground off :)

Edited by Kush, 01 June 2011 - 10:41 AM.


#64 _Liam_

_Liam_
  • Guests

Posted 01 June 2011 - 05:58 PM

Hey Lee, I trimmed the rails today, I saw in a thread to leave a little bit of the rail lip intermittently so that it doesn't lift it at all. Then once it's tacked on with your welder, and your confident she won't lift, trim the remainder and weld it solidly.

I pinched the copper etc from work today, so them bloody arches and rails will be done tomorrow arv/nite and the weekend.

Yeah mate regardin the cavity wax, I wanted rust convert and then paint on Por15. Cavity Wax wouldn't be necessary if I do that?

Regarding the Plenum, yeah, I must have a worse one than you, mine is stuffed lol. Gonna have alot of new metal in there.

#65 _Bomber Watson_

_Bomber Watson_
  • Guests

Posted 01 June 2011 - 06:46 PM

Yeah mate regardin the cavity wax, I wanted rust convert and then paint on Por15. Cavity Wax wouldn't be necessary if I do that?


Can you do that on both sides???

If not then you will need to wax the inside.

Cheers.

#66 _nial8r_

_nial8r_
  • Guests

Posted 01 June 2011 - 07:06 PM

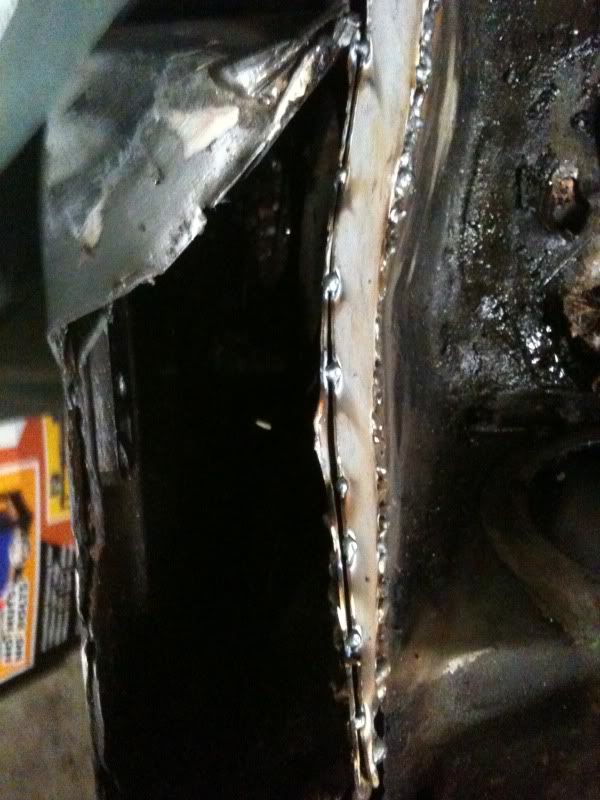
thanks for that Kush i wasnt sure if i should have done a double weld or not, but i do now :spoton:

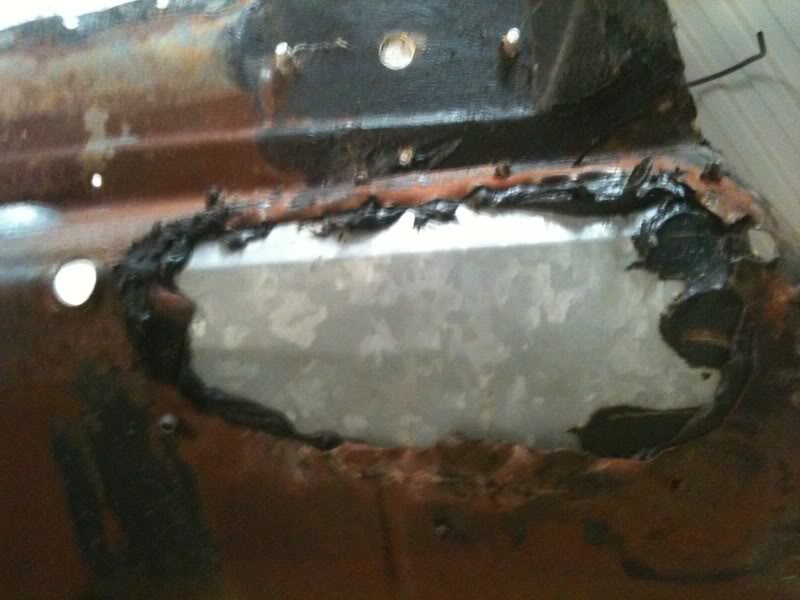
i also seen a thread to leave a bit on each side so it dont lift but, i think i will chop the lot and clamp it cause im pretty good at getting warpage :fool: so if i clamp each side in a few different spots i should be right ( i hope )
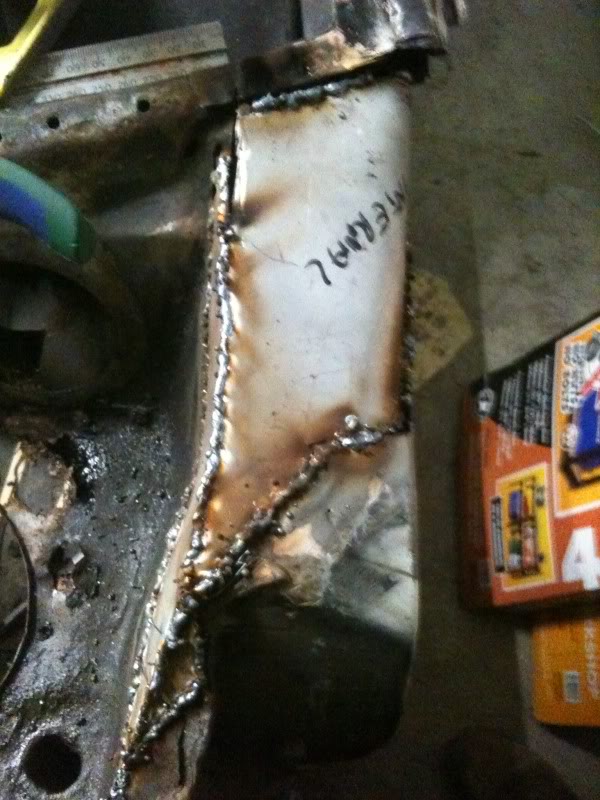
im not to sure if you deoxodine and use POR15 but pretty sure you could apply some cavitiy wax on top to seal the prick right up

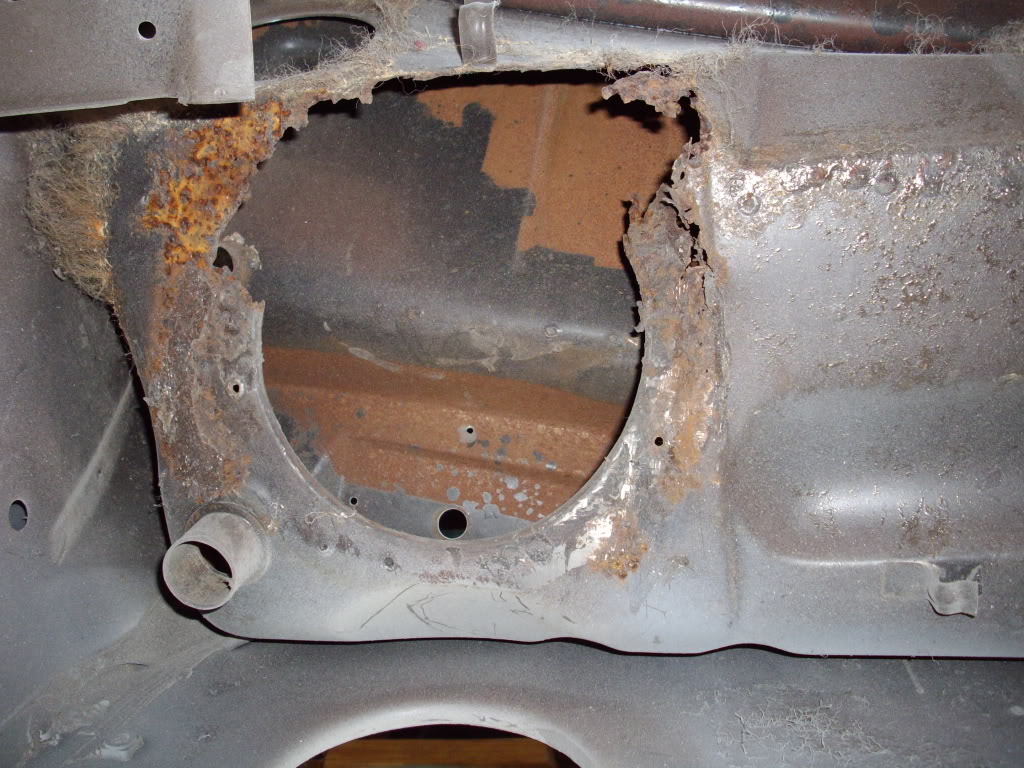
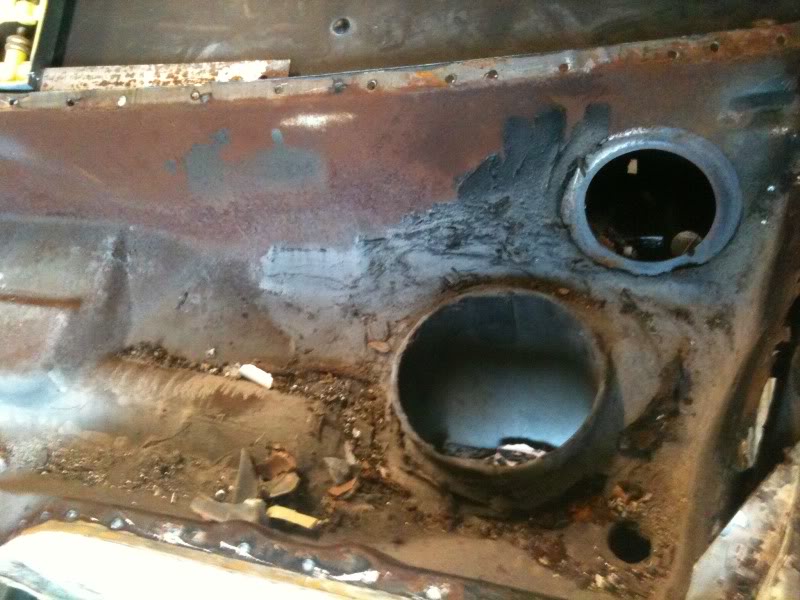
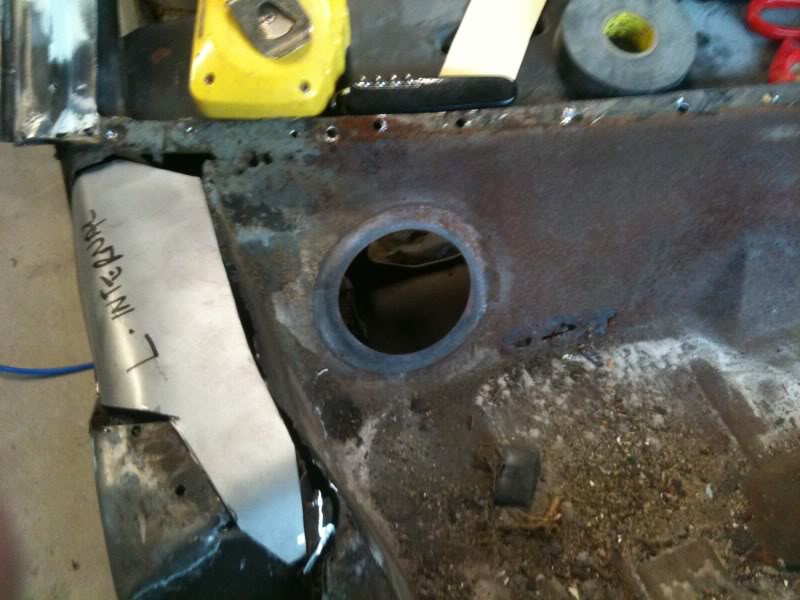
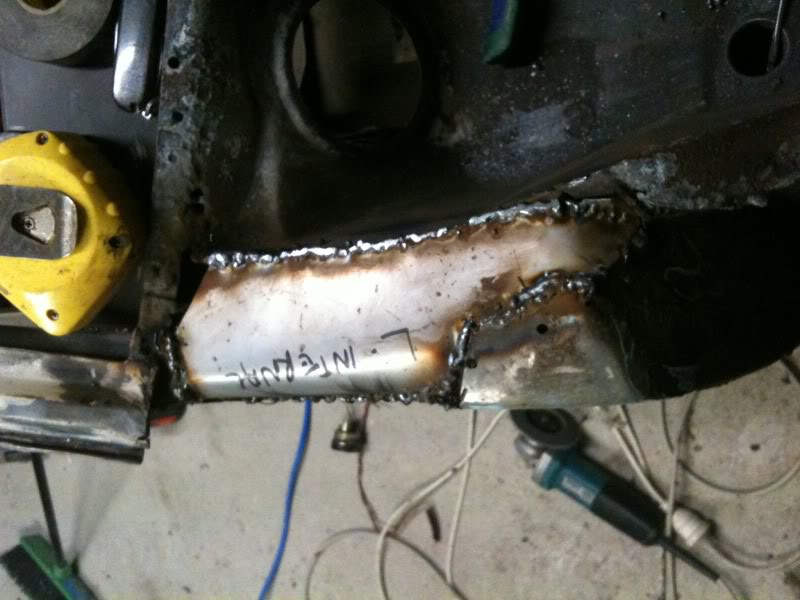
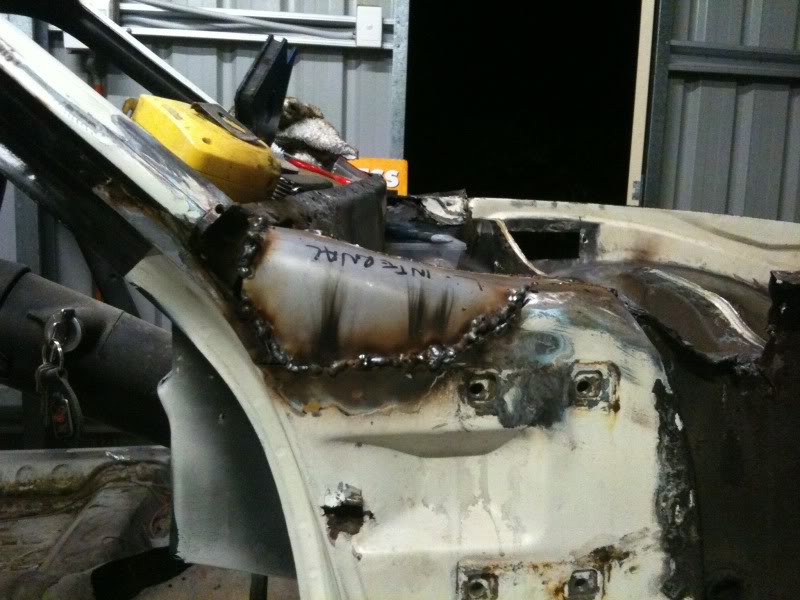
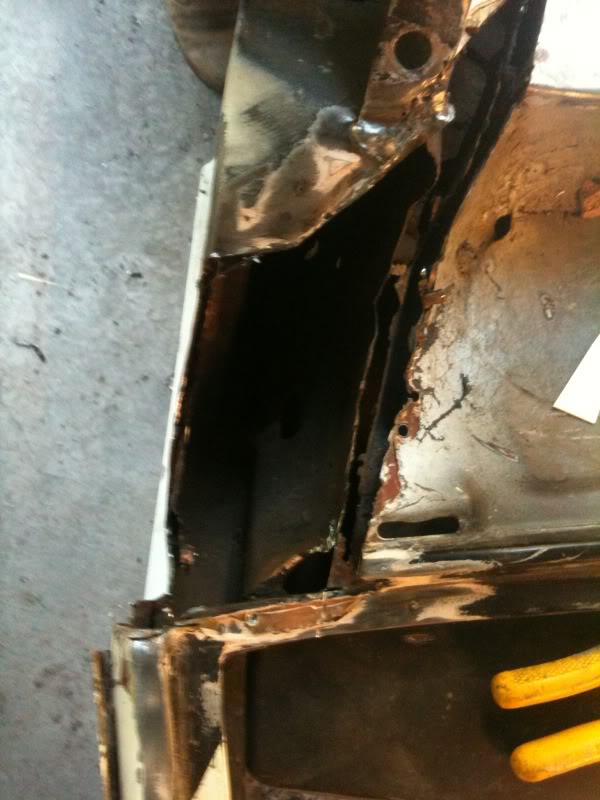
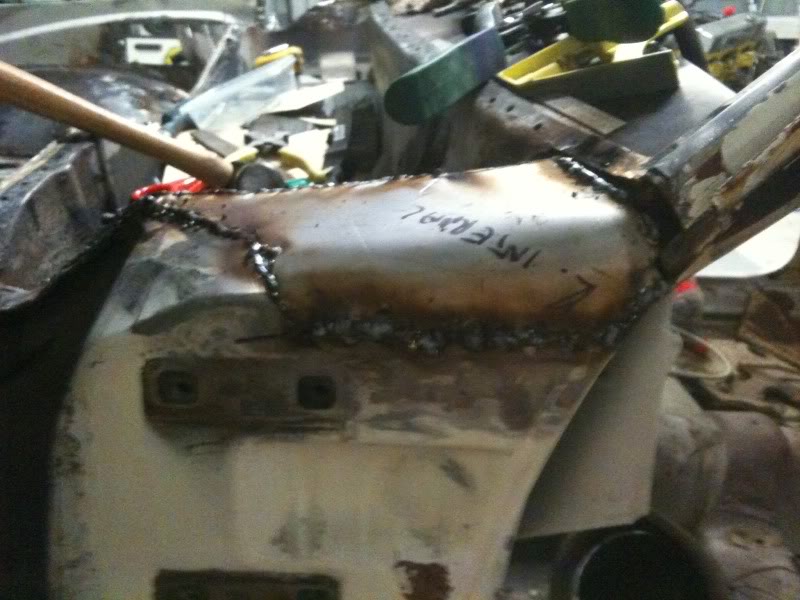
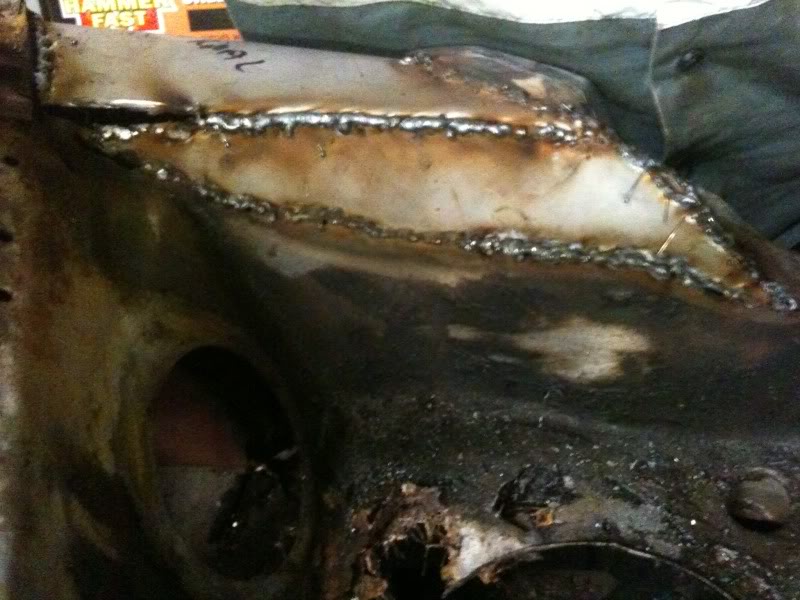
on this repair ( the one i avoided ) i made sure i sealed it up good and proper as i didnt wanna have to do it again in 5yrs

Posted Image
Posted Image
Posted Image
Posted Image
Posted Image
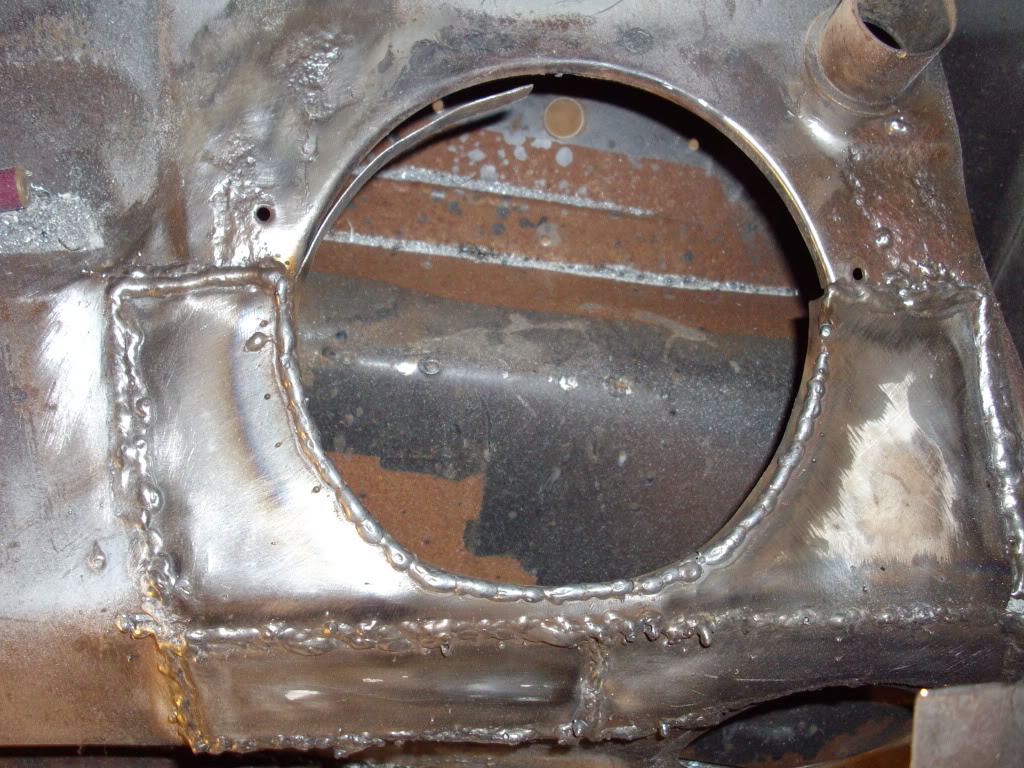
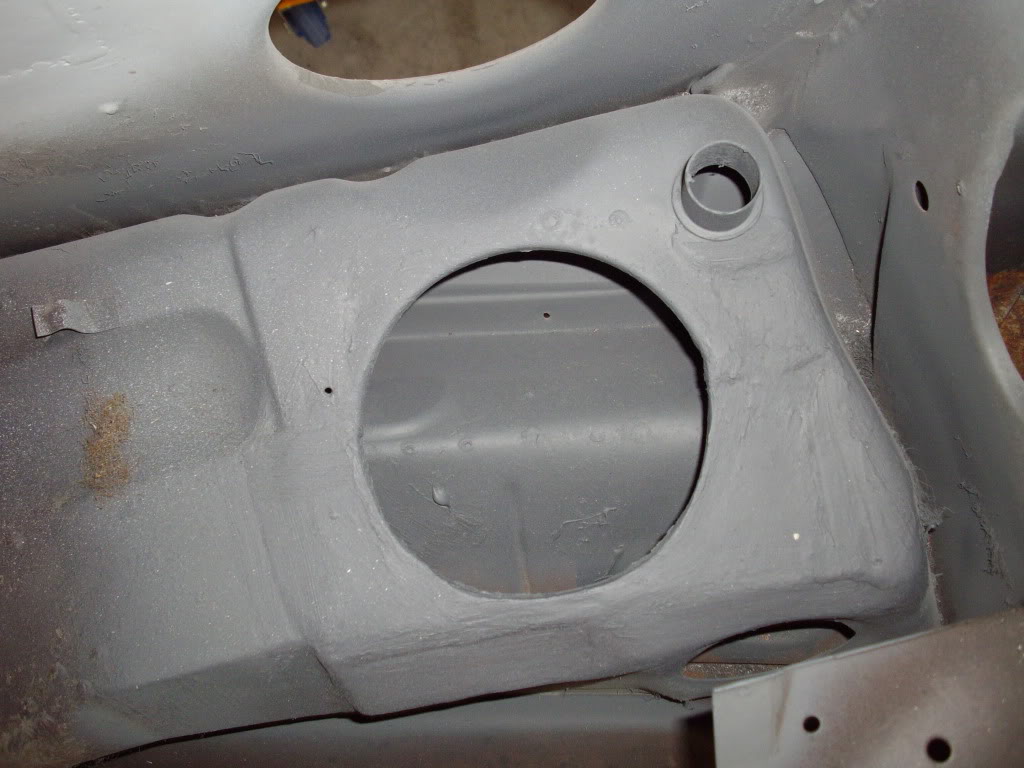
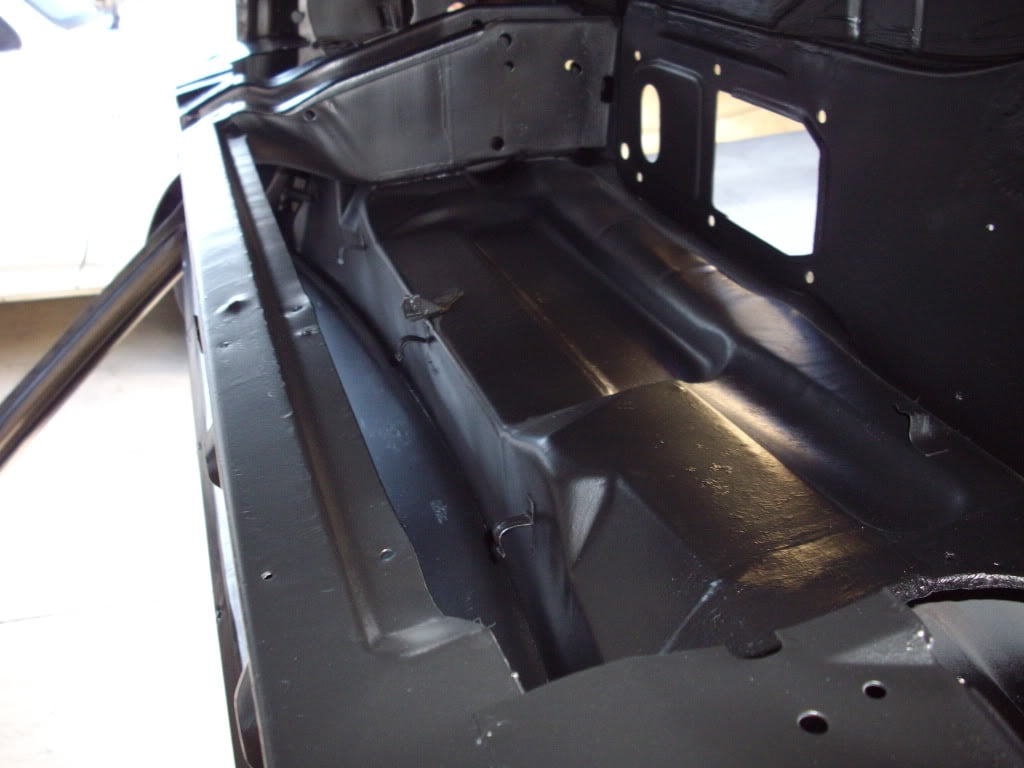
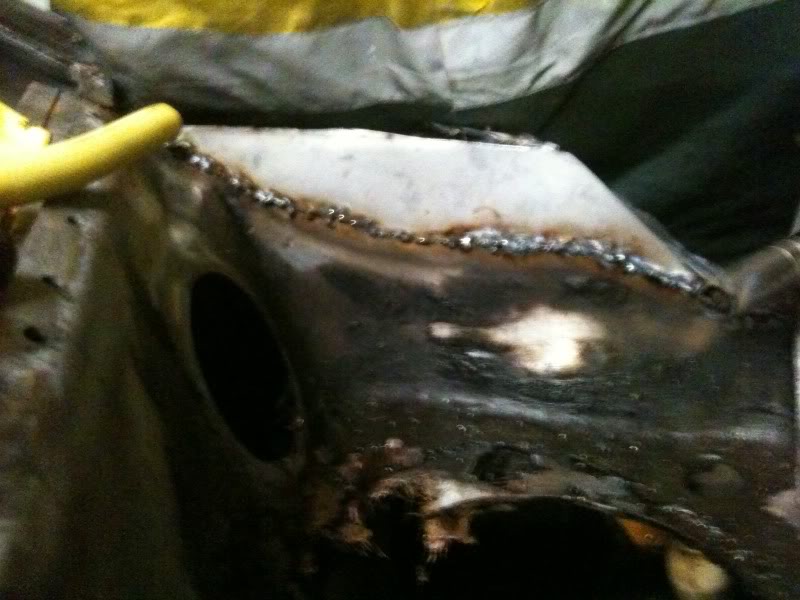
i used deoxodine, etch primer, seam sealer, primer, GMH Black, then cavitiy wax, maybe a bit of over kill :stirpot: but i hope i dont have to do it again

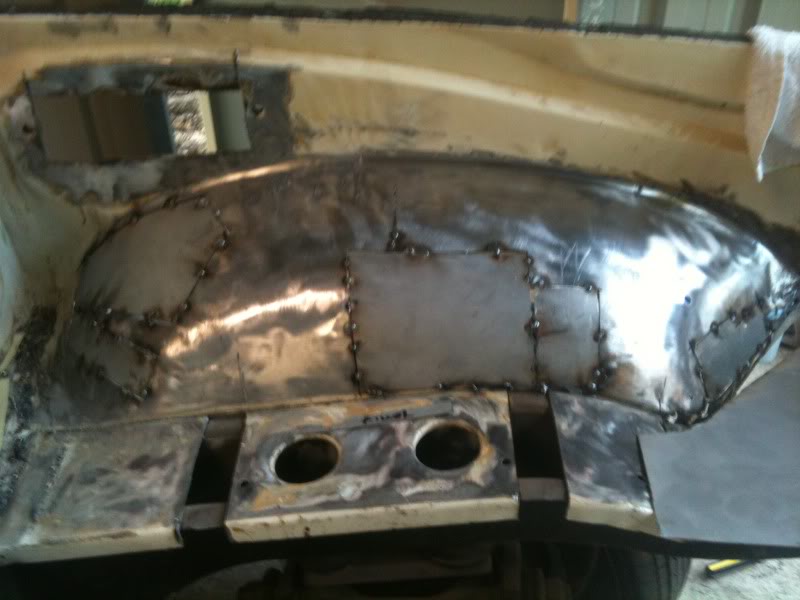
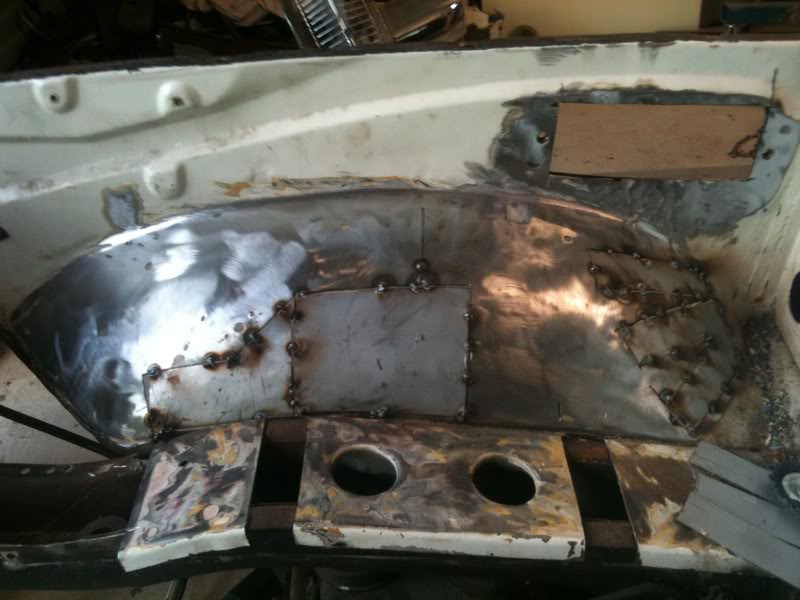
cant wait to see some pic's of you rail chop and to see how you go with the copper backing on the gaurds :spoton: :spoton:

Edited by nial8r, 01 June 2011 - 07:09 PM.


#67 _Quagmire_

_Quagmire_
  • Guests

Posted 01 June 2011 - 07:09 PM

shoot me a pm if you get stuck laim
did waxing/rustproofing for a year


#68 _Liam_

_Liam_
  • Guests

Posted 01 June 2011 - 07:21 PM

No worries Al cheers for that!

Lee, yeah mate, thanks for the tips. I will keep you updated for sure.

Bomber, yeah righto I hear you, will check it out and come back with a verdict.

Oh a bit of a tip, don't ever use 3M Rust Converter..... frOcking useless. :furious:

Wish I could find somewhere that sells Septone again, it was great stuff!

#69 _Bomber Watson_

_Bomber Watson_
  • Guests

Posted 01 June 2011 - 07:35 PM

Yeah i use Septone.

Superjunk used to sell it but they have gone to 3m, bloody useless.

Local paint supply store that i purchase all the stuff for work from sells Septone gear, its the goods cause they like me hehehehe. Spending 5K a month will do that for ya....

Could Maybe mail some to ya if you get real stuck....Not sure how we would go!!

Cheers.

#70 _Liam_

_Liam_
  • Guests

Posted 01 June 2011 - 08:01 PM

I might have to give the local paint shop the go... As you could imagine Maryborough would have everything DJ.... :innocent:

#71 Mort

Mort

    Lotsa Posts!

  • Members
  • PipPipPipPipPipPip
  • 2,760 posts
  • Name:Mort
  • Location:Moranbah, QLD.
  • Car:74 LH SL/R 4.2, 75 LH 4 door 186
  • Joined: 16-December 07
Garage View Garage

Posted 01 June 2011 - 08:25 PM

Do you have a MITRE 10 where you are, our local M10 used to have septone stuff, don't know if they still do i try not to shop there to often, we don't call it highway robbery for nothing.

#72 _Liam_

_Liam_
  • Guests

Posted 01 June 2011 - 08:27 PM

Mitre 10 closed down, cos Bunnings moved in less than 200 metres away from it... There days of pinching all your life savings are done in the Borough... Good call though mate, will have to call around, annoys me when you buy a product that doesn't work... I thought 3M was meant to be a good brand.... Thanks Mort.

#73 _Kush_

_Kush_
  • Guests

Posted 01 June 2011 - 08:31 PM

I tried to use paint stripper on my nosecone today..... It was 3M. It did frOck all, I'll just wire buff the paint off :(

#74 _Liam_

_Liam_
  • Guests

Posted 01 June 2011 - 08:33 PM

I tried to use paint stripper on my nosecone today..... It was 3M. It did frOck all, I'll just wire buff the paint off :(


Great. :Headbang2:

Bought their Paint Stripper as well. frOck!

Septone is the business, one that I know works for sure. Thanks fellas.

#75 _Bomber Watson_

_Bomber Watson_
  • Guests

Posted 01 June 2011 - 08:40 PM

GPI automotive paint stripper is the best i've used so far.

Cheers.


0 user(s) are reading this topic

0 members, 0 guests, 0 anonymous users