
Just a thoughty, would the paint stripper you us for home reno's work, something like a Selly's product, anyone tried it.

Liam's LX 4 Door Rebuild.
Started by
_Liam_
, Jan 31 2011 10:27 PM
211 replies to this topic
#76

Mort
 View Garage
-

- Members
-

- 2,760 posts
Lotsa Posts!
- Name:Mort
- Location:Moranbah, QLD.
- Car:74 LH SL/R 4.2, 75 LH 4 door 186
- Joined: 16-December 07
View Garage
Posted 01 June 2011 - 09:04 PM
#77
_mick74lh_
_mick74lh_
-

- Guests
Posted 01 June 2011 - 11:43 PM
Nice work. I can't believe all the crap you're finding. Good onya for repairing it all.
#78
_mick74lh_
_mick74lh_
-
- Guests
Posted 01 June 2011 - 11:45 PM
I tried to use paint stripper on my nosecone today..... It was 3M. It did frOck all, I'll just wire buff the paint off :(
Don't know if you've tried this, but I've found covering the panel with glad wrap while the paint strippers on it and then leaving it covered for a while helps burn the paint a bit more aggressively.
#79
_nial8r_
_nial8r_
-
- Guests
Posted 02 June 2011 - 08:47 AM
Just a thoughty, would the paint stripper you us for home reno's work, something like a Selly's product, anyone tried it.
i used some stuff from bunnings on a old HQ bonnet, it worked but didnt bite real deep, had to do it twice
#80
_Liam_
_Liam_
-
- Guests
Posted 01 July 2011 - 06:14 PM
Hey guys long time without an update...
Been busy as all shit this last month with the end of my apprenticeship etc and just been flat out. So here is what I've been doing this week.
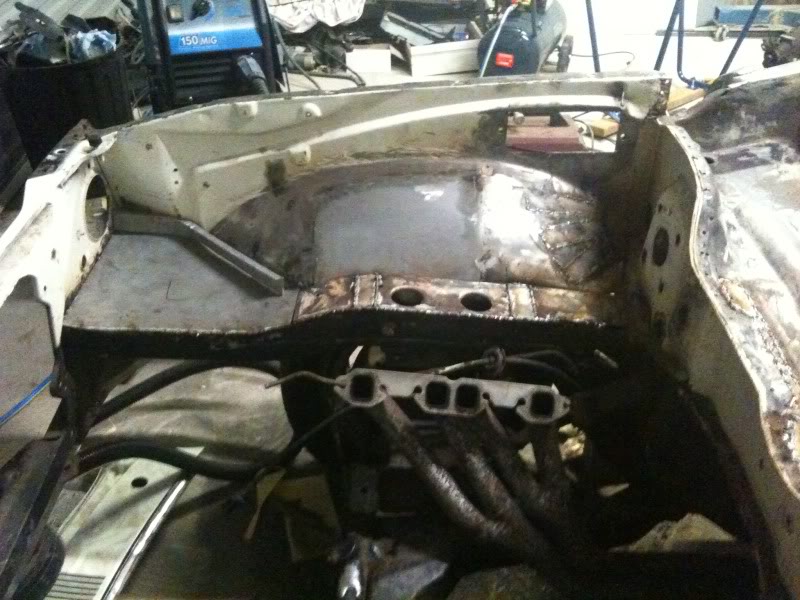
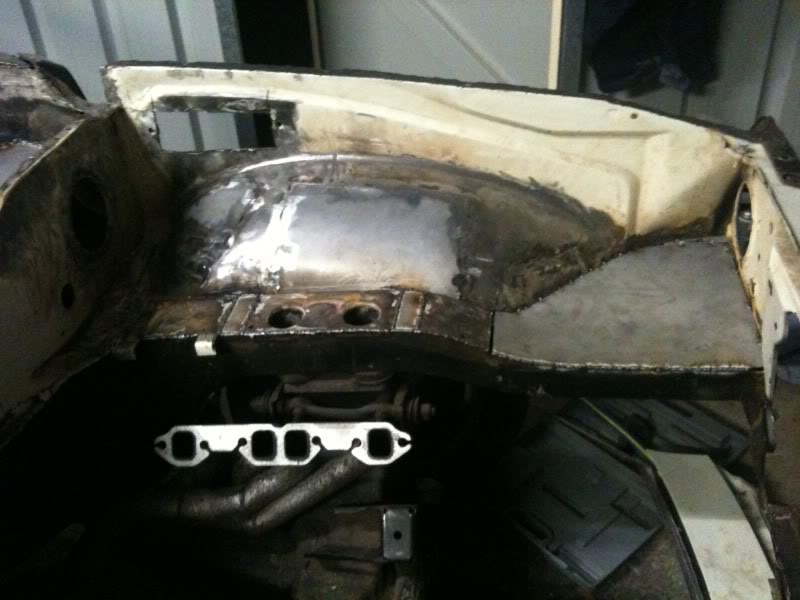
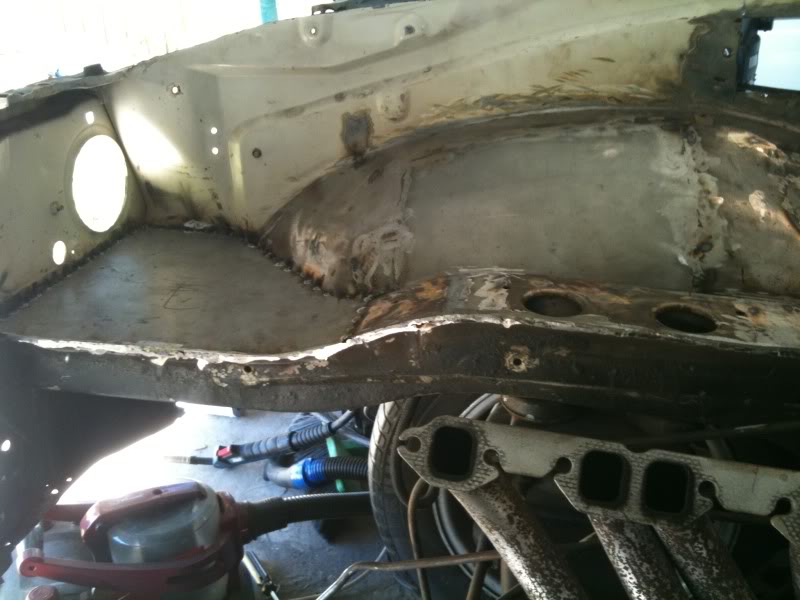
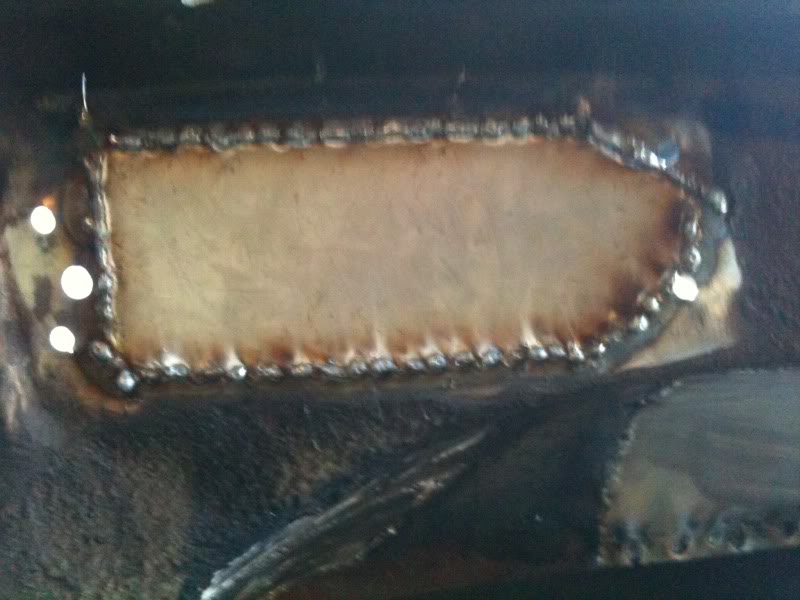
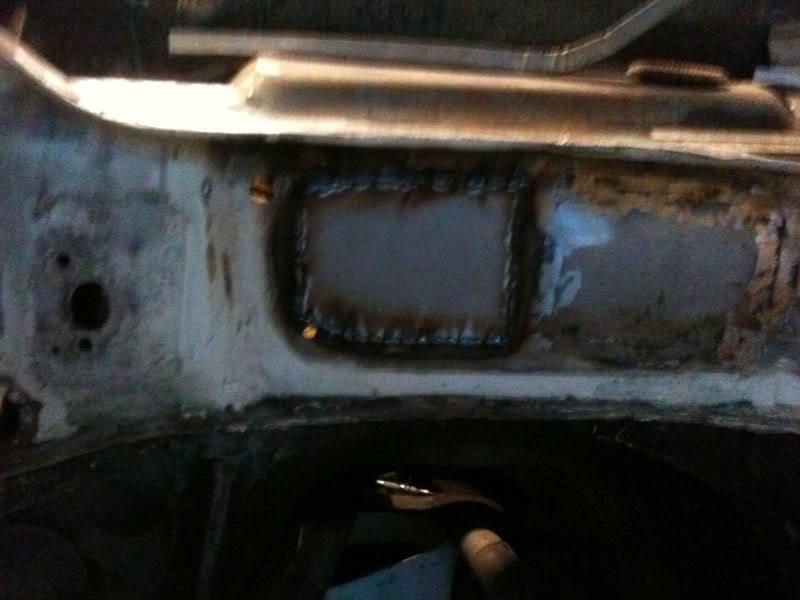
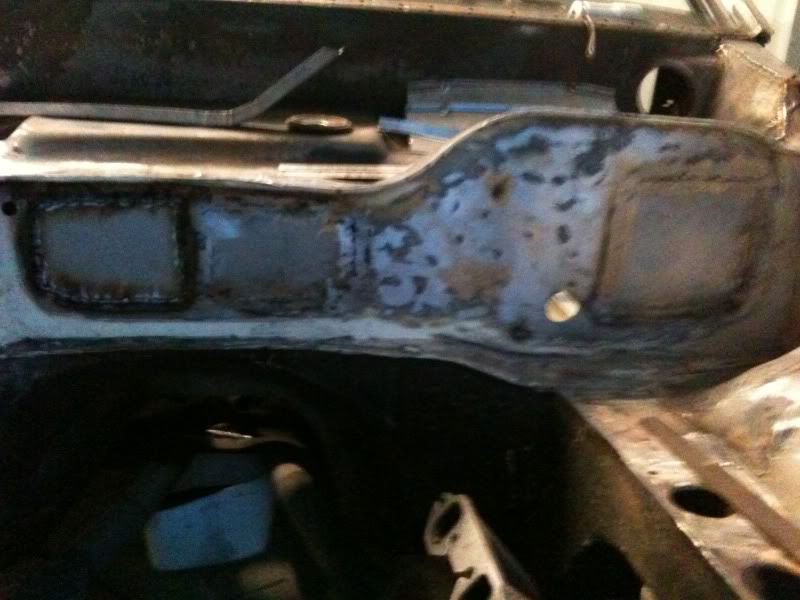
I wasn't happy with how the brake line dent replacements was so I cut it all out and started again. Turned out much better. I also welded in the bits to smooth out the engine bay.
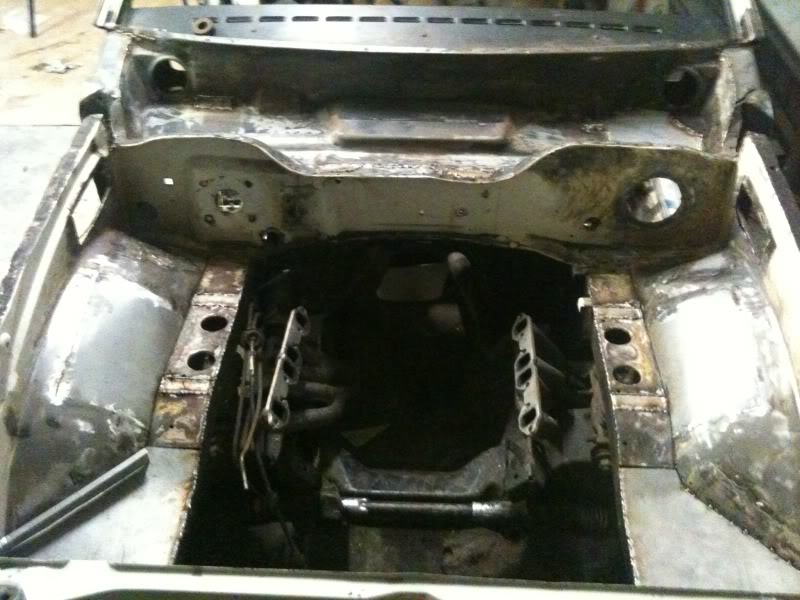
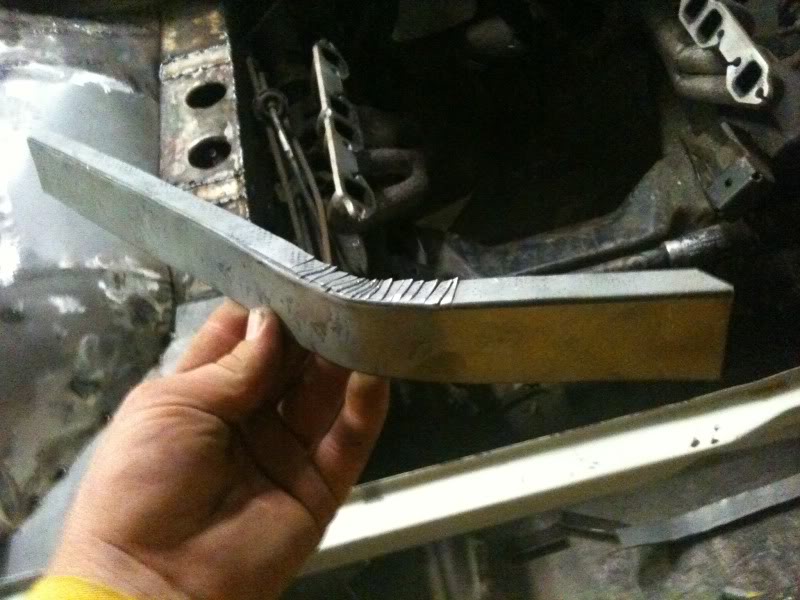
With the trays, I have lifted the outside edges so that water will run from the outside to about 3 inches from the join. So I had to cut the old tray shelf off and fabricated (crudely I might add ) these little doovies to be spot welded into place to act as support for the trays. Welds still need to be grinded.
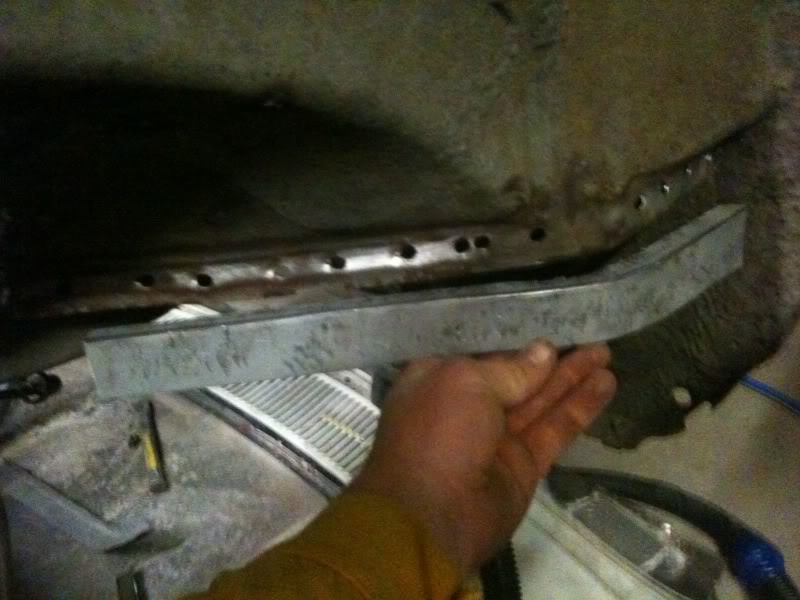
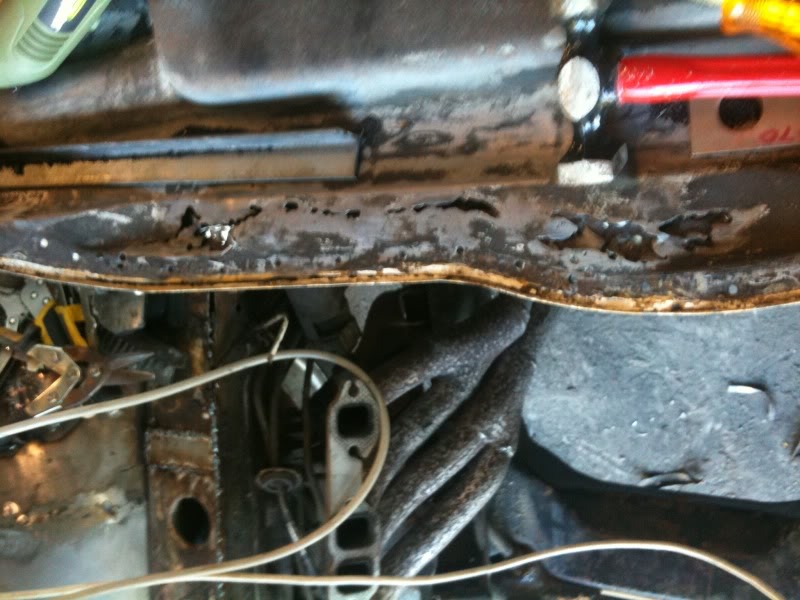
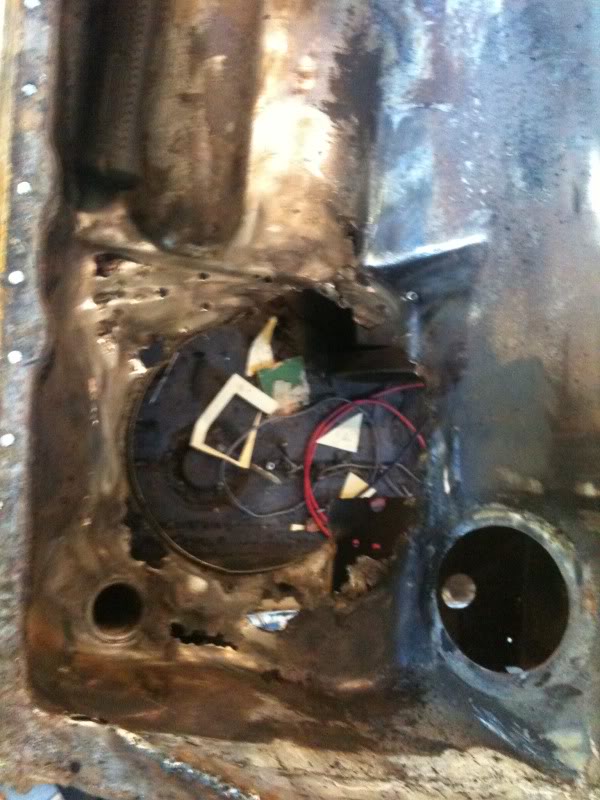
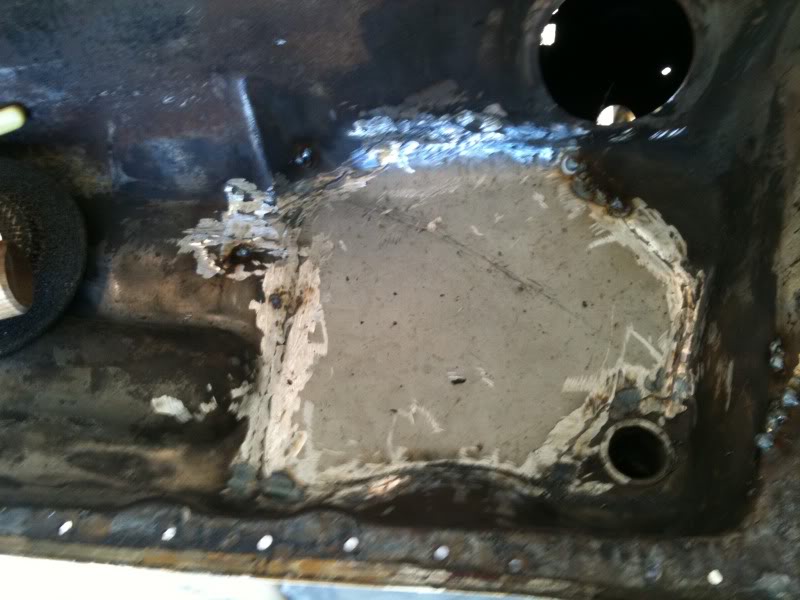
Also began attacking the rust in the plenum. Wasn't that hard, just time consuming to get it all right. (Sorry for the bad pics only took them tonight). Still got to grind welds.

All in all turned out well, be a fair bit more progress done this weekend as my mate is coming up to catch up/help out.
Been busy as all shit this last month with the end of my apprenticeship etc and just been flat out. So here is what I've been doing this week.
I wasn't happy with how the brake line dent replacements was so I cut it all out and started again. Turned out much better. I also welded in the bits to smooth out the engine bay.
With the trays, I have lifted the outside edges so that water will run from the outside to about 3 inches from the join. So I had to cut the old tray shelf off and fabricated (crudely I might add
) these little doovies to be spot welded into place to act as support for the trays. Welds still need to be grinded. Also began attacking the rust in the plenum. Wasn't that hard, just time consuming to get it all right. (Sorry for the bad pics only took them tonight). Still got to grind welds.
All in all turned out well, be a fair bit more progress done this weekend as my mate is coming up to catch up/help out.
Edited by LX Torry Freak, 01 July 2011 - 06:16 PM.
#81
_Kush_
_Kush_
-
- Guests
Posted 01 July 2011 - 08:01 PM
Thumbs up, mate. 
Looking forward to the pics of the welds smoothed up. It'll look cool.
Looking forward to the pics of the welds smoothed up. It'll look cool.
#82
derrin71
-
- Members
-
- 492 posts
Forum Fan
- Name:Derrin
- Location:Emerald Qld
- Car:LX Hatchback, Holden Colorado. Mini Clubman S
- Joined: 29-November 09
Posted 01 July 2011 - 08:44 PM
Great work!!
#83
_Liam_
_Liam_
-
- Guests
Posted 01 July 2011 - 09:10 PM
Yeah thanks fellas. Yeah will be getting on it shortly. I cannot believe for the life of me how easy your arches were Kush, I had so many dramas and even still will need filler.
Thanks again, as I said expect some more updates this weekend.
Kush: When do you start work on your beast again?
You too Derrin?
Thanks again, as I said expect some more updates this weekend.
Kush: When do you start work on your beast again?
You too Derrin?
#84
_UNVSM8_
_UNVSM8_
-
- Guests
Posted 01 July 2011 - 09:57 PM
nice work mate! all these smooth bays are making me jealous!!
#85
_nial8r_
_nial8r_
-
- Guests
Posted 02 July 2011 - 09:34 AM
Looking good mate. i went the same way with my when i did my inners and it was the most hardest way there is i think, next time i will heat and dolly them out
#86
derrin71
-
- Members
-
- 492 posts
Forum Fan
- Name:Derrin
- Location:Emerald Qld
- Car:LX Hatchback, Holden Colorado. Mini Clubman S
- Joined: 29-November 09
Posted 02 July 2011 - 01:01 PM
I have been away for a week, might have a bit of a go sometime in the next couple of days.
#87
_berro59_
_berro59_
-
- Guests
Posted 02 July 2011 - 04:47 PM
Great work. Lots of rust in this one. Keep it up, it will be worth it when you are driving it. I went through the same thing!
#88
_nial8r_
_nial8r_
-
- Guests
Posted 02 July 2011 - 07:15 PM
nice work mate! all these smooth bays are making me jealous!!
lol and im about 95% finished mine and thinking of selling the LX when its up and running so i can go back to the factory look as everyone is going for the smooth look now, the same as the colour orange

#90
_Liam_
_Liam_
-
- Guests
Posted 04 July 2011 - 12:14 PM
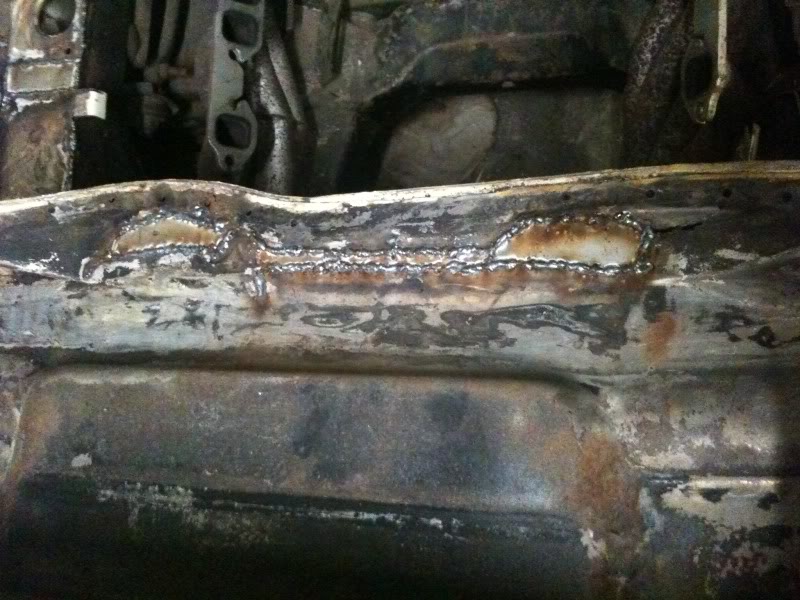
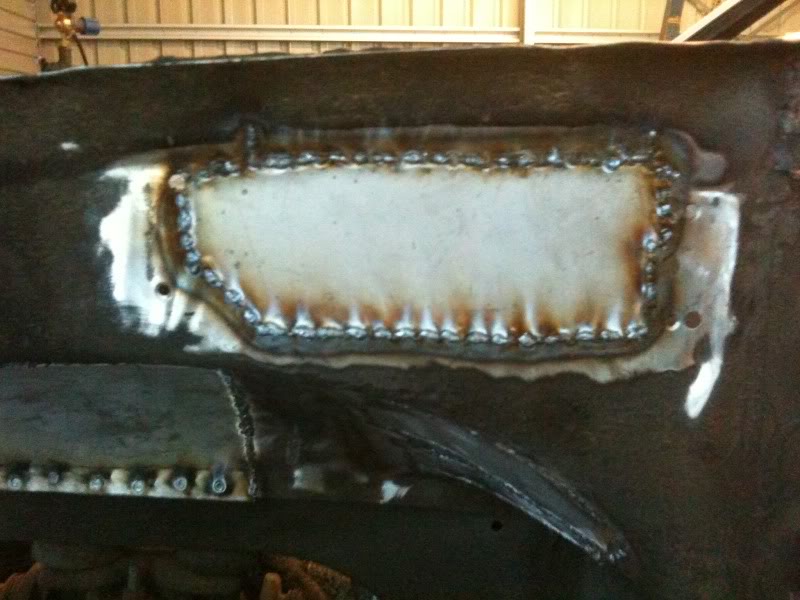
Well as per strict instructions (Kush), I grinded all the welds down flat and smooth for the most part, could probably do with a minor touch up, but it is all coming together nicely, me and my mate got stuck into it yesterday and I'm pretty sure I have industrial deafness now
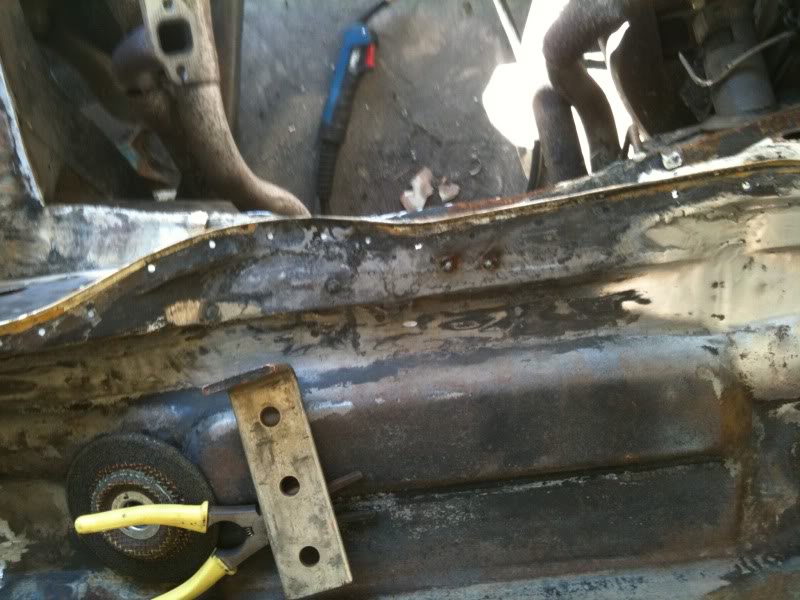
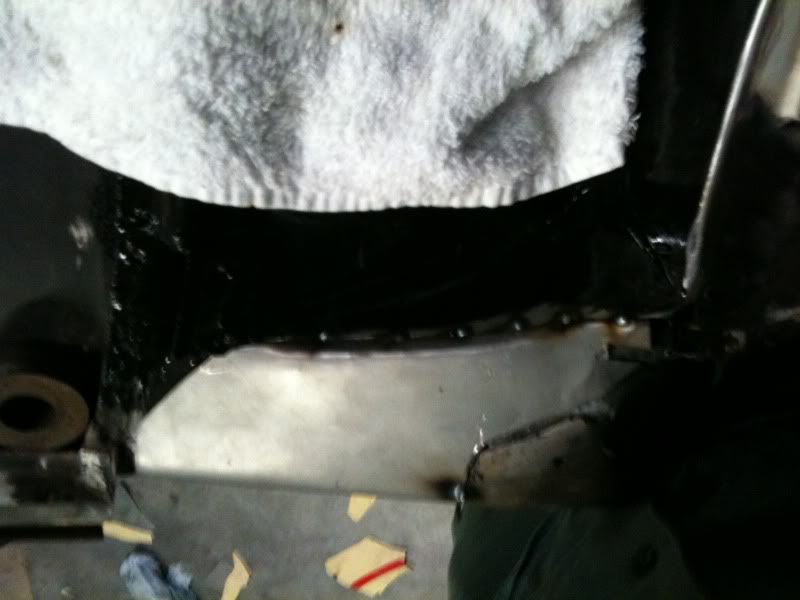
The rails got grinded as well, and I'm pretty happy with how they have turned out, just a few minor touch ups required, but will be pretty ready and accepting of a lick of some 2K etch.
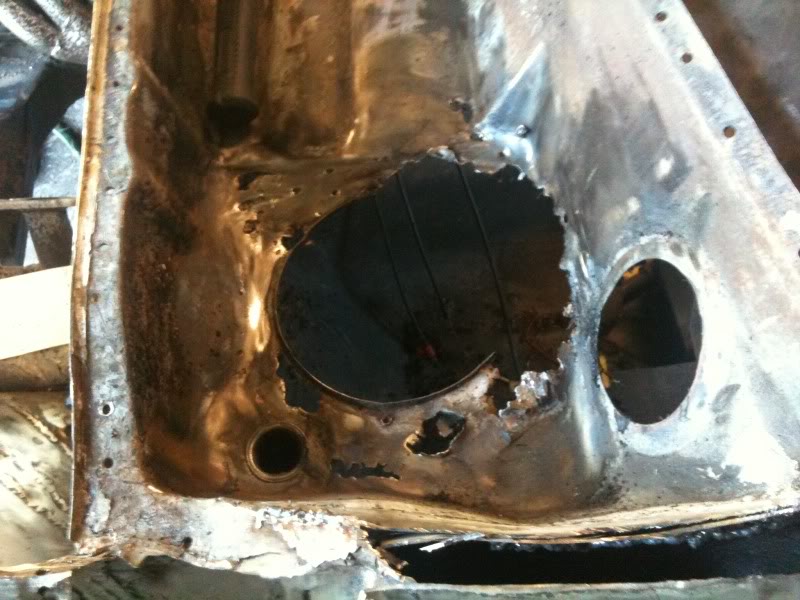
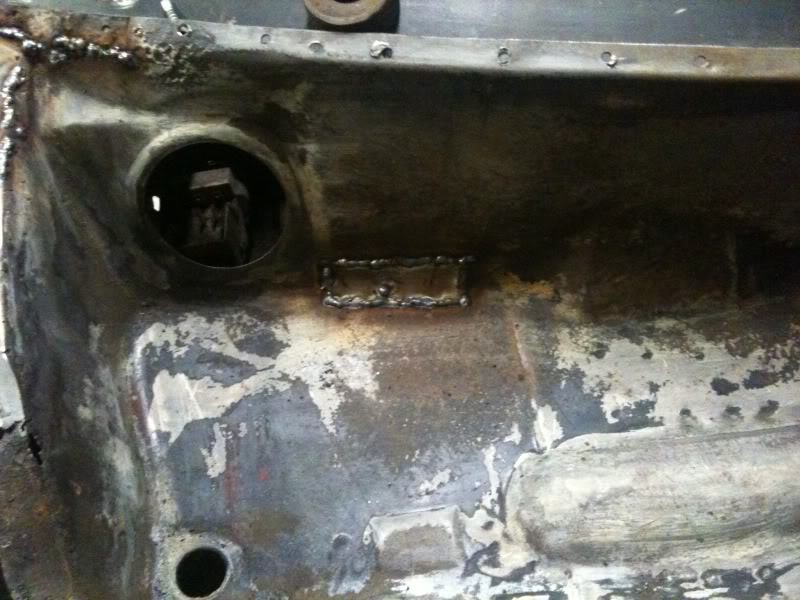
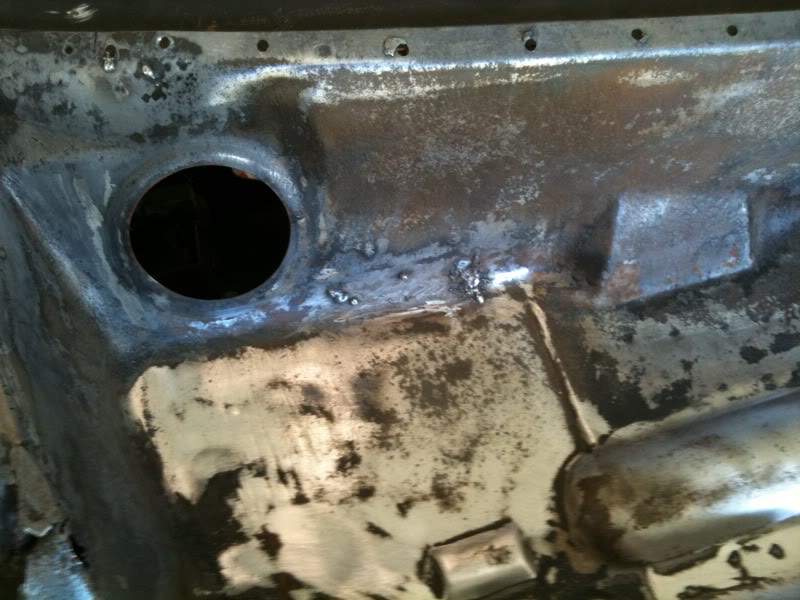
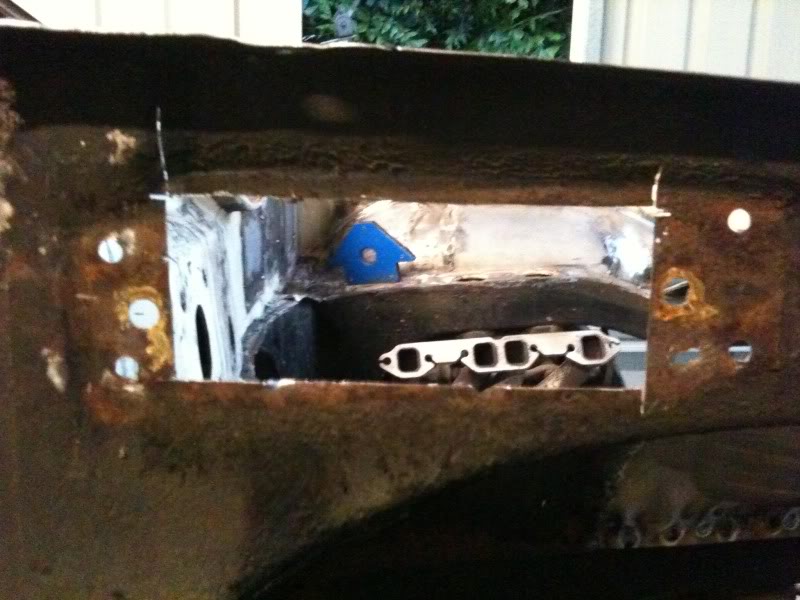
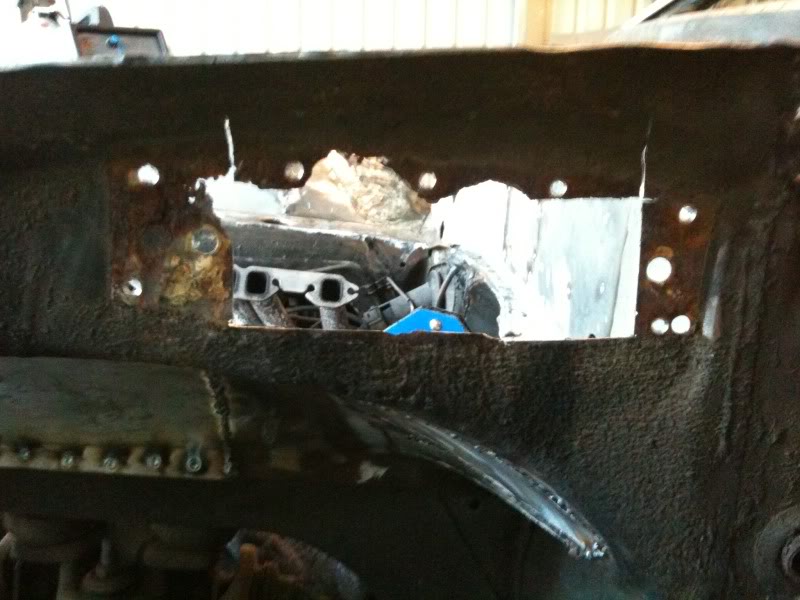
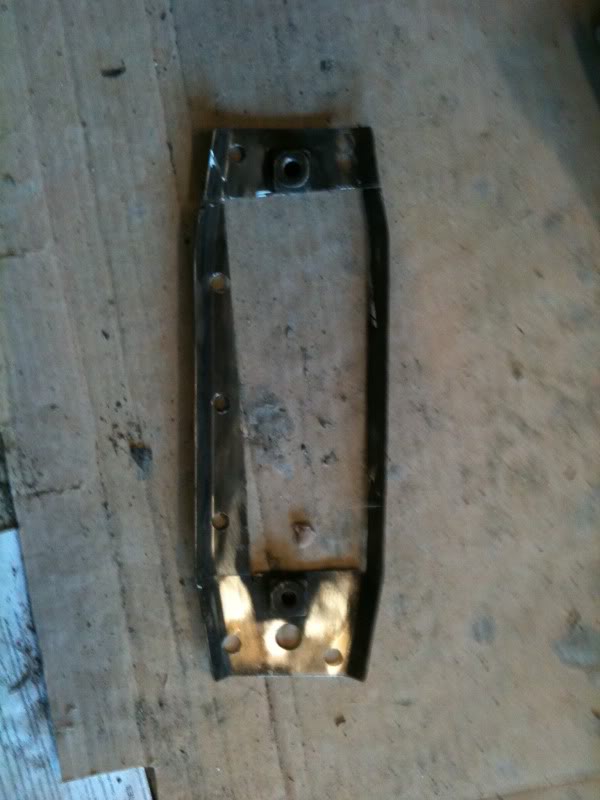
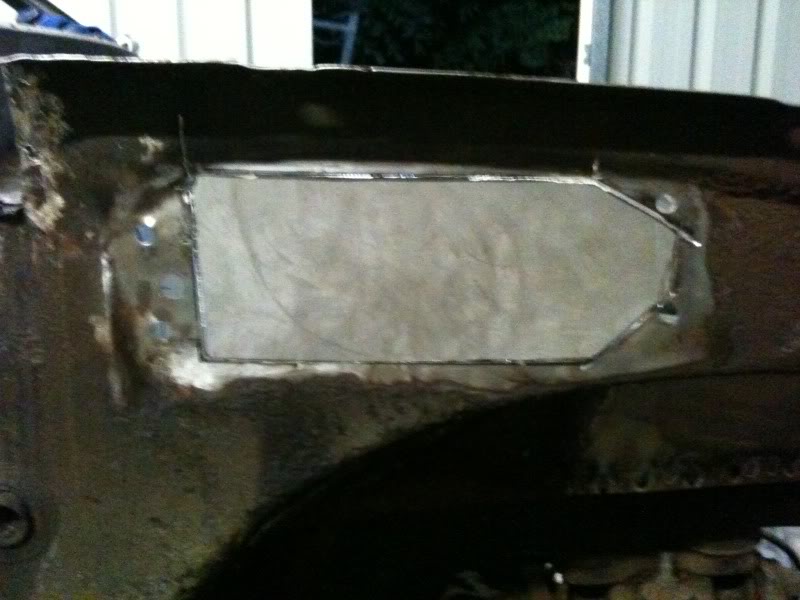
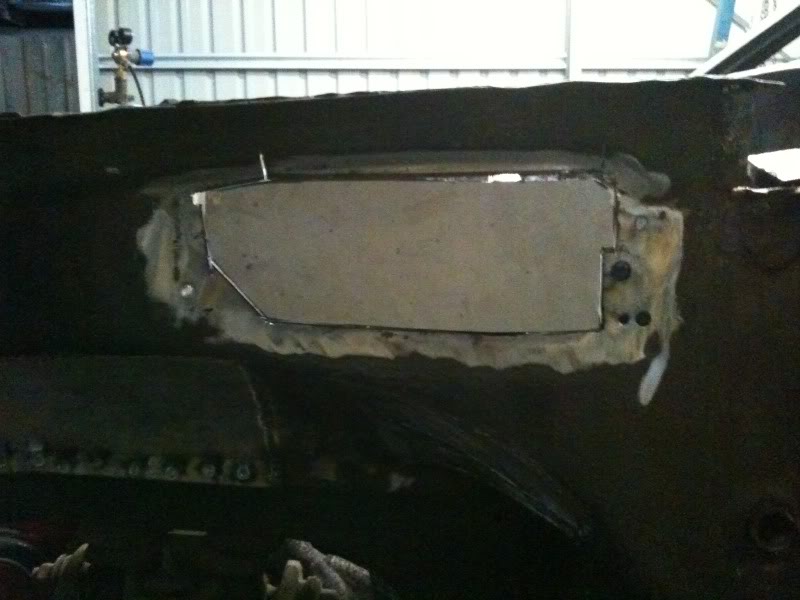
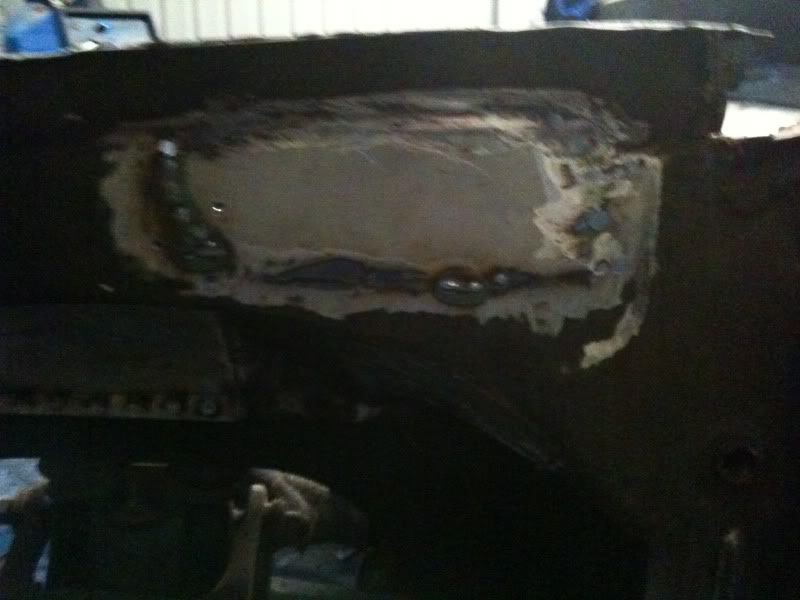
Also filled in a couple of holes and repaired the rust in the plenum cover.
This was the dodgy repair, with rivots of course...
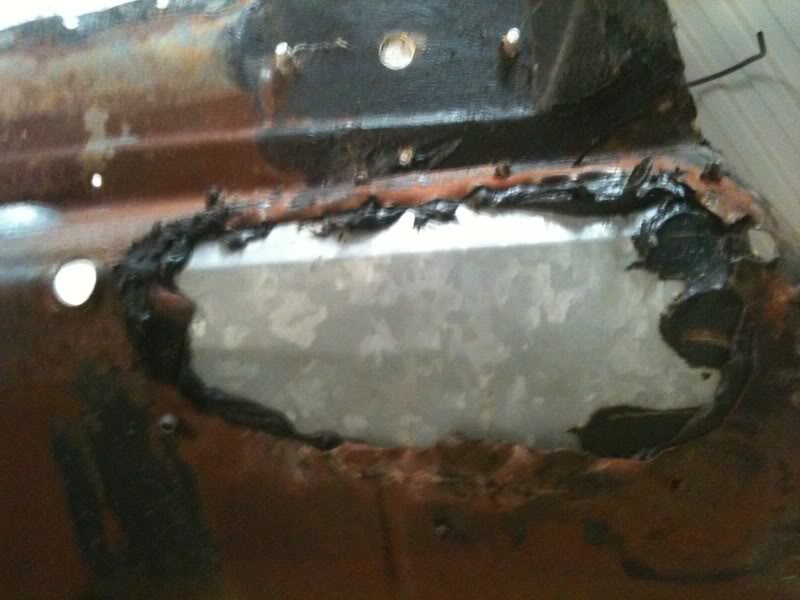
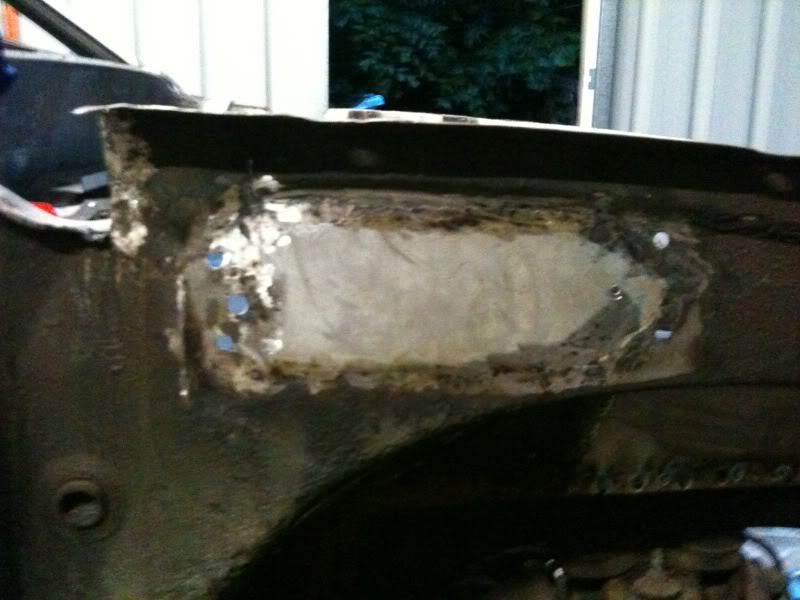
Cut out and new piece welded in.

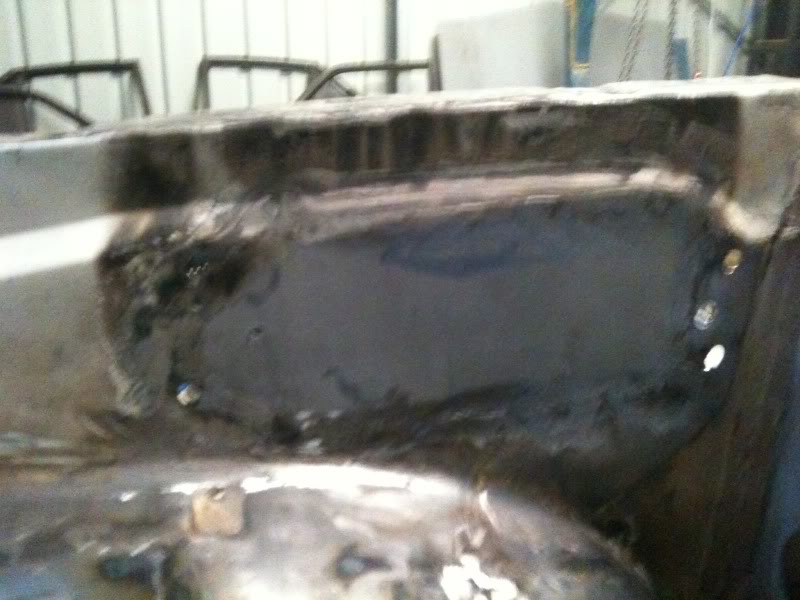
Also filled in the Heater holes.
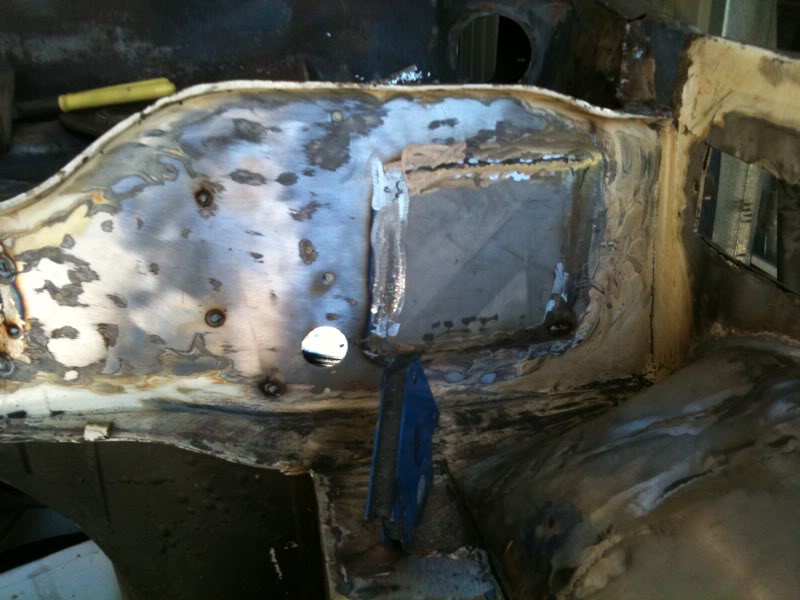
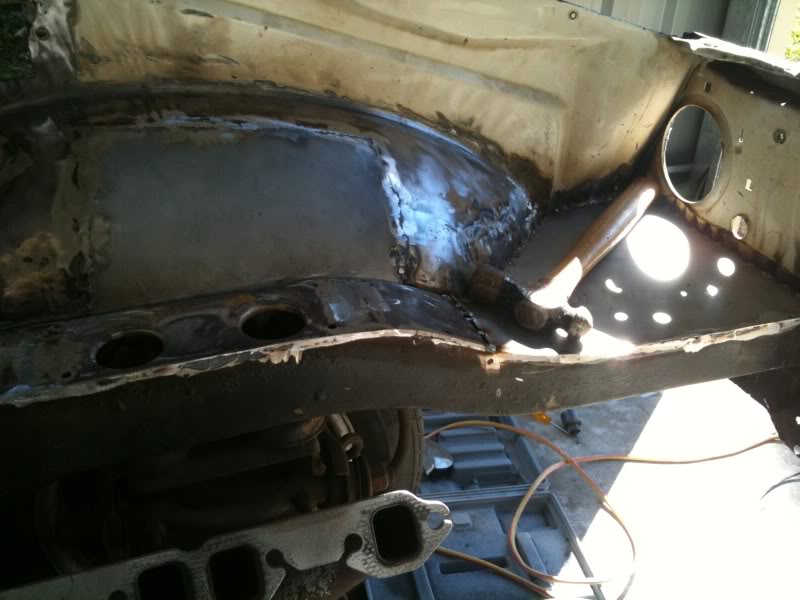
Well thats it for the moment, I will clean up the plenum, and put some KBS Rust Seal down on it, then I will put the plenum cover back on and finish the A-Pillar repairs hopefully this week!
Also ran a shitload more tacks on the trays and will have them welded in properly this week as well. I'm glad to be almost out of the bloody engine bay!
The rails got grinded as well, and I'm pretty happy with how they have turned out, just a few minor touch ups required, but will be pretty ready and accepting of a lick of some 2K etch.
Also filled in a couple of holes and repaired the rust in the plenum cover.
This was the dodgy repair, with rivots of course...
Cut out and new piece welded in.
Also filled in the Heater holes.
Well thats it for the moment, I will clean up the plenum, and put some KBS Rust Seal down on it, then I will put the plenum cover back on and finish the A-Pillar repairs hopefully this week!
Also ran a shitload more tacks on the trays and will have them welded in properly this week as well. I'm glad to be almost out of the bloody engine bay!
#91
_Quagmire_
_Quagmire_
-
- Guests
Posted 04 July 2011 - 05:38 PM
getting there m8t
soon you will have colour on it and filled with something nice and shiny
soon you will have colour on it and filled with something nice and shiny
#92
_Liam_
_Liam_
-
- Guests
Posted 04 July 2011 - 08:34 PM
Haha, I wish Quag.
I did however get some filler and some PPG 2K etch today... I will only do the engine bay as that will be the the one that takes the longest.
I'm just going to clean all the paint off, rust convert, clean it off and sand, put deoxidine on, wipe it off, lay down one coat of etch primer... I think that will do...
Then I can apply the filler.
#93
_Liam_
_Liam_
-
- Guests
Posted 06 July 2011 - 06:29 PM
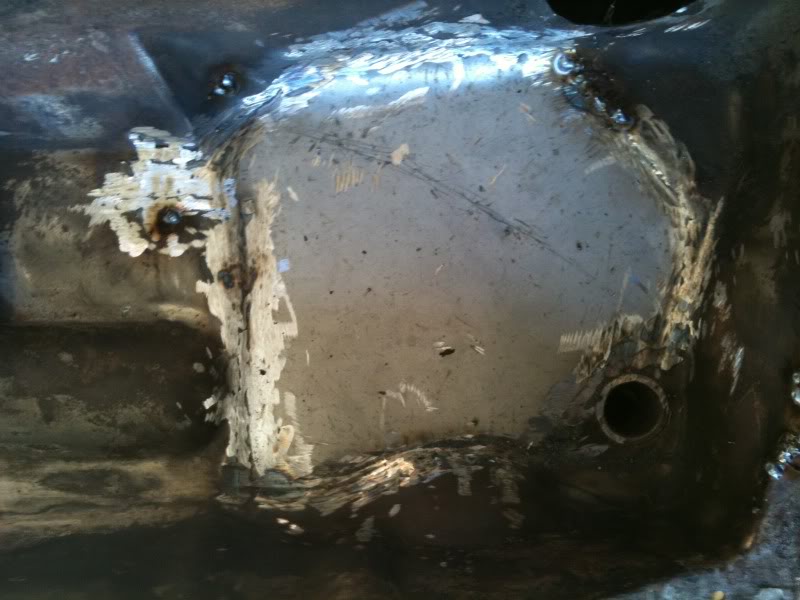
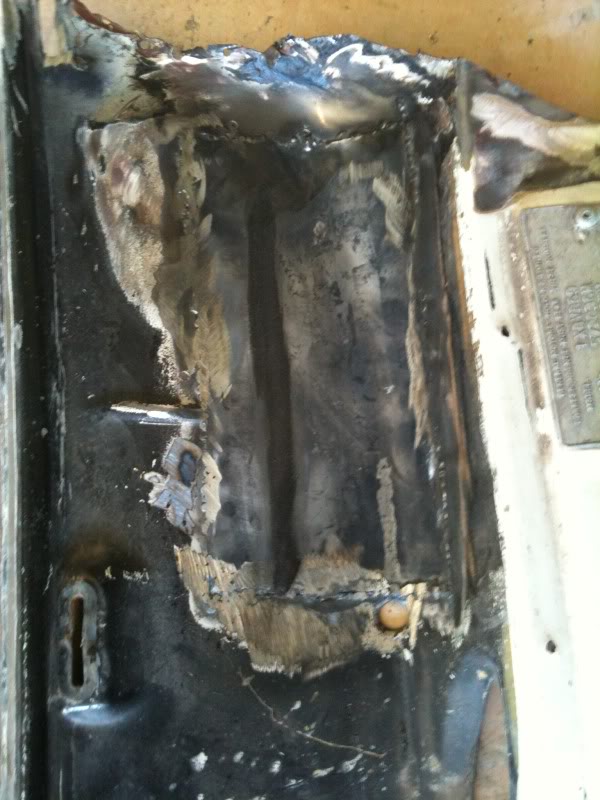
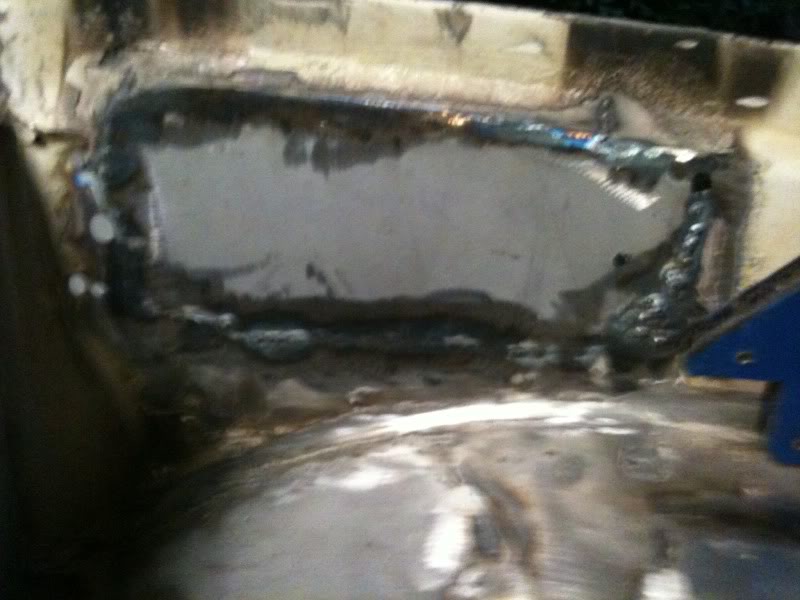
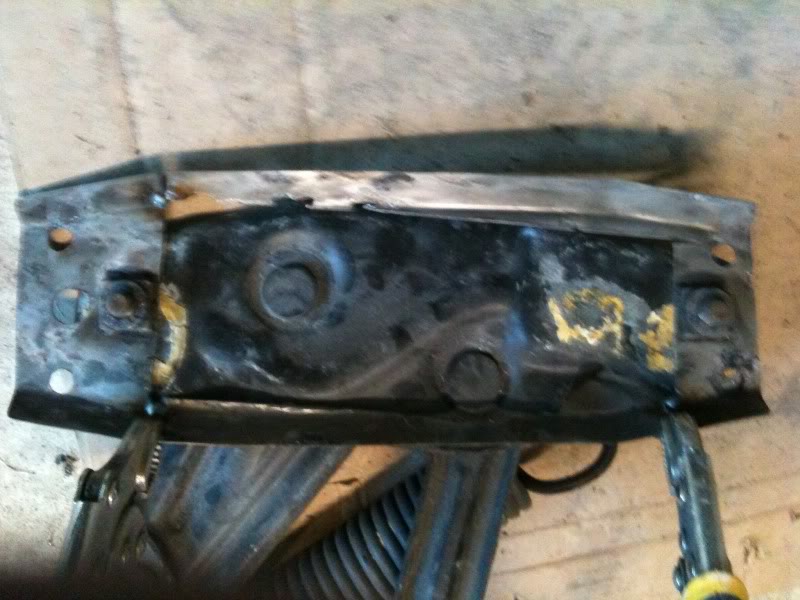
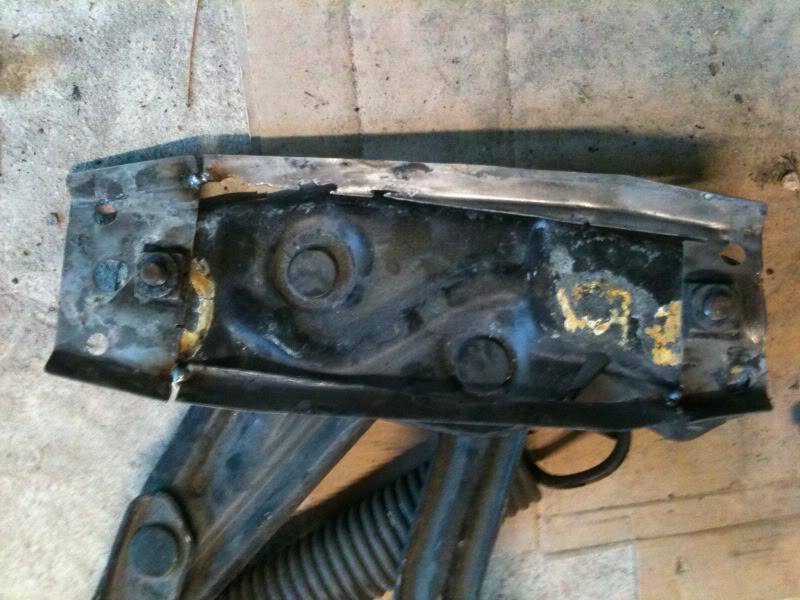
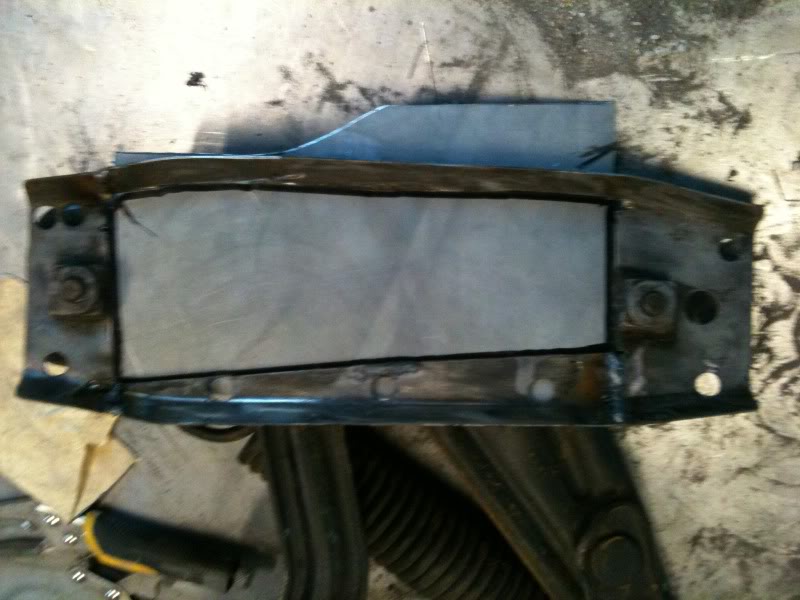
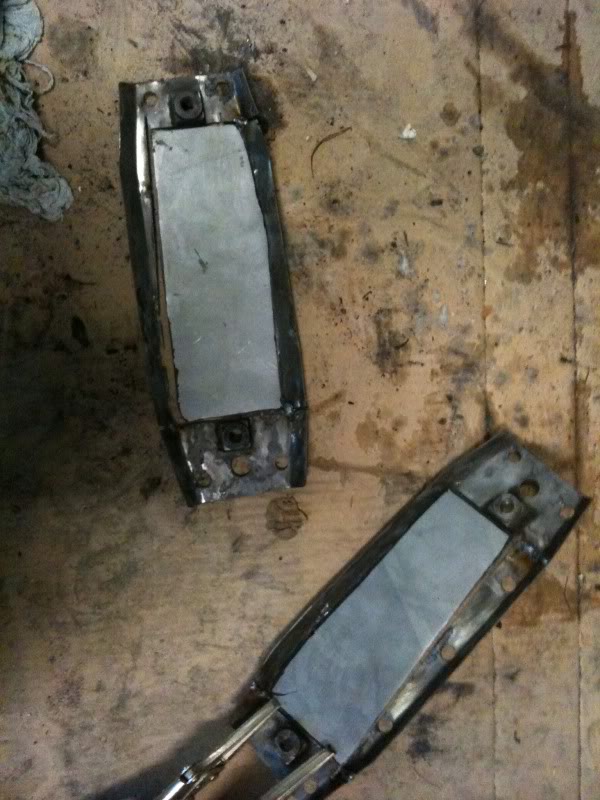
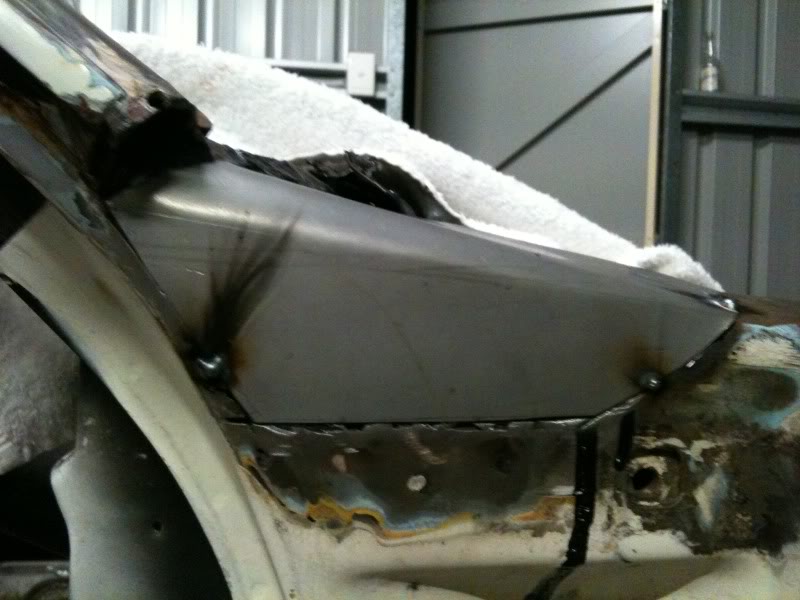
Just a quick update, began attacking the rusty bonnet hinge mounts.
Bit of rust behind there...

The salvaged bonnet mount brackets...
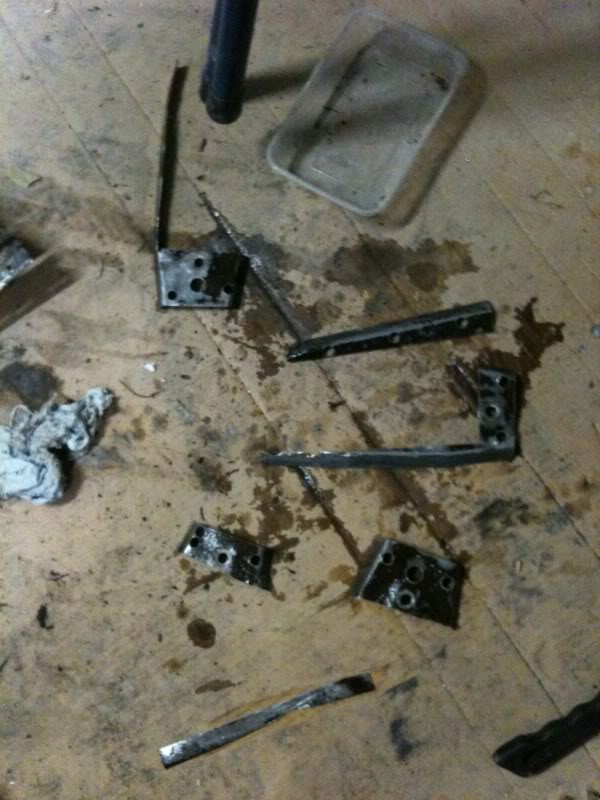
New pieces in place (for the guard) ready to be welded in...
More tomorrow.
Bit of rust behind there...
The salvaged bonnet mount brackets...
New pieces in place (for the guard) ready to be welded in...
More tomorrow.
#94
_Liam_
_Liam_
-
- Guests
Posted 16 July 2011 - 05:48 PM
Hey guys just a quick update, been busy as this week at work. Finished welding in these sections and tried to restore my bonnet hinge mounts as you will see.
So here is the new guard for the hinge to mount to.
And tidied up.
The process of me trying to salvage these bloody mounts... I mounted the mounts on the hinges themselves to get the gaps right, and then clamped in place with some grips.
I then tacked them up.
I then put some filler piece underneath and cut them out to suit.
Welded them all up.
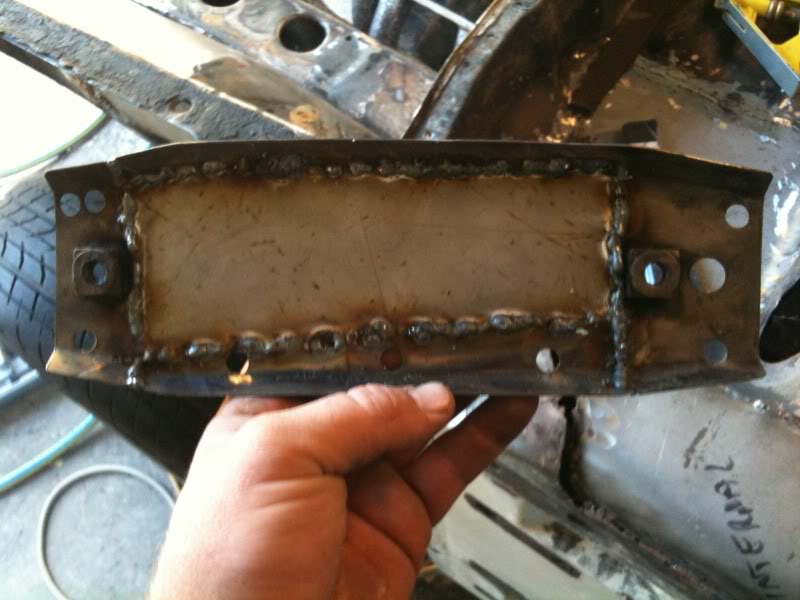

I did then grind the welds down and inspect the repair/restoration...
Didn't work very well as it warped and blew out, as the hinge was thin in patches, so after wasting 3-4 hours of my time, I just made up some new ones like so.
I didn't drill the holes and put over the threaded nuts from the old mount to the new mount, because I have lost my 10 mm drill bit...
I'm thinking when I put the back to the guard, I will be using sikaflex to make sure no moisture or air can get in there, and welding the plates on through the spot weld holes I drilled out.
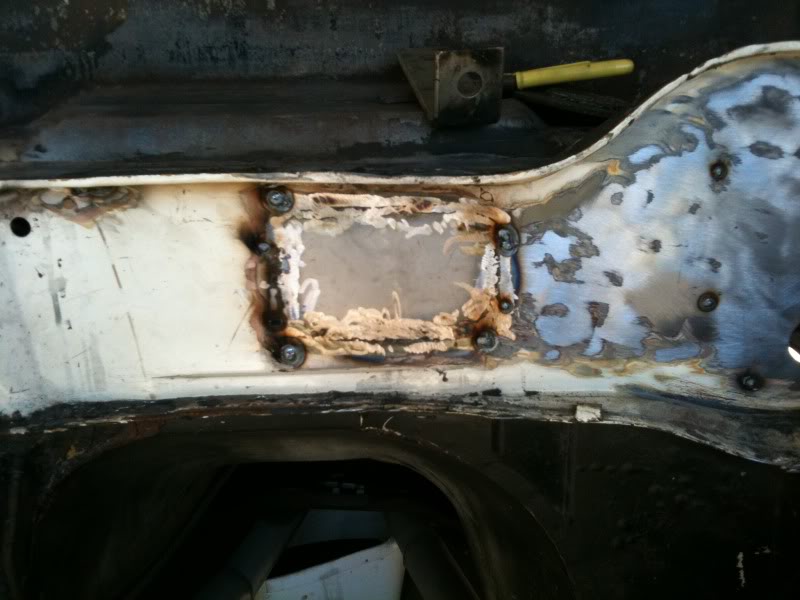
I then filled in another hole in the fire wall.
So that's all for now. Won't be any updates this week as I will be in Rocky finishing up my apprenticeship...
So here is the new guard for the hinge to mount to.
And tidied up.
The process of me trying to salvage these bloody mounts... I mounted the mounts on the hinges themselves to get the gaps right, and then clamped in place with some grips.
I then tacked them up.
I then put some filler piece underneath and cut them out to suit.
Welded them all up.
I did then grind the welds down and inspect the repair/restoration...
Didn't work very well as it warped and blew out, as the hinge was thin in patches, so after wasting 3-4 hours of my time, I just made up some new ones like so.
I didn't drill the holes and put over the threaded nuts from the old mount to the new mount, because I have lost my 10 mm drill bit...
I'm thinking when I put the back to the guard, I will be using sikaflex to make sure no moisture or air can get in there, and welding the plates on through the spot weld holes I drilled out.
I then filled in another hole in the fire wall.
So that's all for now. Won't be any updates this week as I will be in Rocky finishing up my apprenticeship...
#95
_Liam_
_Liam_
-
- Guests
Posted 01 August 2011 - 05:51 PM
Hey guys just a quick update. Been so busy/lazy this fortnight so havn't had too much done.
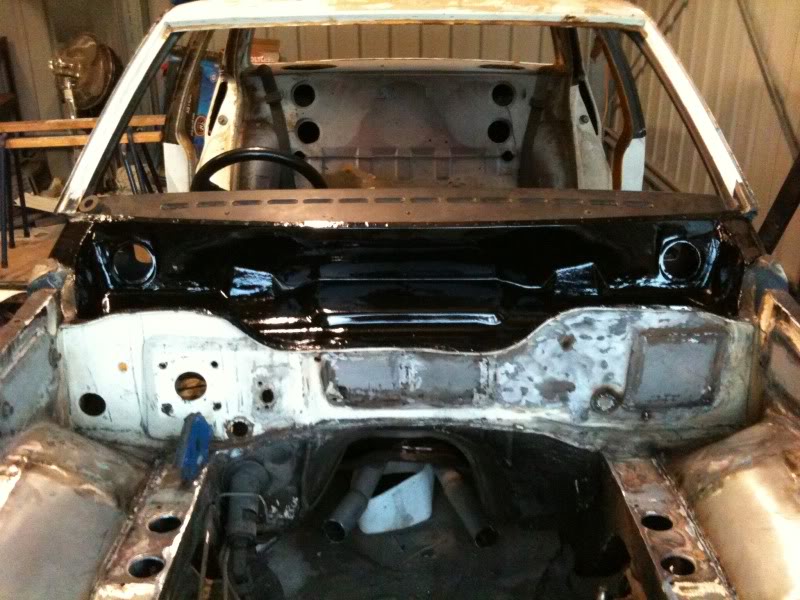
So got some seam sealer on the plenum welds and applied some KBS Rustseal.
Also all but finished the bonnet hinge mounts just gotta weld them on and using seam sealer to get any air voids out between mount and guard face.
Plans for this week include;
*Get the plenum cover back on and weld on caps on the sides of plenum at base of A pillar.
*Seam seal and KBS the inside firewall.
*Cavity Wax the inside A pillar.
*Getting quote for Windscreen surround channel for base of A pillar, and if I can't fabricate the Diamond at bottom of A pillar, quote for it's manufacture as well.
#96
_nial8r_
_nial8r_
-
- Guests
Posted 01 August 2011 - 06:19 PM
coming along nice just a little tip with the outter bonnet hinge skirt plates you made up, trim the top and bottom folded lips off then run a bead of weld along so thatit seals it up then give both top and bottom a good wipe with seam sealer and then prime over it and give it a squirt of stone gaurd or what ever plans you have for it. i stole the idea of Youngy11
#97
_Liam_
_Liam_
-
- Guests
Posted 01 August 2011 - 06:24 PM
Cheers Lee, so you reckon just cut all the lips off? Or do you mean notch it to leave room for a weld?
I was planning to put a thick smear of Seam Seal or Sikaflex inbetween it and the guard face and plug weld the spot weld holes. Using the sikaflex to be the moisture and air filler, also helping adhesion to the panel if you get my drift?
Hows your beast coming along Lee?
I was planning to put a thick smear of Seam Seal or Sikaflex inbetween it and the guard face and plug weld the spot weld holes. Using the sikaflex to be the moisture and air filler, also helping adhesion to the panel if you get my drift?
Hows your beast coming along Lee?
#98
_Liam_
_Liam_
-
- Guests
Posted 16 August 2011 - 05:44 PM
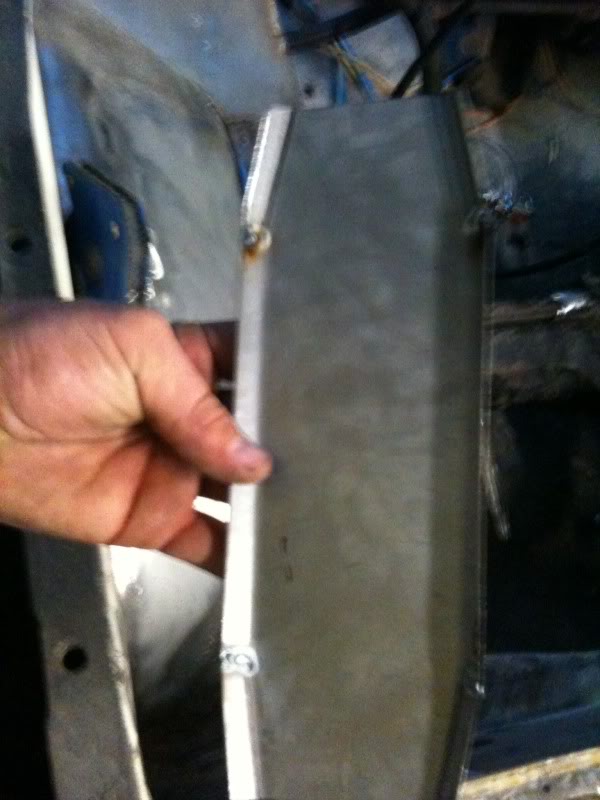
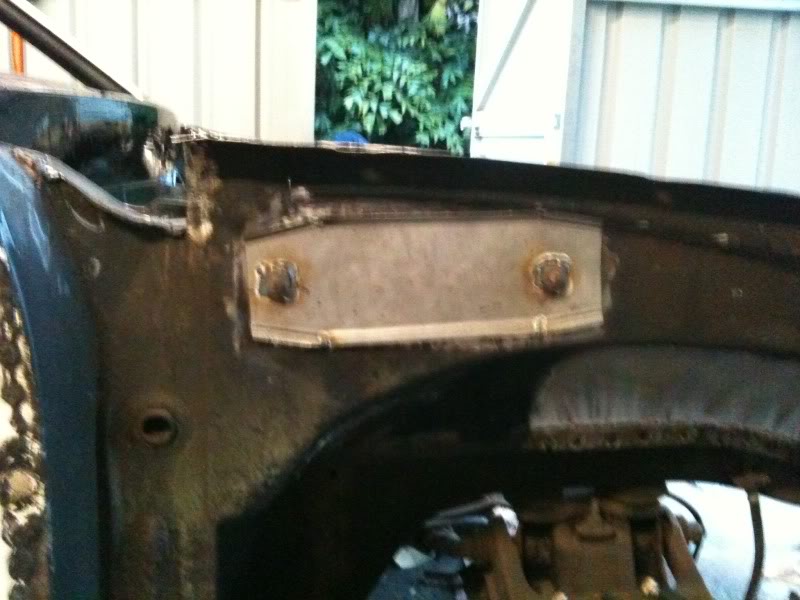
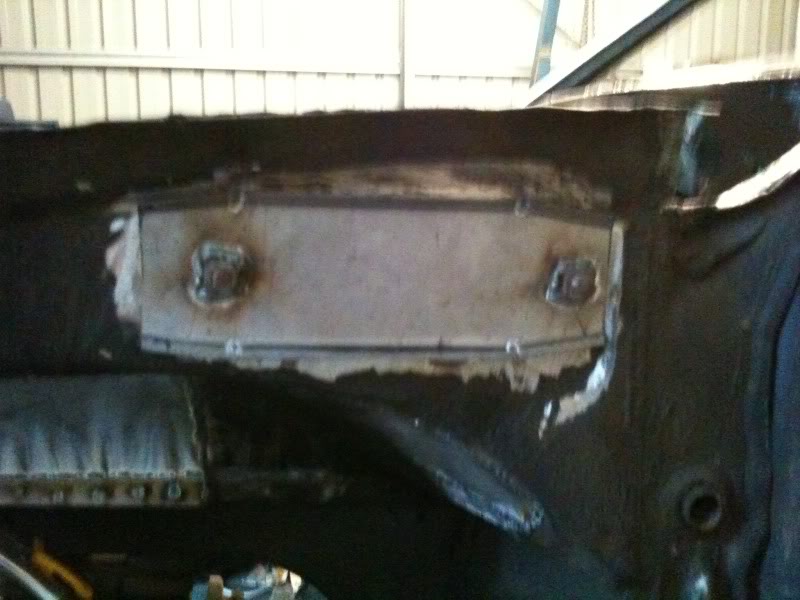
Hey guys just another little update.
Put the caps on the sides and trimmed/bashed into place and then tacked them up in place.

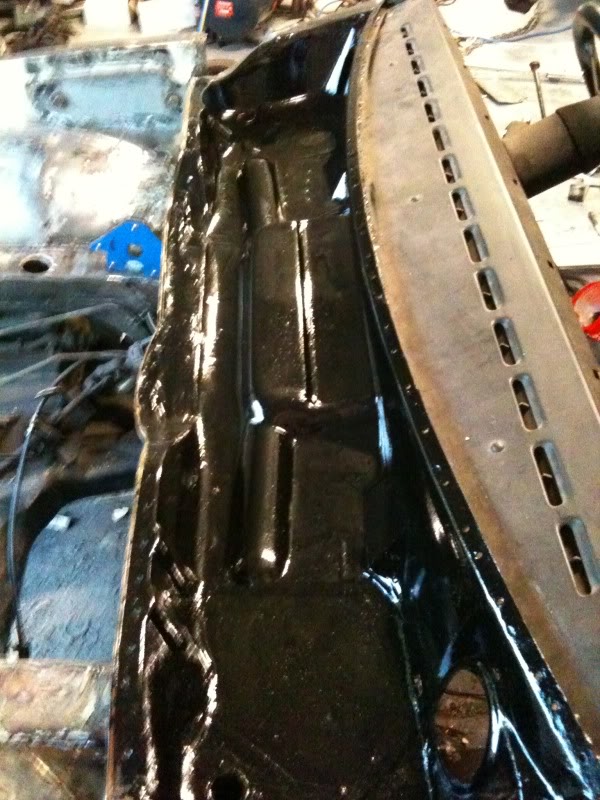
Here is how the plenum cover looked with the caps on.

I then cut the welds from the caps to the A-pillar, so I could weld it onto the plenum cover and then KBS it. I then Put it back onto the plenum and welded it on.
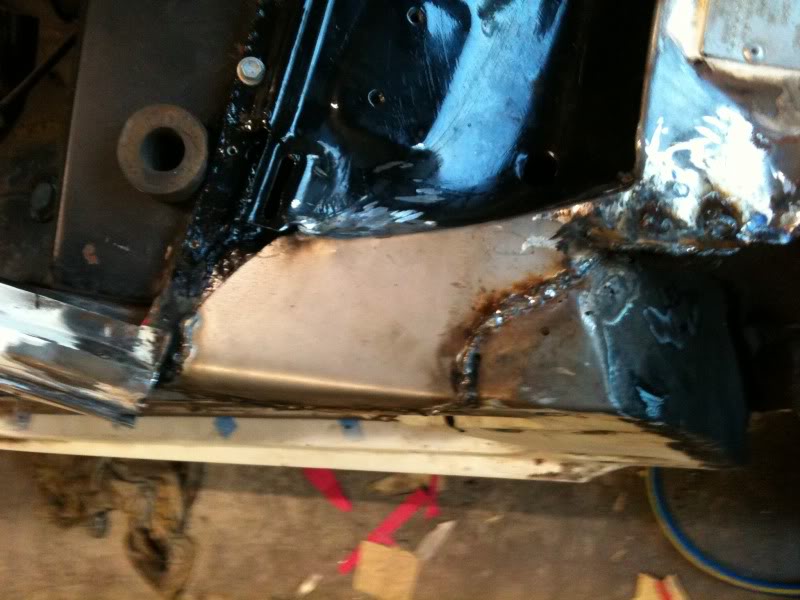
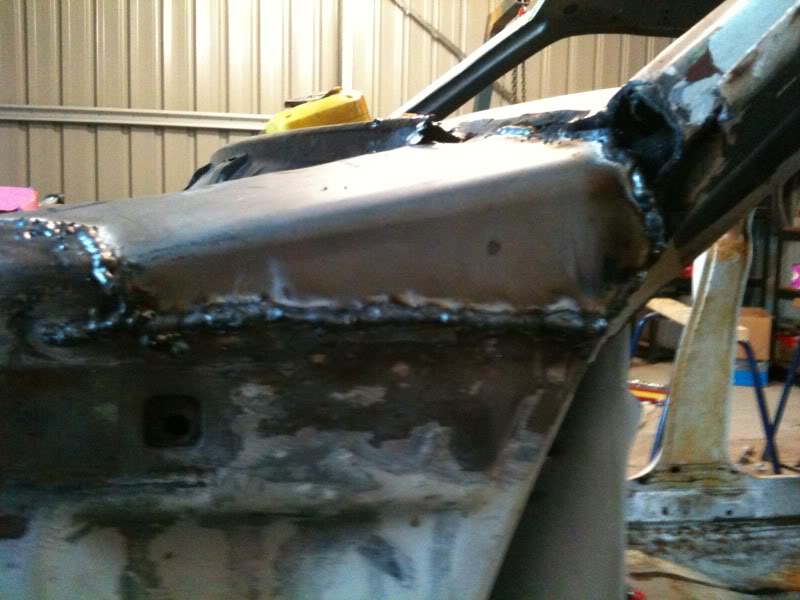
Just got to clean them up and they will look pretty damn shmick.
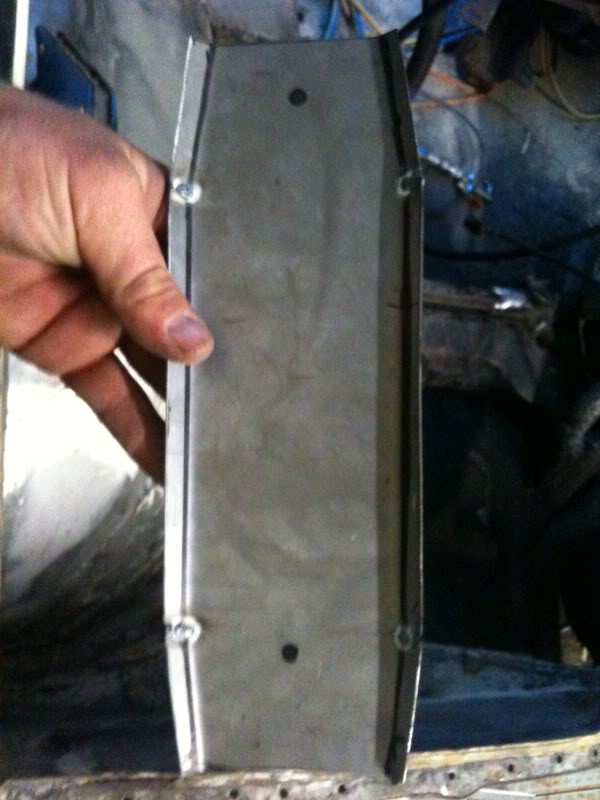
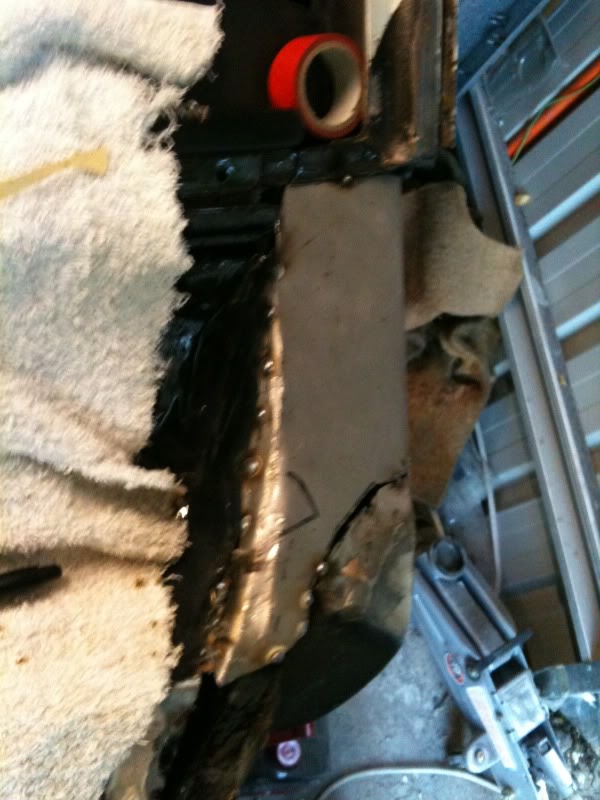
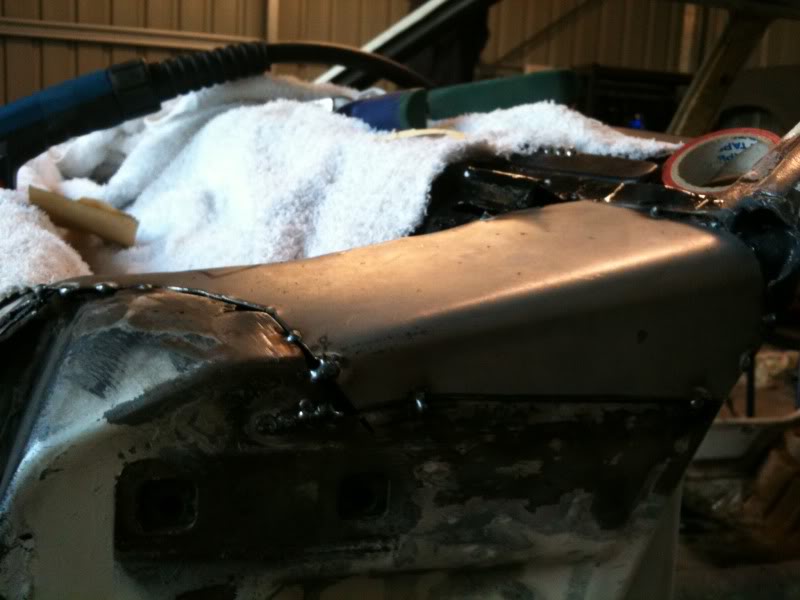
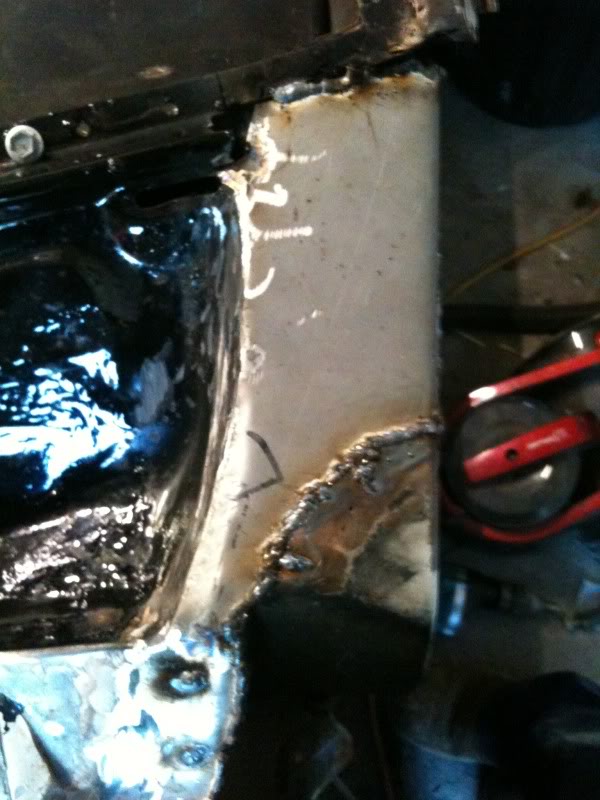
I also got some more expensive template material, and began making a template for the base of the A-Pillar.
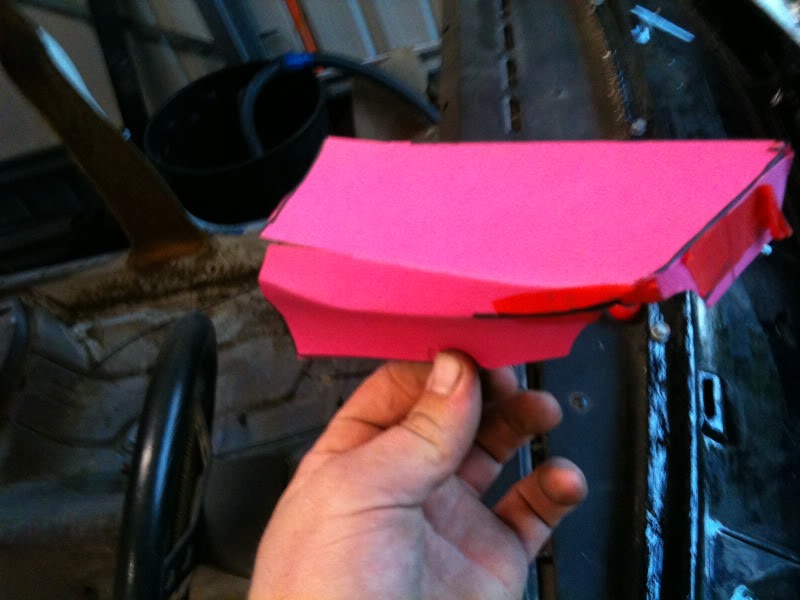
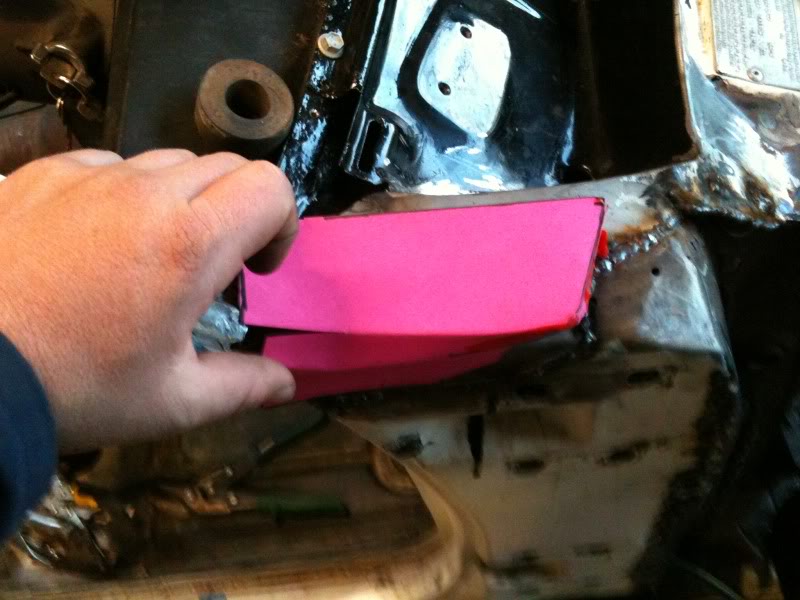
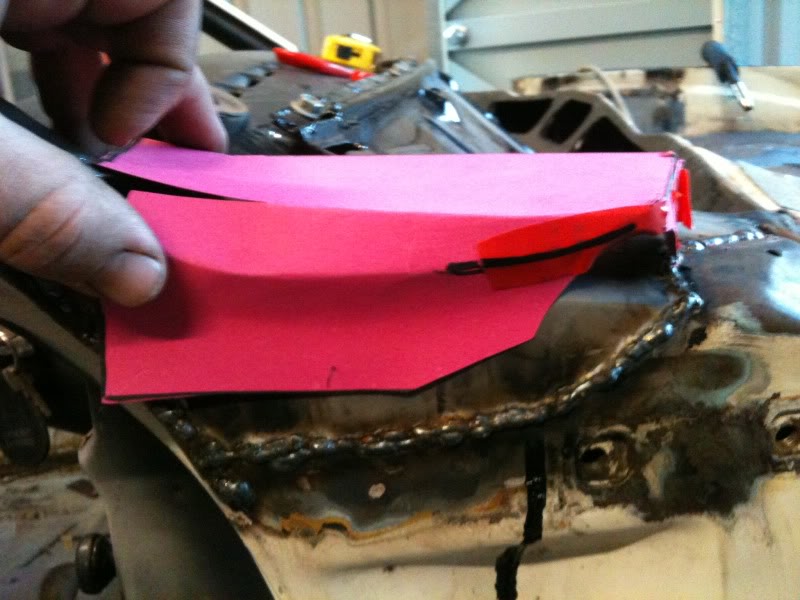
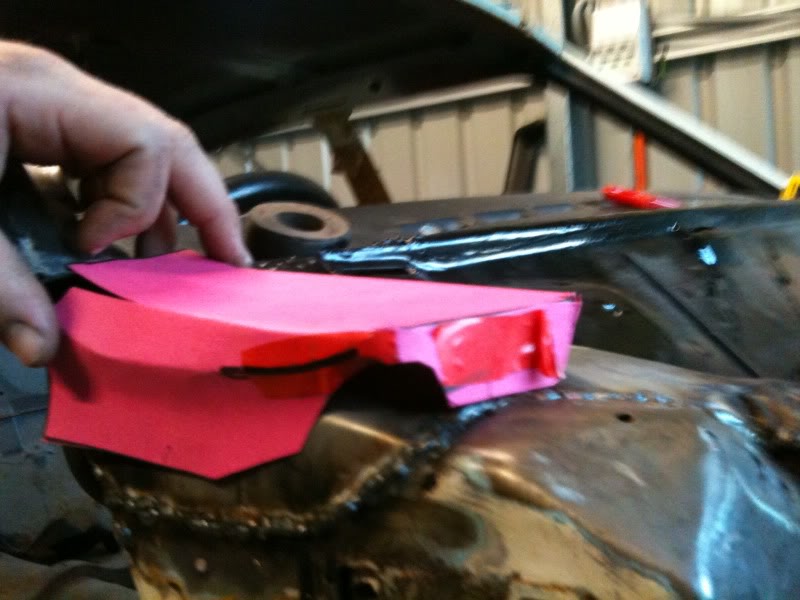
The template turned out pretty damn close and I'm looking forward to making the metal version of it. I hope to have that tackled this week.
Put the caps on the sides and trimmed/bashed into place and then tacked them up in place.
Here is how the plenum cover looked with the caps on.
I then cut the welds from the caps to the A-pillar, so I could weld it onto the plenum cover and then KBS it. I then Put it back onto the plenum and welded it on.
Just got to clean them up and they will look pretty damn shmick.
I also got some more expensive template material, and began making a template for the base of the A-Pillar.
The template turned out pretty damn close and I'm looking forward to making the metal version of it. I hope to have that tackled this week.
#99
Scottyb
-

- Members
-
- 10 posts
Forum Participant
- Name:Scotty
- Location:Brisbane
- Car:76 lx
- Joined: 11-August 11
Posted 25 August 2011 - 10:56 AM
Looking good mate. Hope mine isn't this rusty when I pull her apart. Fingers crossed
#100
_nial8r_
_nial8r_
-
- Guests
Posted 25 August 2011 - 12:01 PM
coming along nice, nothing like the old cardbard for templets, im for ever robbing the kids lol the last piece i flogged was a piece that my daughter had for a up coming project at school
heres a link to Youngy's build thread. i found the page with the bonnet hinge plates trimmed and welded, there about halfway down the page so you can see what i mean. great idea as nothing will even get stuck behind them again
http://www.gmh-toran...h/page__st__175
heres a link to Youngy's build thread. i found the page with the bonnet hinge plates trimmed and welded, there about halfway down the page so you can see what i mean. great idea as nothing will even get stuck behind them again
http://www.gmh-toran...h/page__st__175


0 user(s) are reading this topic
0 members, 0 guests, 0 anonymous users

